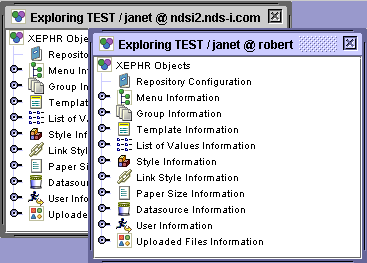
Objects can be transferred from one Xephr
For example, if the entity SCREEN is transferred, and it requires template SCREEN_TEMPLATE, style BODY_STYLE, link style LEFT_MENU_LINKS, and list of value CUST_NUMBER, only the screen SCREEN needs to be selected and tagged for transfer. When the transfer tool goes to transfer the entity SCREEN, it will also transfer the required template SCREEN_TEMPLATE, style BODY_STYLE, link style LEFT_MENU_LINKS, and list of value CUST_NUMBER.
If the objects with the same name as the required objects exist in the new repository, they will not be transferred.
For example, if the new repository has a template called SCREEN_TEMPLATE, and a style called BODY_STYLE, only the link style LEFT_MENU_LINKS and list of value CUST_NUMBER will be transferred with the entity SCREEN.
If you wish to overwrite the objects with the same name in the new repository with the objects in the from repository, you must select them separately from the entity.
For example, if the SCREEN_TEMPLATE in the new repository is different than the SCREEN_TEMPLATE in the from repository, and you wish to overwrite the one in the new repository, you must select the template for transfer separately from the entity that uses it. So in our example, you would select both SCREEN and SCREEN_TEMPLATE for transfer.
Unless otherwise specified, the entire Explorer Tree structure of the selected entity will be transferred. This means that if an entity is layered under many groups in the explorer, the entity and all of the groups will be moved. For example, if the entity SCREEN is located under group FORMS, and then group SV, when you transfer SCREEN, the non-existent groups FORMS and SV will be created, and SCREEN will be located under them.
The following objects can be transferred.
All Entities
Menus
Templates
Lists of Values
Styles
Link Styles
Paper Sizes
When an object is transferred, if an object of the same type with the same name already exists in the repository to which the object is being transferred, a backup will be made of the 'old' object.
Backup objects are renamed by adding the characters BAK and a sequential three digit number to the end of the object name.
For example, suppose you were transferring an entity named SALES to a repository that contains an entity named SALES.
The entity is transferred with the temporary name TMP_SALES.
A check is done to determine if an entity with that name exists in the to repository.
The existing entity is found and renamed SALES_BAK001.
The transferring entity is copied over and named SALES.
The next time the SALES entity is transferred, it is transferred with the temporary name TMP_SALES.
A check is done in the to repository, and the two existing entities are found.
SALES_BAK001 is renamed SALES_BAK002
SALES is renamed SALES_BAK001
The transferring entity is copied over and named SALES.
In the Xephr Studio, click on the Server menu and select Connect.
Log in to the repository from which you are transferring the entities. This repository will be referred to as the 'from repository' in the following instructions.
Click on the Server menu and select Connect again.
Log in to the repository to which you are transferring the entities. This repository will be referred to as the 'to repository' in the following instructions.
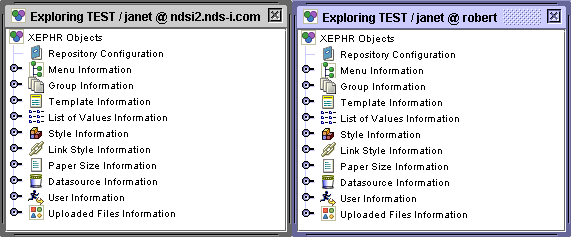
When you have logged into both repositories, there will be two Explorer Trees in the Xephr Studio. Each Explorer Tree will display the repository name/login@xephr install url in the top bar.

To make it easier to separate the from repository from the to repository, move the Explorer Trees so that the from repository tree is on the left and the to repository tree is on the right.
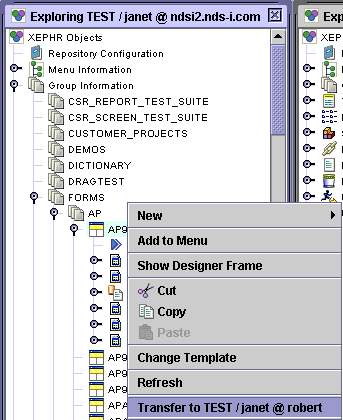
In the Explorer Tree in the , expand the object group from which you are selecting the object to transfer. For example, to transfer an entity, you would expand the Group Information object.
Locate the object that you are transferring.
Right click on the object, and then left click on the Transfer to repository name/login@xephr install url selection on the menu.
If you have selected a group for transfer, a pop-screen will be displayed for you to indicate what you are transferring, with the choices Groups Only, Groups and Entities, and Cancel.
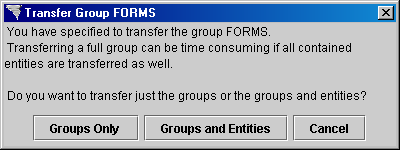
Clicking on the Groups Only button indicates that you only wish to transfer the group objects for the selected entity.
Clicking on the Groups and Entities button indicates that you wish to transfer both the selected group and any entities that are its children in the tree.
Clicking on the Cancel button indicates that the entity selected should not be transferred.
Repeat these steps for all objects that you are transferring.
The transfer tool does a tally of how many objects that will transfer and displays the total number in the main toolbar.
On the main toolbar, left click on the Transfer menu and select Execute Transfer.
The Data In Queue screen will display all of the entities and objects in the queue to be moved. The information displayed includes the following columns for each object.
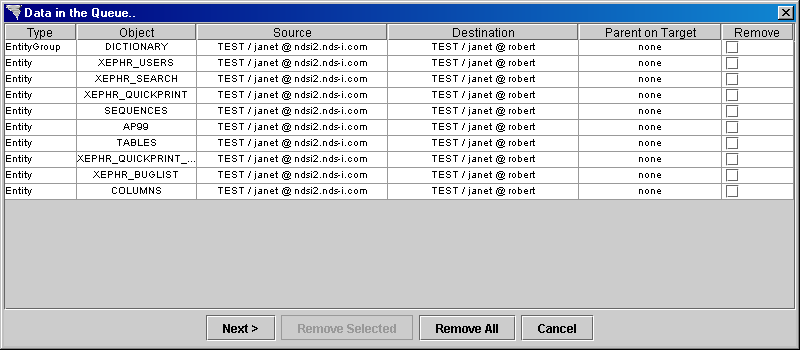
Type: the type of object being transferred, i.e. Entity, Entity Group, Template, etc.
Object: the name of the object being transferred.
Source: the repository name/login@xephr install url for the repository from which the object is being transferred.
Destination: the repository name/login@xephr install url for the repository to which the object is being transferred.
Parent on Target: the parent object in the to repository for this object. If you are do not wish for the object to be placed under the same group as it was in the from repository, you can select a new parent group in the to repository.
Remove: if you do not wish for this object to be transferred, set this flag to on.
To select a different parent for the object, double click on the Parent on Target field for that object. A selection screen will be displayed, with the Explorer Tree layout for the to repository. Only the sections of the Explorer to which this object can be moved are displayed.
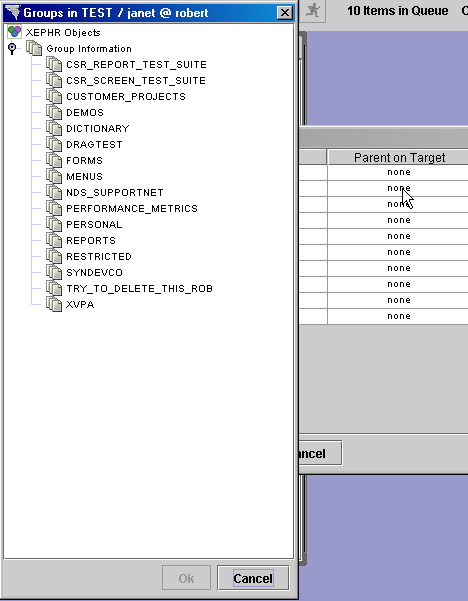
Expand the objects in the tree until you can select the desired parent.
Left click on the desired parent, and then click the Ok button to select it.
The name of the parent selected will be copied to the Parent on Target field in the Data In Queue screen.

To remove an object from the transfer screen, set the Remove flag to on, and click on the Remove Selected button at the bottom of the Data In Queue screen.
To remove all objects from the transfer screen, click on the Remove All button at the bottom of the Data In Queue screen.
To cancel the transfer without removing the objects from the transfer queue, click on the Cancel button at the bottom of the Data in Queue screen.
To continue with the transfer, click on the Next > button.
The Convert Datasources screen is displayed. This screen allows you to convert the datasources assigned to the objects that you are transferring to datasources that in the to repository.
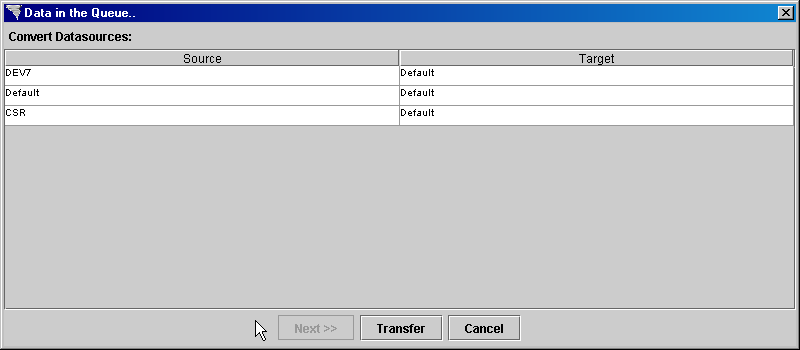
The Source column lists the datasources that are currently assigned to the objects selected to be transferred.
The Target column contains the datasource that will be used for the objects when they are transferred. Select the desired datasource from the Target pop-list.
When all datasources have been assigned, click on the Transfer button to continue the transfer process.
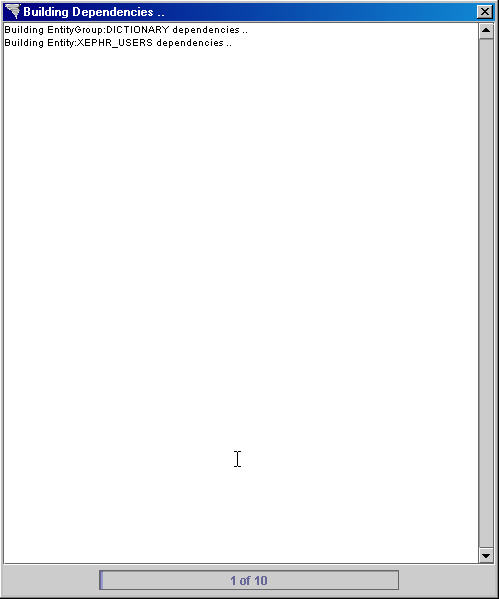
The Dependencies screen will be displayed, showing which objects are having the dependent objects selected. Dependencies are objects like lists of values, templates, and styles upon which the transferred objects were built.
The Transferring screen will be displayed, showing which entities are actually being transferred.
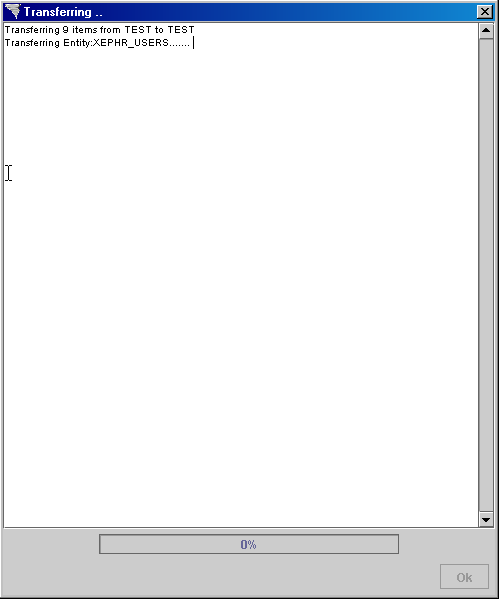
The transfer is complete when the Ok button is no longer grayed out. Press the Ok button.
All of the objects have been transferred and the to Explorer Tree is refreshed.
Xephr is a registered trademark of NDS Systems, LC.
Copyright