
The Designer Tool is a graphical representation of the layout of the object with which you are working. It provides a realistic representation of how the object will look to the users and allows you to manipulate the fields and blocks in the form manually, using mouse clicks and drags.
The Designer Tool canvas can be stretched larger or smaller by placing your mouse cursor over the edge that you wish to stretch until it turns into the stretch arrows, press the left mouse button and hold, and then drag the edge to the desired size. Release the left mouse button when you are done.
The Designer Tool can only be displayed for screen and report objects. Spreadsheet, data exchange, and XML document entities cannot be modified using the Designer Tool.
To open the Designer Tool for an object, right click on the object and select Show Designer Frame from the Right-Click Menu. The Designer Tool will be displayed.

The designer toolbar is located at the top of the Designer Tool. The buttons and pop-lists on this toolbar assist in the manipulation of the objects selected within the designer tool. When a button is grayed out on the toolbar, that means that the functionality of that button is not available for the selected object.
Left Justify  : When
multiple objects are selected, press this button to line up the left sides
of the objects with the left side of the object that was first selected.
This is a vertical alignment.
: When
multiple objects are selected, press this button to line up the left sides
of the objects with the left side of the object that was first selected.
This is a vertical alignment.
Center Justify  : When multiple objects are selected, press
this button to line up the middle of the objects with the middle of the
object first selected. This is a vertical alignment.
: When multiple objects are selected, press
this button to line up the middle of the objects with the middle of the
object first selected. This is a vertical alignment.
Right Justify  : When multiple objects are selected, press
this button to line up the right side of the objects with the right side
of the object first selected. This is a vertical
alignment.
: When multiple objects are selected, press
this button to line up the right side of the objects with the right side
of the object first selected. This is a vertical
alignment.
Top Align  : When
multiple objects are selected, press this button to line up the top of
the objects with the top of the first object selected. This
is a horizontal alignment.
: When
multiple objects are selected, press this button to line up the top of
the objects with the top of the first object selected. This
is a horizontal alignment.
Center Align  : When
multiple objects are selected, press this button to line up the center
of the objects with the center of the first object selected. This
is a horizontal alignment.
: When
multiple objects are selected, press this button to line up the center
of the objects with the center of the first object selected. This
is a horizontal alignment.
Bottom Align  : When
multiple objects are selected, press this button to line up the bottom
of the objects with the bottom of the first object selected. This is a
horizontal alignment.
: When
multiple objects are selected, press this button to line up the bottom
of the objects with the bottom of the first object selected. This is a
horizontal alignment.
Horizontal Stack  : When multiple objects are selected, press
this button to stack the objects horizontally. This
means that the objects will be laid out horizontally on the screen, starting
with the one on the far right, each object placed with its right edge
even with the left edge of the object to the left of it..
: When multiple objects are selected, press
this button to stack the objects horizontally. This
means that the objects will be laid out horizontally on the screen, starting
with the one on the far right, each object placed with its right edge
even with the left edge of the object to the left of it..
Vertical Stack  :
When multiple objects are selected,
press this button to stack the objects vertically. This
means that the objects will be laid out vertically on the screen, starting
with the one at the top, each object placed with its top edge even with
the bottom edge of the object above it.
:
When multiple objects are selected,
press this button to stack the objects vertically. This
means that the objects will be laid out vertically on the screen, starting
with the one at the top, each object placed with its top edge even with
the bottom edge of the object above it.
Horizontal Distribution  : When multiple objects are selected, press
this button to distribute the objects horizontally. This
means that the objects will be laid out horizontally on the screen. The
horizontal distance between the first object and last object is calculated
and used to determine where each object will be placed. Then,
each object is placed at an equal distance from the object to its left.
The object on the far left and the object on the
far right are not moved.
: When multiple objects are selected, press
this button to distribute the objects horizontally. This
means that the objects will be laid out horizontally on the screen. The
horizontal distance between the first object and last object is calculated
and used to determine where each object will be placed. Then,
each object is placed at an equal distance from the object to its left.
The object on the far left and the object on the
far right are not moved.
Vertical Distribution  : When multiple objects are selected, press
this button to distribute the objects vertically. This
means that the objects will be laid out vertically on the screen. The
vertical distance between the first object and last object is calculated
and used to determine where each object will be placed. Then,
each object is placed at an equal distance from the object above it. The
top object and the bottom object are not moved.
: When multiple objects are selected, press
this button to distribute the objects vertically. This
means that the objects will be laid out vertically on the screen. The
vertical distance between the first object and last object is calculated
and used to determine where each object will be placed. Then,
each object is placed at an equal distance from the object above it. The
top object and the bottom object are not moved.
Zoom In  : Press
this button to zoom into the Designer Tool view, displaying a smaller
section of the entity at once.
: Press
this button to zoom into the Designer Tool view, displaying a smaller
section of the entity at once.
Zoom Out  : Press
this button to zoom out of the Designer Tool view, displaying a larger
section of the entity at once.
: Press
this button to zoom out of the Designer Tool view, displaying a larger
section of the entity at once.
Zoom Percentage  : Change the setting of this pop-list to zoom
in or out of the Designer Tool view, displaying less or more of the entity
at one time.
: Change the setting of this pop-list to zoom
in or out of the Designer Tool view, displaying less or more of the entity
at one time.
Select Parent  :
When a sub-object is selected on the
Designer Tool, press this button to select the object's parent object.
For example, if you had a field selected and you
pressed this button, the block to which the field belonged would be selected.
:
When a sub-object is selected on the
Designer Tool, press this button to select the object's parent object.
For example, if you had a field selected and you
pressed this button, the block to which the field belonged would be selected.
View Mode  : Change
the setting of this pop-list to change the mode in which you are viewing
the entity. This pop-list also allows you to view
the break blocks and automatic total blocks.
: Change
the setting of this pop-list to change the mode in which you are viewing
the entity. This pop-list also allows you to view
the break blocks and automatic total blocks.
There are rulers at the top and left of the entity displayed in the Designer Tool. These rulers show the size of the entity, blocks, and fields in the measurements for that entity. For screen entities, the measurement is always pixels. For report entities, the measurement is defined at the entity level as inches, millimeters, or pixels.
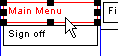
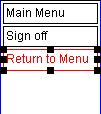
To select an object in the Designer Tool, left-click on the object, which will change the color of the outline of the object to red. The properties for the object will be displayed in the Property Sheet and the object will be highlighted in the Explorer Tree.
The layout and location of the fields and blocks can be changed in the Designer Tool. To move a field or block, left-click on the desired object, hold the left mouse button down, and drag the object to the desired location.
Some rules apply to moving fields and blocks:
Fields can only be moved within the block to which they belong.
Blocks can only be moved within the container to which it belongs. For instance, if the block is contained within another block, it can only be moved within that block. If the block is contained only within the screen or report (a top-level block), it can be moved anywhere within the screen or report.
Non-mutable blocks on non-template objects cannot be moved or modified in the Designer Tool, although they are displayed as part of the layout.
Positionally mutable blocks on non-template objects can be moved in the Designer Tool, but otherwise cannot be modified.
The layout of an object can be locked or unlocked using the [Lock/Unlock] button in the upper left corner of the Designer Tool. This feature allows fields and blocks to be selected without having to worry about accidentally moving them.
To lock the Designer Tool, click
on the [Lock/Unlock]  button. The button will change
to a locked version
button. The button will change
to a locked version  . When the object layout is
locked, the layout cannot be changed in the Designer Tool. Fields
and blocks can be selected, but cannot be moved.
. When the object layout is
locked, the layout cannot be changed in the Designer Tool. Fields
and blocks can be selected, but cannot be moved.
To unlock the Designer Tool, click
on the [Lock/Unlock] button. The button will change
to an unlocked version . When the object layout is
unlocked, the layout can be changed.
Xephr is a registered trademark of NDS Systems, LC.
Copyright