Our goal is to set up an interconnect XML document and create a screen
that pulls the data from that document. We will
be using the CUSTOMERS document that we created earlier as the interconnect
XML document.
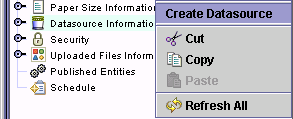
In the Explorer Tree, select the
Datasource Information object.
Right click on the Datasource
Information object and select Create
Datasource.
The
Creating Database Datasource wizard
will be displayed.
In
the Category property, select
Xephr Interconnect Datasource.
Leave
the Type property set to Remote
Xephr Entity.
In
the Name property, enter XEPHR_INTERCONNECT.
In
the Description property, enter
Xephr Interconnect Datasource.
In
the Host property, enter the host
on which the interconnect entities were published. The
host used for the examples is test10.ndsasp.com.
In
the Port property, enter the port
to use to access the published entities. The port
for the example is 80.
Leave
the Is Secure checkbox set to
off, as the host and port do not
need to be accessed using a secure connection.
In
the Default User property, enter
admin as the user ID to access the published entities on this host.
In
the Default Password property,
enter the administrator's user password to access the published entities
on this host.
Leave the Proxy
Server and Proxy Port properties
set to their defaults as they are not necessary to access the host.
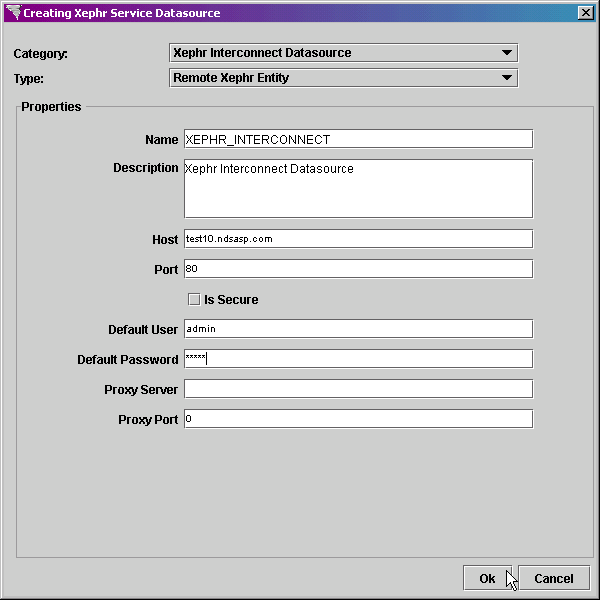
Click on the Ok
button to create the datasource.
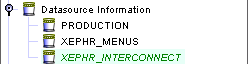
The new datasource is added to the
Explorer Tree.
Click on the Save
 button in the main toolbar to save the new datasource.
Press the Preview
 button in the main toolbar to view your new datasource. The
published CUSTOMERS entity is displayed.
button in the main toolbar to view your new datasource. The
published CUSTOMERS entity is displayed.

The CUSTOMERS entity was published previously in the
Publishing Entities Example
section and is accessed using the XEPHR_INTERCONNECT datasource created
in the Interconnect Datasource Example section.
Now we need to create a screen that accesses the data
in the CUSTOMERS entity. You could create any entity
type, but for this example, we will use a screen.
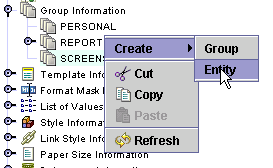
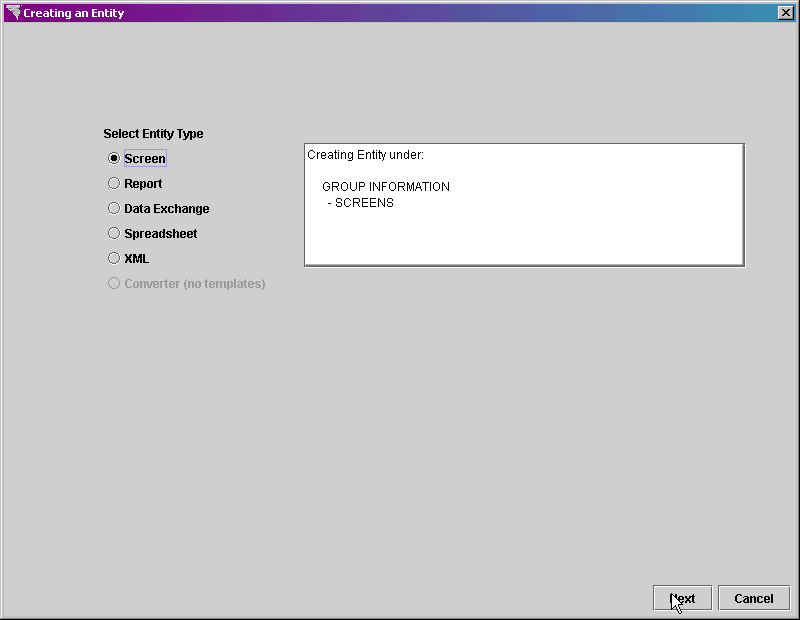
Select the Group
Information object. Expand it, and select
the group to which you wish to add the new screen entity.
Right click on the group and select
Create ->Entity.
Click on the Screen
bullet.
In the Entity
Name property, type INTERCONNECT_CUST as the entity name.
Leave the Datasource
property set to (use default), since there is only one datasource for
the Xephr® install.
In the Based
On property, select SCREEN_TEMPLATE, which is the template that
we created earlier.
Set the Default
Mode property to List View.
Leave the Body
Style, Editable Field
Style, Non-Editable Field Style,
Lov Style, and Link
Style properties set to (from parent), as these styles will be
taken from the SCREEN_TEMPLATE for this screen.
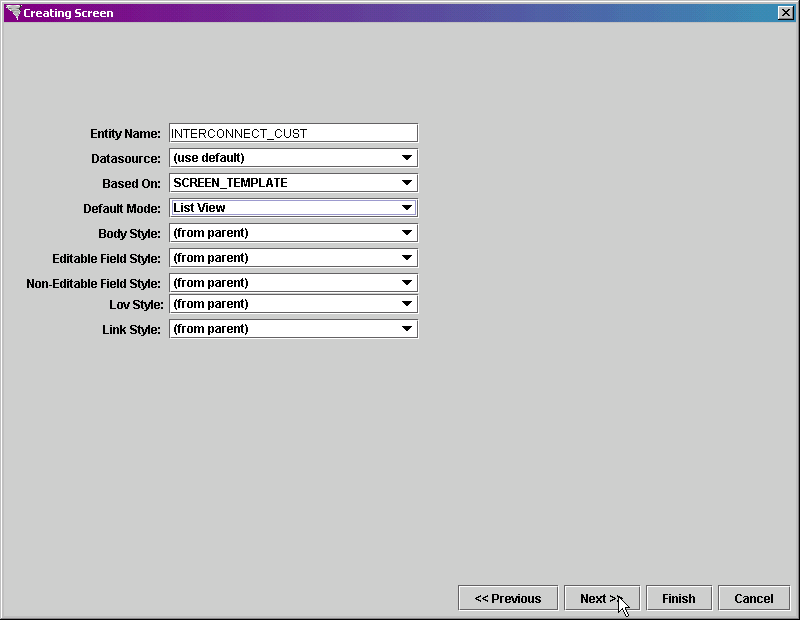
Click on the Next
button at the bottom right of the screen.
The Adding
New Block screen is displayed next.
In the Block
Name property, enter CUSTOMER as the name of the block.
In the Block
Type property, select Standard Block.
Set the Query
Type property to Xephr Interconnect.
The Datasource
property will default to the XEPHR_INTERCONNECT datasource.
Leave the Interconnect
Entity set to CUSTOMERS.
Set the Create
Heading checkbox to off to indicate that no heading should be created.
No login or password is needed to
access the published interconnect entity, so leave the Target
Login and Target Password
properties blank.
In the Mode
Selection section, leave the List checkbox set to on.
In the Scheme
Selection section, set the List
bullet to on, since multiple records
are being returned to this screen and we wish to have the labels displayed
at the top of the screen and the fields displayed below them.
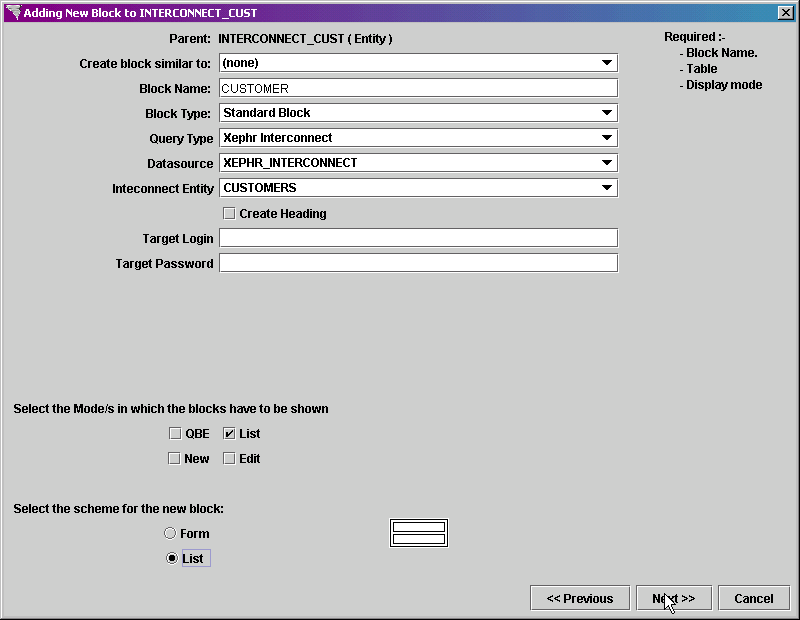
Click on the Next
button at the bottom of the screen.
The Constructing
Xephr Interconnect screen is displayed next.
Click on the Field
column header and the Label column
header to set the flags to on
for all columns.
Set the Key
checkbox to on for the CUST_NO
column since it is the key to the records.
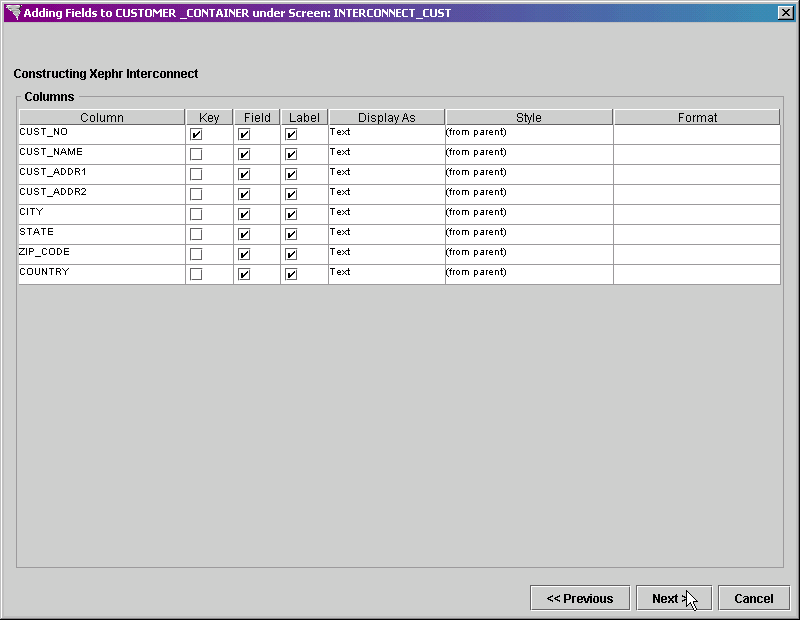
Click on the Next
button at the bottom of the screen.
The Ordering
Fields screen is displayed next. The columns
are initially ordered as they were listed on the previous screen, which
is in the same order as they are ordered in the XML document. We
have no reason to order them differently.
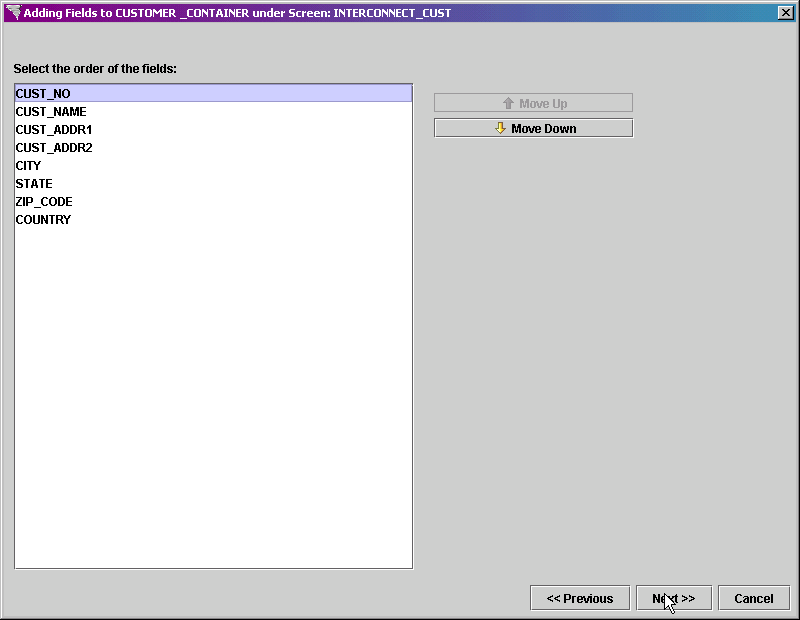
Click on the Next
button to continue.
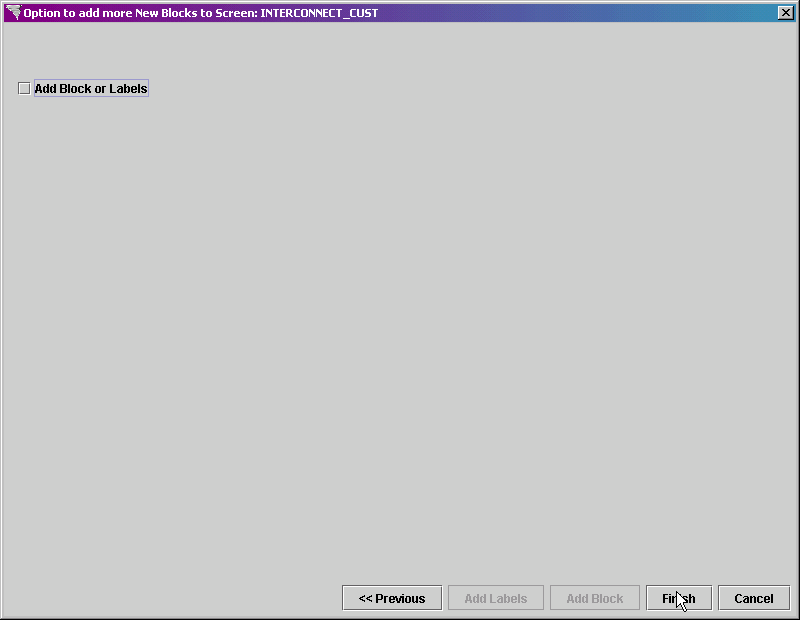
The Option
to add more Blocks screen is displayed. We
have no more blocks or labels to add. Click on
the Finish button.
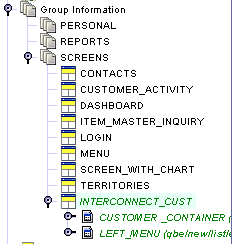
The new screen is added to the initially
selected group. In the Explorer Tree, the new screen
will be displayed, expanded with all blocks shown.
Click on the Save
button in the main toolbar to save the new screen.
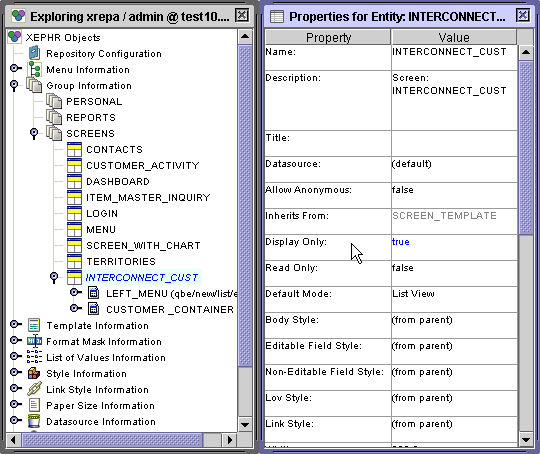
Our screen is going to be display
only. Left click on the INTERCONNECT_CUST entity
in the Explorer Tree. Double click to display the
property sheet.
Change the Display
Only property to true.
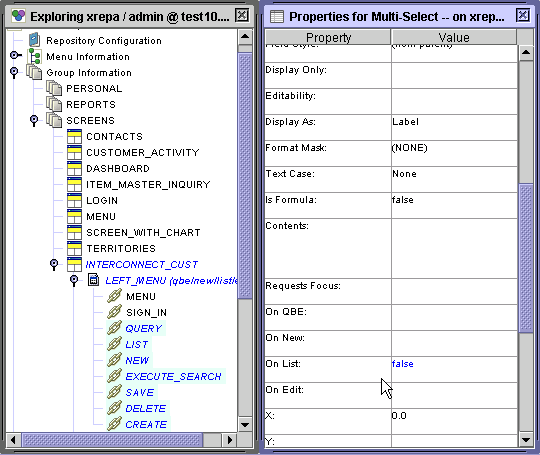
Expand the LEFT_MENU block. Since
the only mode for this screen is a display only list mode, we do not many
of the links on the left menu.
Hold down the Shift button and select
the following links:
QUERY
LIST
NEW
EXECUTE_SEARCH
SAVE
DELETE
CREATE
Display the multi-select property
sheet.
Set the On
List property to false.
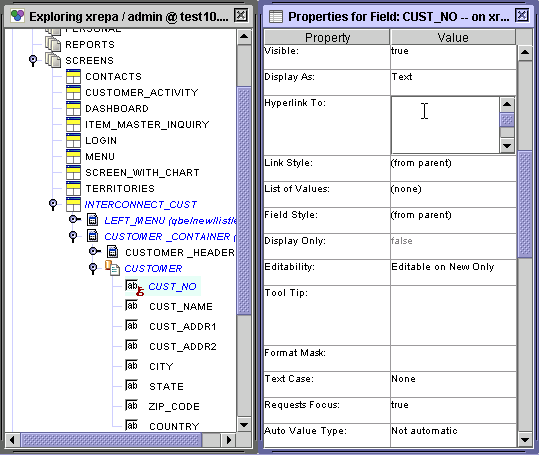
Expand the CUSTOMER_CONTAINER block
and the CUSTOMER block.
We need to modify the CUST_NO field
to remove the link created, since the only mode for this screen is list
mode.
Left click on the CUST_NO field
to select it.
In the Hyperlink
To property, delete all the text.
Click on the Save
button in the main toolbar to save the changes.
To test the new screen entity, highlight
it by selecting it, and click on the Run
 button in the main toolbar.
The Preparing to Run pop-up screen
is displayed. Click on the Run
button.
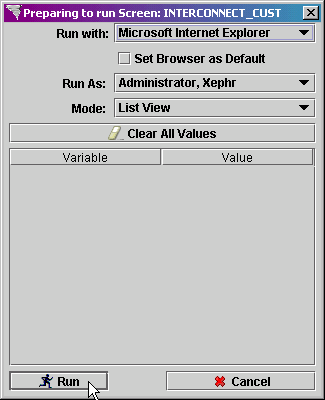
The file will be run in the browser.
Additional changes can be made to better fit the fields
to the screen.
Xephr is a registered trademark of NDS Systems, LC.