Roles are used to define the policies, database log ins, and global
variables that are assigned by default to a user, enabling the creation
of a standard set of defaults for different types of users.
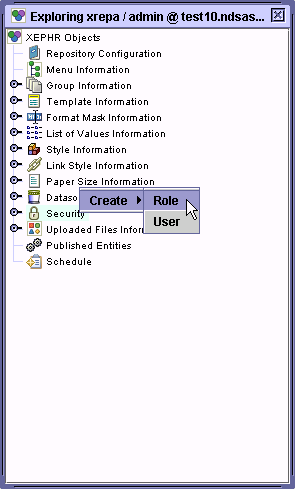
Left click on the Security
object to select it.
Right click on the Security
object to display the menu, and select Create
> Role.
The Creating Role
screen is displayed.
In the Name
field, enter USERS.

Click on the Next
button at the bottom of the screen to continue.
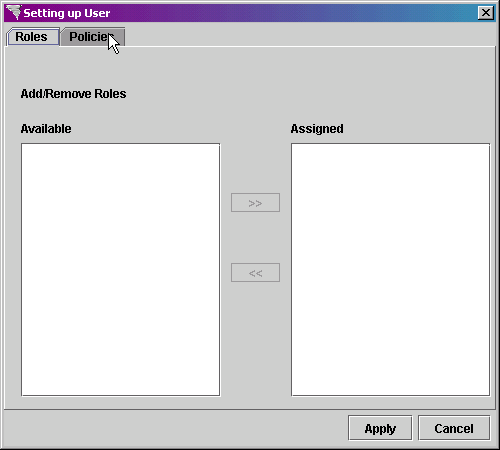
The Roles/Policies
screen is displayed next. If you had other roles
created, you could assign them to this role. You
can also assign policies to the role, which define what the user can access
in the Xephr Studio.
Click on the Policies
Tab.
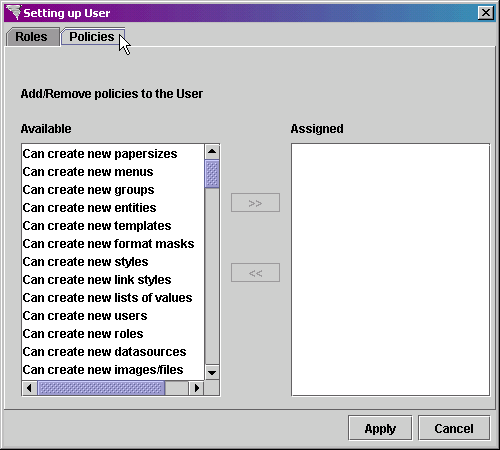
We want the users that are assigned this role to be
able to perform certain functions in the Xephr Studio, but be restricted
from others.
In the Available side of the screen, select the following
policies by holding down the Ctrl key on your keyboard and clicking on
each policy:
Can create new menus
Can create new groups
Can create new entities
Can create new list of values
Can create new images/files
Can modify existing menus
Can modify existing groups
Can modify existing entities
Can modify existing list of values
Can modify existing images/files
Can delete existing menus
Can delete existing groups
Can delete existing entities
Can delete existing list of values
Can delete existing images/files
Can view menus
Can view groups
Can view entities
Can view list of values
Can view images/files
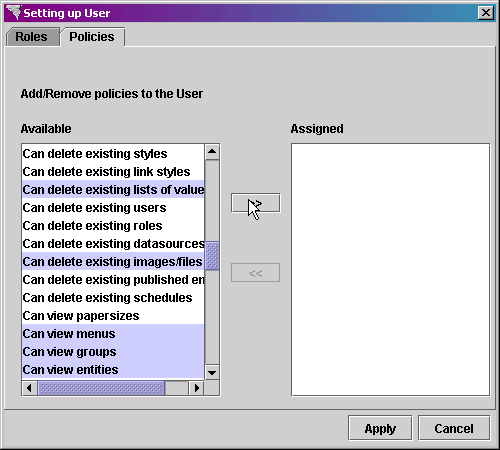
Click on the >>
button to assign the policies to the role.
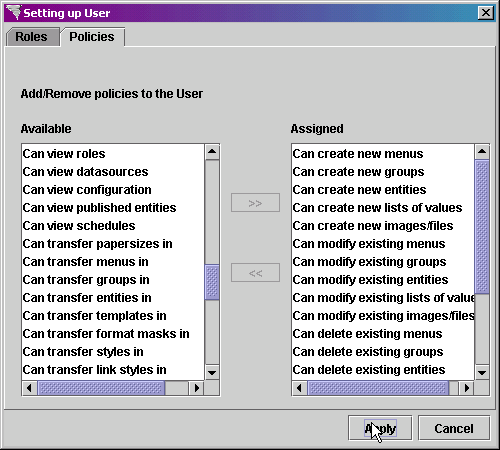
Click on the Apply
button to continue.
The Adding DB Logins
screen is displayed next. On this screen, we can
assign multiple database log-ins to determine which database-specific
user is logging into the datasource.

We are not assigning a separate database login to our
role. Click on the Next
button at the bottom of the screen to continue.
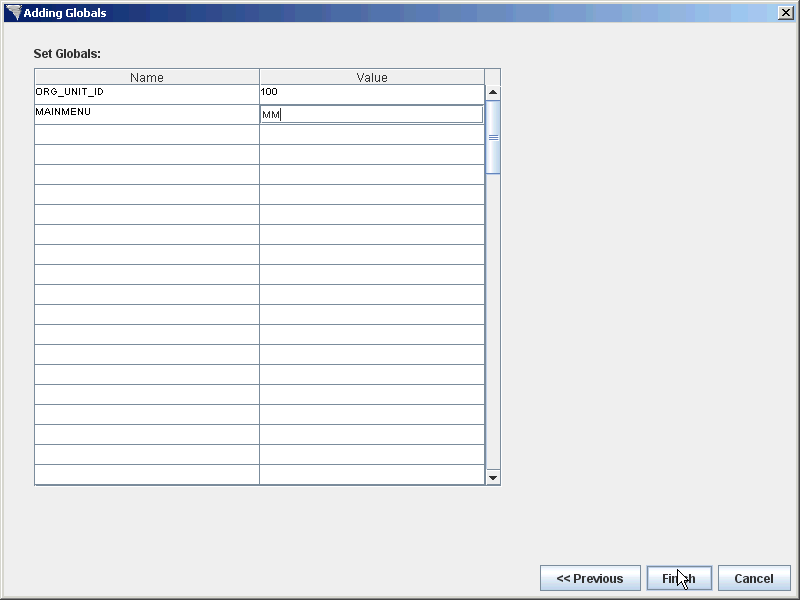
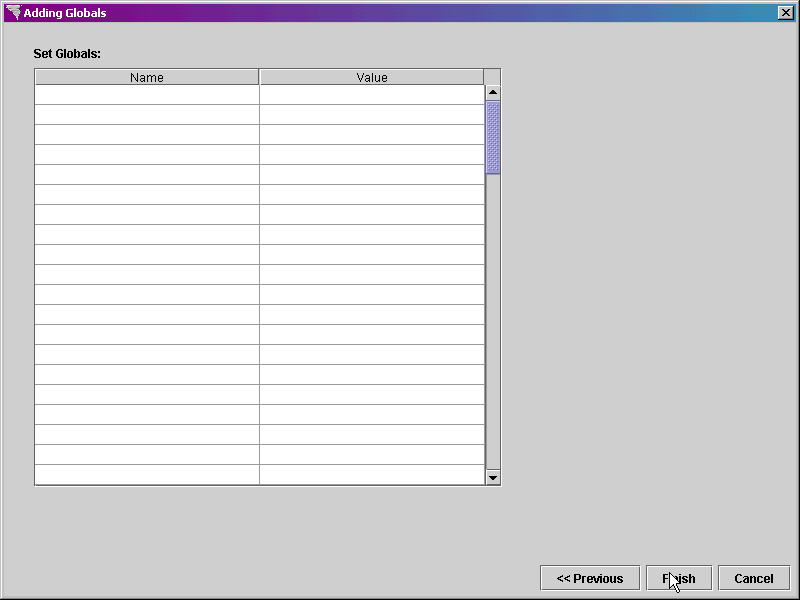
The Adding Globals
screen is displayed. We are going to set up default
global variables and values for the users to which this role is assigned.
-
Set up the following global variables and values.
|
Name |
Value |
|
ORG_UNIT_ID |
100 |
|
MAINMENU |
MM |
Once you have entered these two globals, click on the
Finish button.
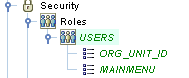
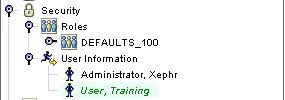
The role is added to the Roles
section of the Security object:
Click on the Save  button in the main toolbar.
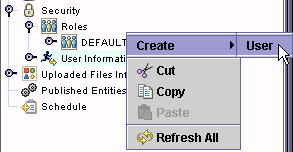
Left click on the User
Information object to select it.
Right click on the User
Information object to display the menu and select Create->
User from the menu.
The Creating User
screen is displayed.
In the First Name
property, enter Training.
In the Last Name
property, enter User.
In the Login
property, enter train.
In the Password
property, enter train. The Login and Password values
are used to log into the studio and the run time for the user.
In the E Mail Address
property, enter your email address.
Leave the Datasource
property set to (use parent).
In the Start Page
property, enter MENU, which is created in the Menu
Examples section.
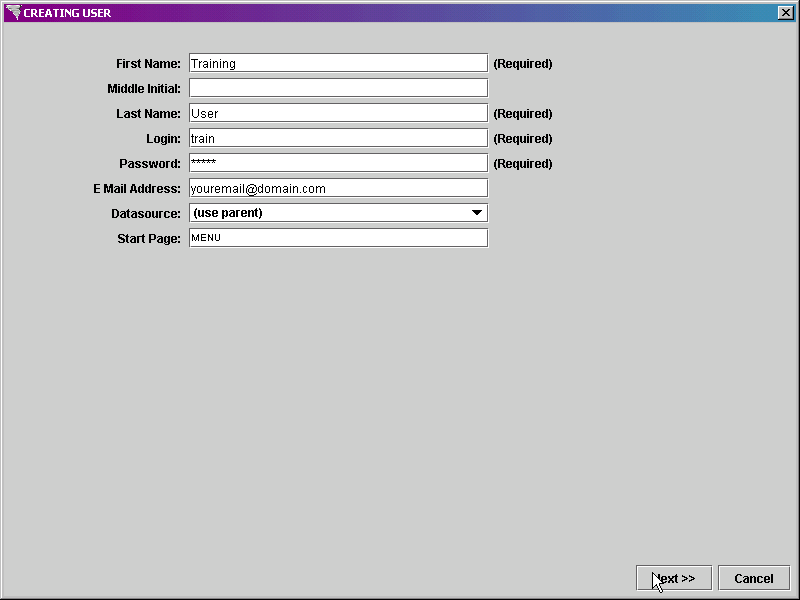
Click on the Next
button at the bottom of the screen.
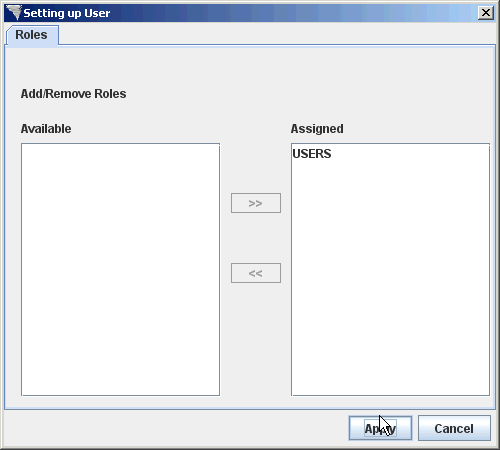
The Roles/Policies
screen is displayed next. You can assign both roles
and policies to a user. When assigned a role, the
user is also assigned the roles, policies, and global variables assigned
to that role.
Left click on the USERS role in the Available
column.
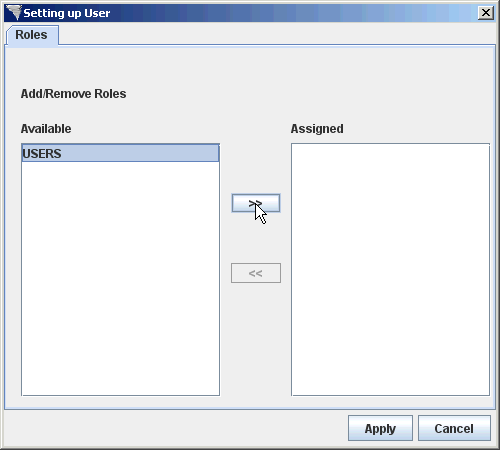
Click on the >>
button to assign the role to this user.
We are not going to assign any additional policies to
this user, so click on the Apply button to apply just the role.
The Set DB Logins
screen is displayed. If the user had access to
multiple data sources, this is where the user ID and password for the
user would be set up. Our user only has access
to the default datasource, so do not enter anything here.
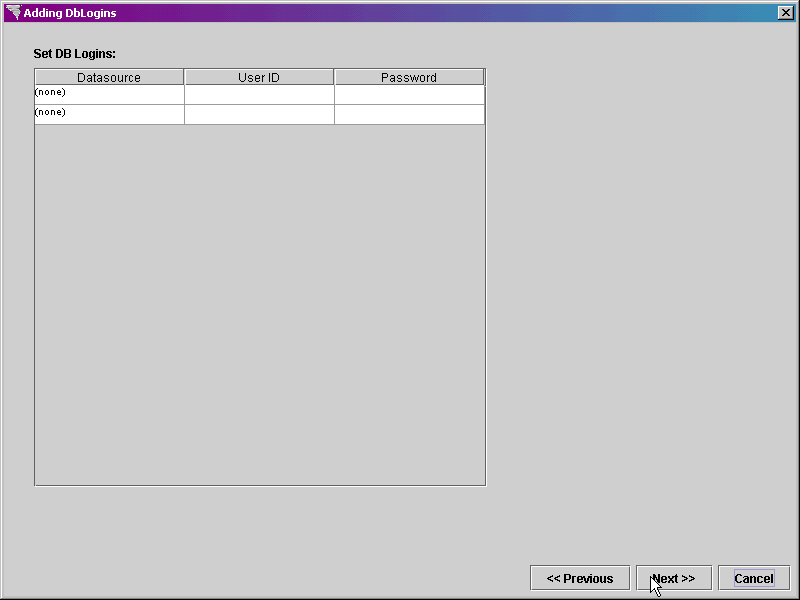
Click the Next
button at the bottom of the screen to continue.
The Set Globals
screen is displayed. This screen allows you to
define global values by user. These globals are
assigned to the Xephr®
session when the user logs in. These globals will
be in addition to the ones assigned to the role.
Since we only need the globals assigned to the role
for this user, click on the Finish
button at the bottom of the screen to create the user.
The user is displayed in the Explorer
Tree.
Click on the Save
button in the main toolbar.
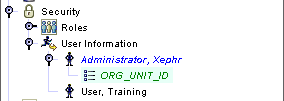
The administration user needs to be assigned the global ORG_UNIT_ID
in order to run some of the lists of values in the system.
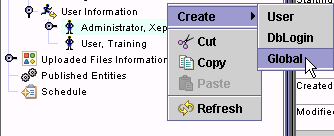
Right click on the Administrator,
Xephr user.
Select Create >
Global from the right menu.
Since you are modifying the currently logged in user,
you will get a confirmation message. Select Yes.

The Adding Globals
screen is displayed.
In the Name
field, enter ORG_UNIT_ID.
In the Value
field to the right of the Name field, enter 100.
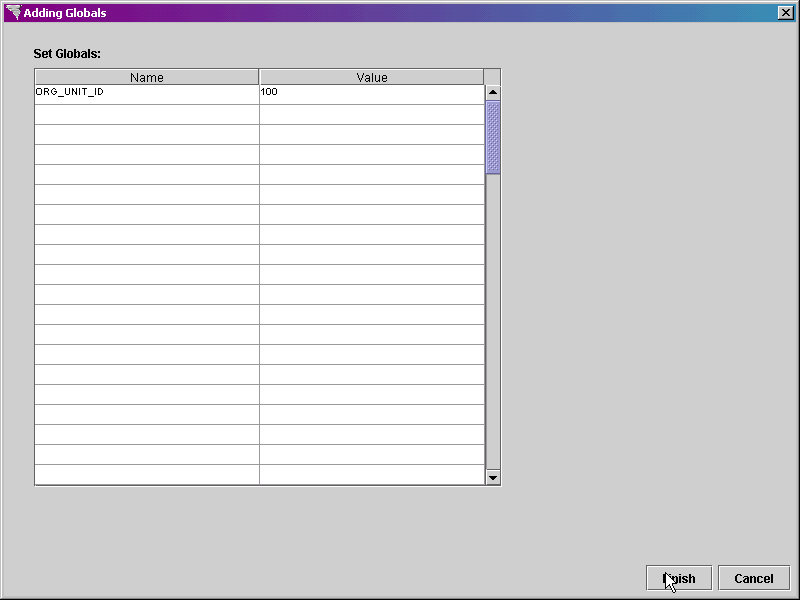
Click on the Finish
button.
The global is added to the user.
Click on the Save
button in the main toolbar.
Xephr is a registered trademark of NDS Systems, LC.