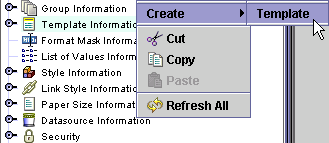
Right click on the Template Information object.
Select Create
> Template from the menu.
The Creating an Entity screen is displayed.
Click on the Screen
bullet.

Click on the Next button at the bottom right of the screen to continue.
In the Entity Name property, enter SCREEN_TEMPLATE as the entity name.
Leave the Datasource
property set to (use default), since there is only one datasource for
the Xephr
Leave the Based On property set to (NONE), since this template will not be based off of any other template.
Leave the Default Mode property set to QBE View. This property determines the default mode for the screens created from this template.
Set the Body Style property to DEFAULT_STYLE, which was modified in the Style Example section.
Set the Editable Field Style property to DEFAULT_DATA_ENTRY, which was modified in the Style Example section.
Set the Non-Editable Field Style property to DEFAULT_STYLE, which was modified in the Style Example section.
Set the Lov Style property to DEFAULT_STYLE, which was modified in the Style Example section.
Set the
Link Style property to LINKS, which was created in the Link
Style Example section.

Click on the Next button at the bottom right of the screen to continue to the block creation section of the wizard. If you were not going to add a block to the template, you could click on Finish here instead.
In the Block Name property, enter HEADER_BLOCK as the name of the block.
In the Block Type property, select Standard Block.
Set the Query Type property to Not From Query, since the fields will be hard coded for the header.
Leave the Datasource property set to (use parent), since there is only one datasource for the Xephr install.
Leave the Create Heading checkbox set to off. When you set this flag to on, a heading block is created for all modes selected for this block. Since this is the screen header, we don't need a heading for the block.
In the Mode Selection section, set all checkboxes to on. We want the header to appear on every screen mode for the screens created for this block.
In the Scheme
Selection section, leave the Form bullet set to on. This
block will only display one record at a time (the header), so the Form
scheme is the best choice.

Click on the Next button at the bottom right of the screen to add fields to the block.
Click on the Add button three times to add three fields.
In the first field, type LOGO and press the Enter key on your keyboard.
In the second field, type HEADER_TEXT and press the Enter key on your keyboard.
In the third field, type POWERED_BY_IMAGE and press
the Enter key on your keyboard.

Press the Next button on the bottom right of the screen to continue.
We need to add the second block
for the left menu to this template. Set the Add Block or Labels checkbox to on.
The screen template will be displayed for you to
select the entity or block to which you are adding the new block.

Click on the SCREEN_TEMPLATE
entity.

Click on the Add Block button on the bottom right of the screen to add the block to the template.
In the Block Name property, enter LEFT_MENU as the name of the block.
In the Block Type property, select Standard Block.
Set the Query Type property to Not From Query, since the fields will be hard coded for the left menu.
Leave the Datasource property set to (use parent), since there is only one datasource for the Xephr install.
Leave the Create Heading checkbox set to off. When you set this flag to on, a heading block is created for all modes selected for this block. Since this is the left menu link block, we don't need a heading for the block.
In the Mode Selection section, set all checkboxes to on. We want the left menu to appear on every screen mode for the screens created for this block.
In the Scheme
Selection section, leave the Form bullet set to on.

Click on the Next button at the bottom right of the screen to add fields to the block.
Click on the Add button nine times to add nine fields.
In the first field, type MENU.
In the second field, type SIGN_IN.
In the third field, type QUERY.
In the fourth field, type LIST.
In the fifth field, type NEW.
In the sixth field, type EXECUTE_SEARCH.
In the seventh field, type SAVE.
In the eighth field, type DELETE.
In the ninth field,
type CREATE.

Press the Next
button on the bottom right of the screen to continue.

Click on the Finish button.
The template is displayed in the
Explorer Tree.

Click on the Save
 button in the main toolbar to save the template.
Click on the template object to select it and display the property sheet.
Check the Width
and Height values for the template.
They must have a value greater than 0. Change
the Width to 800 and the Height to 600 for this template. Since
this template is not based on another template, the width and height must
be defined.

Expand the template and click on the LEFT_MENU object in the Explorer Tree.
Check the Width
and Height values for the block.
They must have a value greater than 0. Change
the Width to 160 and the Height to 400 for this block. Since
this template is not based on another template, the width and height must
be defined.

Click on the HEADER_BLOCK object in the Explorer Tree.
Since we want the header included in all screens created from this template, set the Mutability pop-list to Not Mutable. This will prevent users that are creating screen entities from this template from modifying this block.
Check the Width
and Height values for the block.
They must have a value greater than 0. Change
the Width to 800 and the Height to 100 for this block. Since
this template is not based on another template, the width and height must
be defined.

Click on the Save
button in the main toolbar to save the changes.
Expand the HEADER_BLOCK.
Left click on the LOGO field. We need to modify the logo field to display our logo and to link to our home page.
In the Display As property, select Image.
In the Hyperlink To property, enter the home page url. http://www.ndsapps.com
In the Use New Window property, select true to indicate that when someone clicks on the logo image, the home page will open in a new browser window.
In the Tool Tip property, enter the text to be displayed when the mouse pointer hovers over the logo image in the web browser. Go to the NDSi Home Page.
In the Image
Location property, select the previously uploaded logo image -
xephr.gif. When you click out the property, the
path to the image will be entered automatically.

To find out the size of the image,
in the Explorer Tree, expand the Uploaded
Files Information object.

Select the image
xephr.gif. In the image's property sheet, the height
and width are displayed. Note these values.

Select the LOGO
field again, and in the Height
and Width properties, enter the
height and width of the image.

Click on the Save
button in the main toolbar to save the changes to this field.
Select the HEADER_TEXT field. We need to modify the contents of this field to display the desired text.
In the Contents
property, enter the desired text. Welcome to NDS-i
Xephr.

Click on the POWERED_BY_IMAGE field. This field will be an image with no link.
In the Display As property, select Image.
In the Tool Tip property, enter the text to be displayed when the mouse pointer hovers over the powered by image in the web browser. Powered by NDSi
In the Image
Location property, select the previously uploaded logo image -
poweredby.gif. When you click out the property,
the path to the image will be entered automatically.

To find out the size of the image,
in the Explorer Tree, expand the Uploaded
Files Information object.

Select the image
poweredby.gif. In the image's property sheet, the
height and width are displayed. Note these values.

Select the POWERED_BY
field again, and in the Height
and Width properties, enter the
height and width of the image.

Click on the Save
button in the main toolbar to save the changes to this field.
Right click on the template object
in the Explorer Tree and select Designer
Frame.

The Designer
Tool is displayed.

Within the Designer
Tool, you can move, align, and resize the objects. Move
the objects around until they look like this. For
specific instructions on the Designer Tool and its functionality, see
the Designer Tool section.

Click the Save
button on main toolbar to save the changes.
Click on the LEFT_MENU object in the Explorer Tree and expand it.
Each of the label fields displayed in the Explorer Tree need to be modified and changed into hyperlinks that allow navigation between the different modes and functionality of the screens to be created from this template.
For each field, select the field and make the following changes:
In the Hyperlink To property, the code is specific to the functionality of the link.
|
Field |
Hyperlink To Property |
Function |
|
MENU |
ShowList('MENU'); |
This function shows the entity named MENU in List mode. |
|
SIGN_IN |
DoLogout('LOGIN'); |
This function ends your Xephr session and displays the defined entity in its default mode. In this case, the entity is the entity named LOGIN, which we will create later. |
|
QUERY |
ShowQBE(); |
This function shows the current entity in Query mode. |
|
LIST |
ShowList(); |
This function shows the current entity in List mode. |
|
NEW |
ShowNew(); |
This function shows the current entity in New mode. |
|
EXECUTE_SEARCH |
ExecuteQbe(); |
This function executes a query against the database, passing in the values entered in the fields, and returning them to the current entity in List mode. |
|
SAVE |
Save(); |
This function saves the changes made on the screen, and if no error messages are returned, refreshes the screen. |
|
DELETE |
Delete(); |
This function deletes the record displayed on the screen, and refreshes the screen. |
|
CREATE |
Save(); |
This function inserts a new record from the entries made on the screen in new mode. |
In the Hyperlink Scripted? property, select true as all of the links are Xephr functions.
In the Contents property, enter the text the be displayed in the left menu for the link.
|
Field |
Contents Property |
|
MENU |
Main Menu |
|
SIGN_IN |
Sign In |
|
QUERY |
New Search |
|
LIST |
Show All |
|
NEW |
New |
|
EXECUTE_SEARCH |
Execute Search |
|
SAVE |
Save |
|
DELETE |
Delete |
|
CREATE |
Create |
In the On QBE, On New, On List, and On Edit properties, set this pop-list according to the link's functionality.
|
Field |
On QBE |
On New |
On List |
On Edit |
|
MENU |
true |
true |
true |
true |
|
SIGN_IN |
true |
true |
true |
true |
|
QUERY |
false |
true |
true |
true |
|
LIST |
true |
true |
true |
true |
|
NEW |
true |
false |
true |
true |
|
EXECUTE_SEARCH |
true |
false |
true |
false |
|
SAVE |
false |
false |
false |
true |
|
DELETE |
false |
false |
false |
true |
|
CREATE |
false |
true |
false |
false |

When all changes have been made,
press the Save button in the main toolbar.
The template is complete.