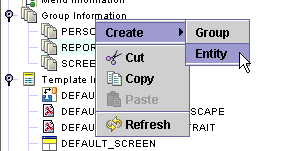
Select the Group Information object. Expand it, and select the group to which you wish to add the new report entity.
Right click on the group and select
Create->Entity.
Click on the Report
bullet.

Click on the Next button at the bottom right of the screen.
In the Entity Name property, type OPEN_INVOICE_TOTALS as the entity name.
Leave the Datasource
property set to (use default), since there is only one datasource for
the Xephr
In the Based On property, select REPORT_TEMPLATE, which is the template that we created earlier.
Leave the Default Mode property set to Parameter Form.
Leave the Body Style set to (from parent).
Leave the Editable Field Style set to (from parent).
Leave the Non- Editable Field Style set to (from parent).
Leave the Lov Style set to (from parent).
Leave the Link Style set to (from parent).
Leave the Document
Security set to Not Secure.
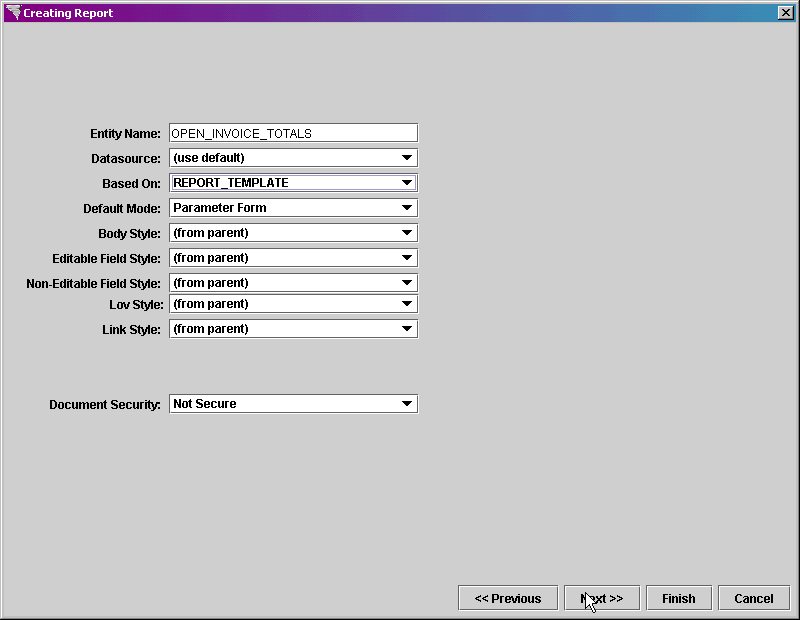
Click on the Next button at the bottom right of the screen.
In the Block Name property, enter INVOICES as the name of the block.
In the Block Type property, select Standard Block.
Set the Query Type property to Simple Query.
Leave the Datasource property set to (use parent), since there is only one datasource for the Xephr install.
In the Table property, select the name of the table or view from which the data will be obtained. Since our datasource is set to use the Oracle 9i database for NDS Applications, we will select the view ARINVSUM_VW.
Leave the Create Heading checkbox set to off since we do not want a heading to be created for the block.
In the Scheme
Selection section, set the List
bullet to on since we will be
seeing multiple records on the block at the same time.
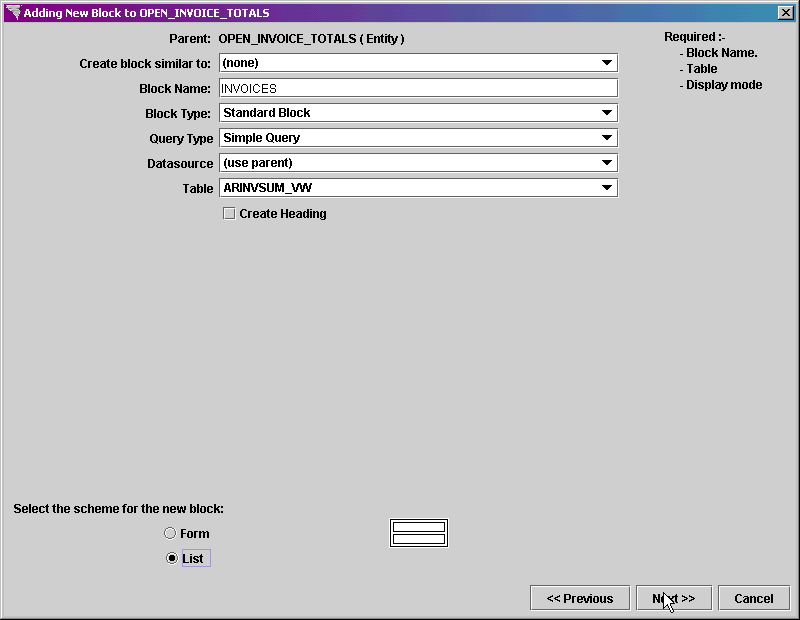
Click on the Next button at the bottom right of the screen.
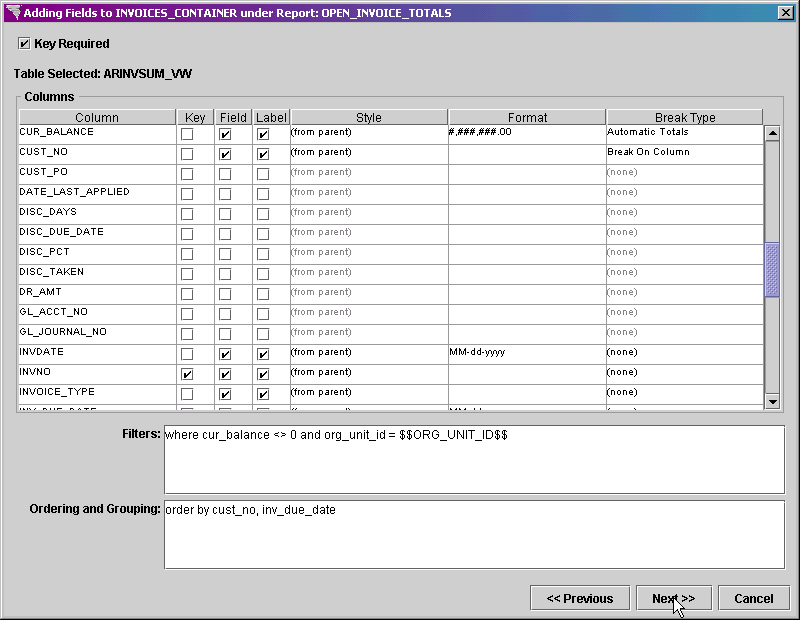
The Adding Fields screen is displayed. Select the columns that you wish to include in the report.
Click on the name of the column
to select both the Field and Label checkboxes for that column. Do
this for the following columns
CUR_BALANCE
CUST_NO
INVDATE
INVNO
INVOICE_TYPE
INV_DUE_DATE
ORIG_AMT
A key must be selected to continue. Set the Key checkbox to on for the INVNO field as it is the key for this view.
Formatting can be applied to some
of these fields. In the Format
column, select the following format masks for the following fields.
CUR_BALANCE #,###,###.00
INVDATE MM-dd-yyyy
INV_DUE_DATE MM-dd-yyyy
ORIG_AMT #,###,###.00
We need to apply the breaks on some of the columns as well. For the CUST_NO field, set the Break Type to Break on Column, this indicates that totals will be applied for each customer.
For the CUR_BALANCE field, set the Break Type to Automatic Totals. This indicates that totals will be calculated for this column.
For the ORIG_AMT field, set the Break Type Automatic Totals. This indicates that totals will be calculated for this column.
In the Filters
property, you could enter code to restrict the data returned from the
table. We want to include all invoices with a current
balance for the user's current enterprise, so enter the following filters.
where cur_balance <> 0 and org_unit_id = $$ORG_UNIT_ID$$
In the Ordering and
Grouping property, you can enter code to determine the order in
which the data is displayed in the report. We want
the report to be ordered by customer number, and then invoice due date,
so the following should be entered:
order by cust_no, inv_due_date
Click on the Next button at the bottom right of the screen.
The Ordering Fields
screen is displayed next. The columns are initially
ordered as they were listed on the previous screen. To
move a field up or down, highlight the desired field by selecting it,
and click on the Move Up or Move Down buttons on the right of the screen.
Move the fields until they are in the following
order:
CUST_NO
INVNO
INVOICE_TYPE
INV_DATE
INV_DUE_DATE
ORIG_AMT
CUR_BALANCE
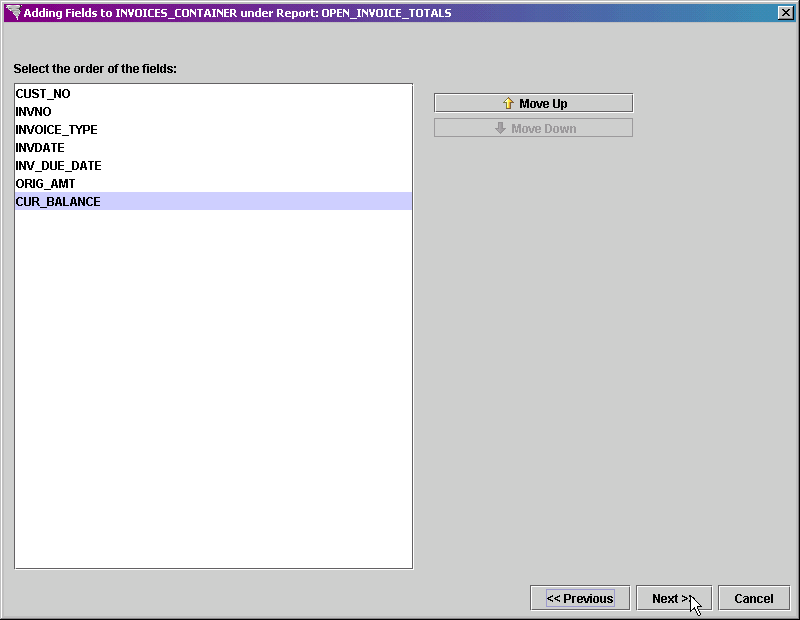
Click on the Next button when you have finished moving the fields.
The Option to Add More screen is displayed. We need to add one more block for the parameter form for this report.
Set the Add Block or
Labels flag to on.
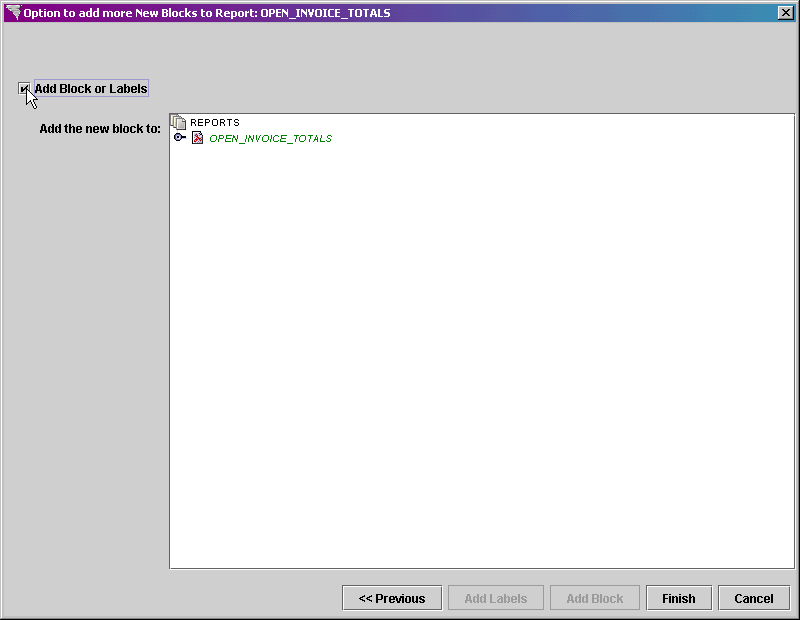
The report is displayed. Click on the OPEN_INVOICE_TOTALS report to select it.
Click on the Add Block
button at the bottom of the screen to add the next block.
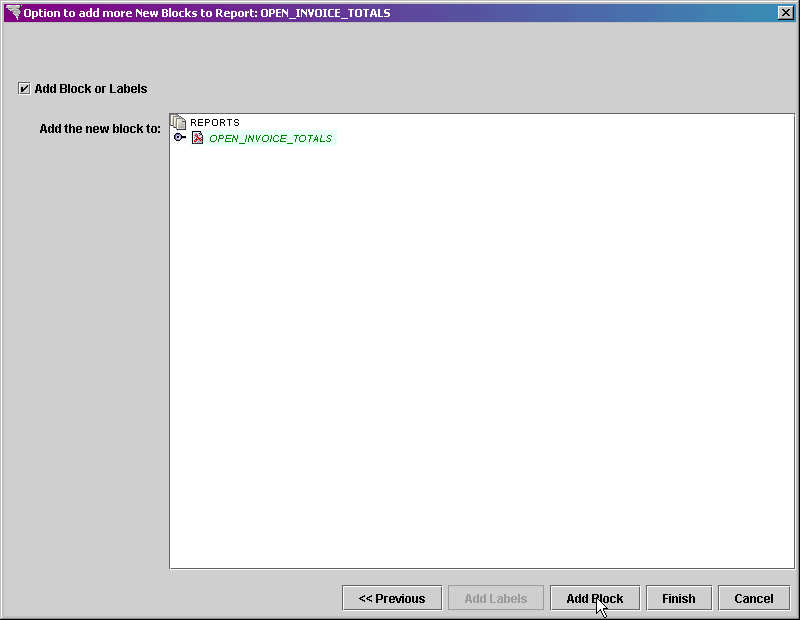
The Adding New Block screen is displayed.
In the Block Name field, enter PARAMETER_FORM.
Set the Block Type to Parameter Form.
Set the Create Heading flag to on as we want an extra field on this block for a header.
In the Editable Field Style pop-list, select DEFAULT_DATA_ENTRY.
In the Non-Editable Field Style pop-list, select DEFAULT_STYLE.
In the Body Style pop-list, select DEFAULT_STYLE.
In the Link Style
pop-list, select LINKS.
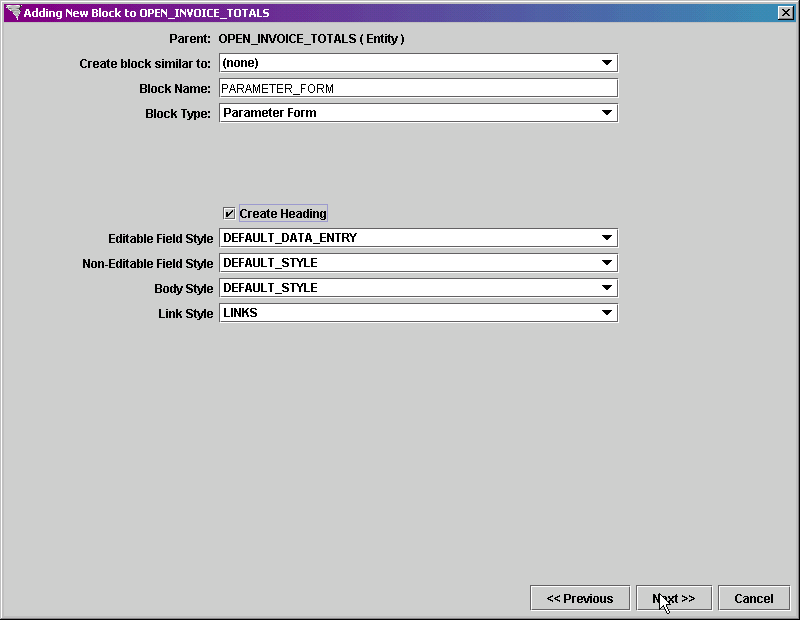
Click on the Next button to continue.
The Adding Fields screen is displayed next. A field is displayed here for each of the database fields that were selected on the database block.
Set the Include
flag to on for the INVOICES.CUST_NO
field, as we want the report to be able to be restricted to a specific
customer.
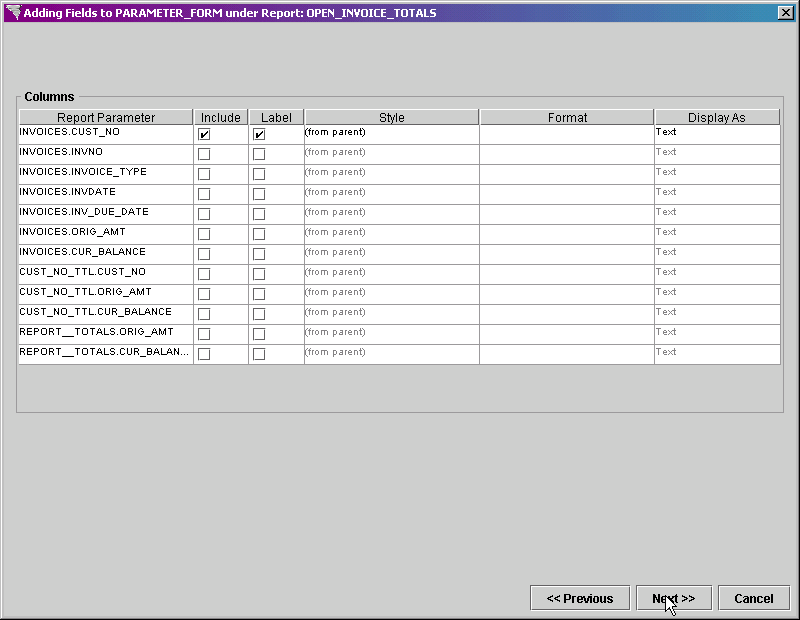
Click on the Next button at the bottom of the screen to continue.
The Ordering Fields
screen is displayed Next. Since we only have one
field, there's nothing to order.
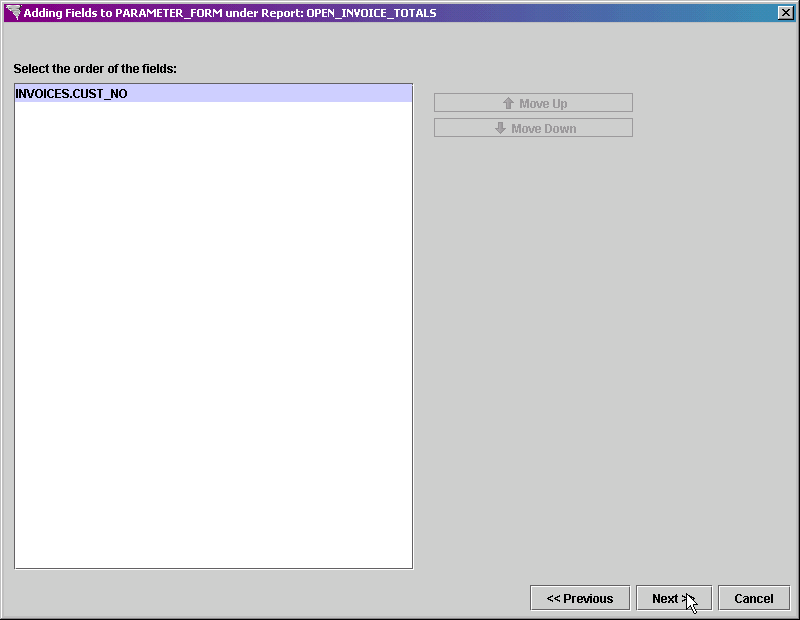
Click on the Next button at the bottom of the screen to continue.
The Option to Add More screen is displayed. We need to add a label to the parameter form in order to run the report.
Set the Add Block or Labels flag to on.
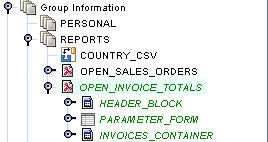
Expand the OPEN_INVOICE_TOTAL entity.
Click on the PARAMETER_FORM block to select it.
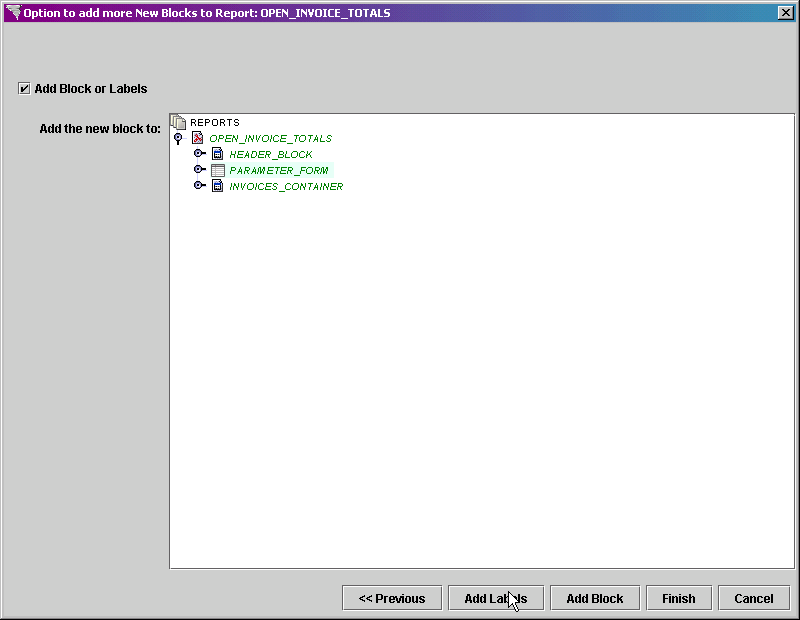
Click on the Add Labels button at the bottom of the screen.
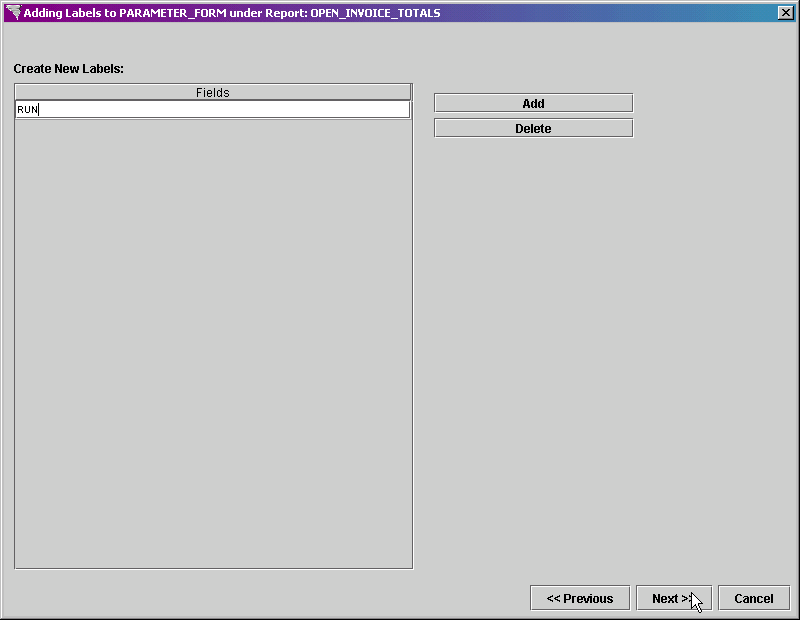
The Adding Labels screen is displayed.
Click on the Add button to add a field to the section on the left.
In the field, enter Run.
Click on Next
button at the bottom of the screen.
The Option to Add More
screen is displayed.

We have no more blocks to add, so click on the Finish button.
The new entity is added to the initially selected group.
Click on the Save  button in the main toolbar to save the new report entity.
In the Explorer Tree, left click on the OPEN_INVOICE_TOTALS report entity and display the property sheet.
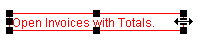
In the Title
property, enter the title for this report - Open Invoices with Totals
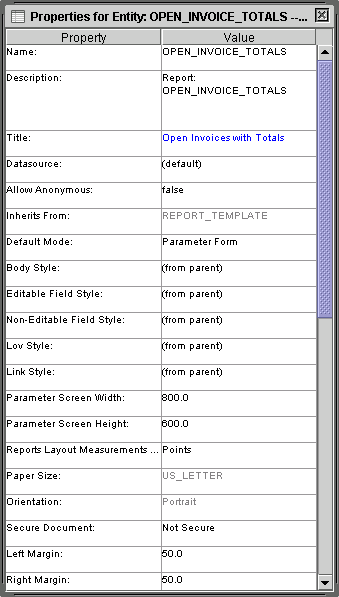
All other settings come from the report template.
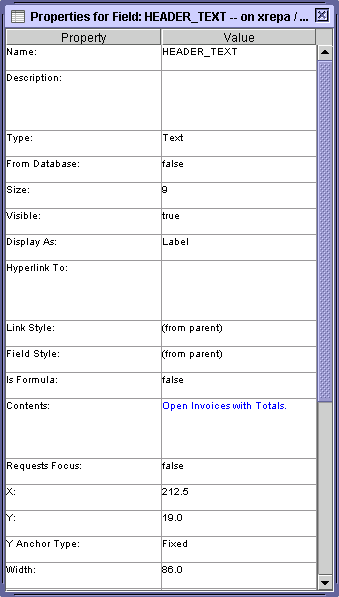
Expand the HEADER_BLOCK block next, select the HEADER_TEXT field, and display the property sheet.
In the Contents
property, enter the name of the new report - Open Invoices with Totals.
Expand the PARAMETER_FORM block next.
Select the HEADING field and display the property sheet.
In the Contents
property, enter the name of the new report - Open Invoices with Totals.
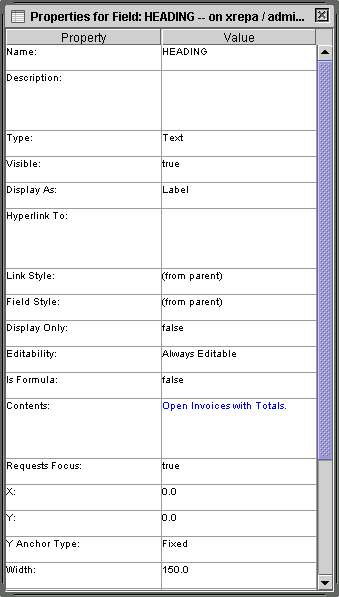
In the List of Values property, select the CUST_NO list of values that was created in the List of Values Examples section.
In the Text Case
property, select Uppercase as customer numbers are restricted to uppercase.
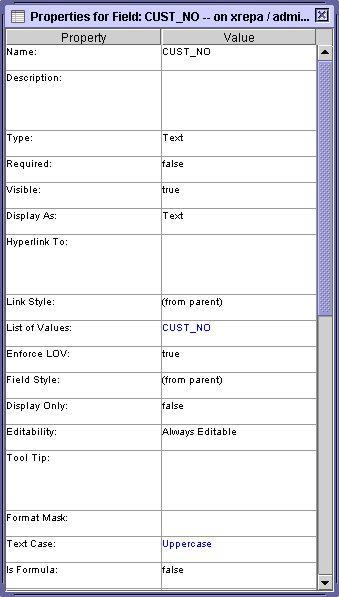
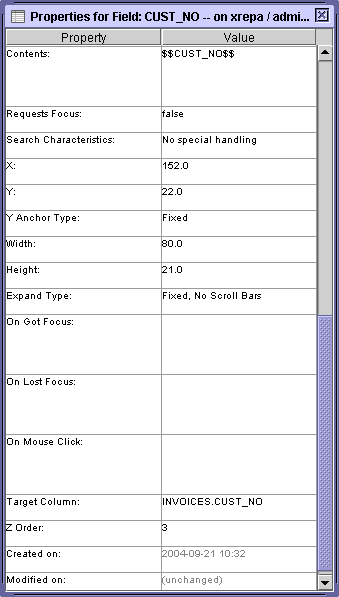
In the Contents field, the global $$CUST_NO$$ is entered automatically. This global is set on the execution of the report, and if the global exists, its value will be placed in this field the next time the report is run in the same session.
Scroll down on the property sheet and in the Target
Column, the block and field that will be restricted by the value
entered in this field on the parameter form is displayed. This
is the block and field that was selected during the block creation.
Select the RUN field and display the property sheet.
Set the Display As property to Button.
Set the Field Style property to DEFAULT_BUTTON.
In the Contents
property, enter Run Report.
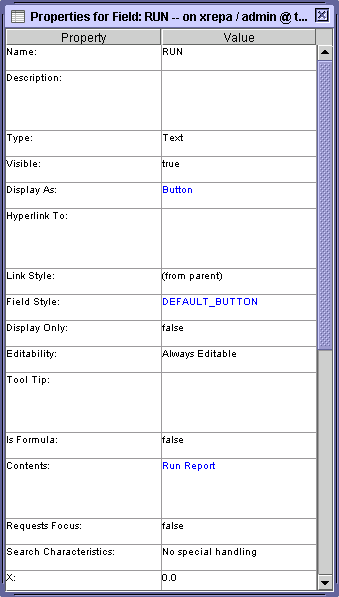
Scroll down until you reach the On
Mouse Click field. Enter ExecuteReport();

Click on the Save
button in the main toolbar to save the changes.
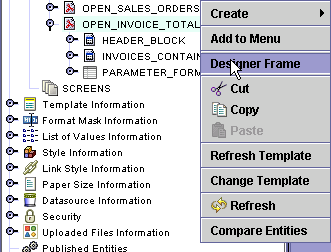
In the Explorer Tree, left click on the OPEN_INVOICE_TOTALS entity to select it.
Right click to display the menu. Select
Designer Frame from the menu.
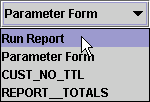
The Designer Tool will be displayed containing the Parameter Form. We need to modify the report itself first.
In the pop-list in the upper right of the Designer
Tool, select Run Report.
The report is displayed.
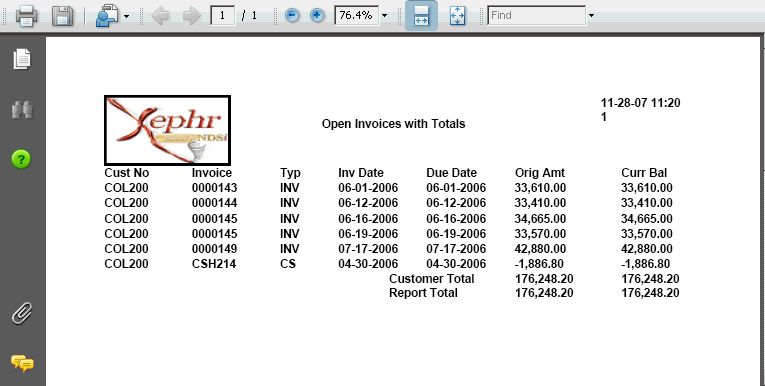
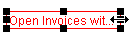
Notice that the report title is too small to display
all of the words. Left click on the field to select
it. Then, hold your cursor over the right edge
of the field until it turns into a double headed arrow. Left
click, hold down the mouse button, and drag the edge to the right until
the field displays all the words.
Select the field that displays the text In. This
is the Invoice Type label. In the Contents
field, enter Typ.
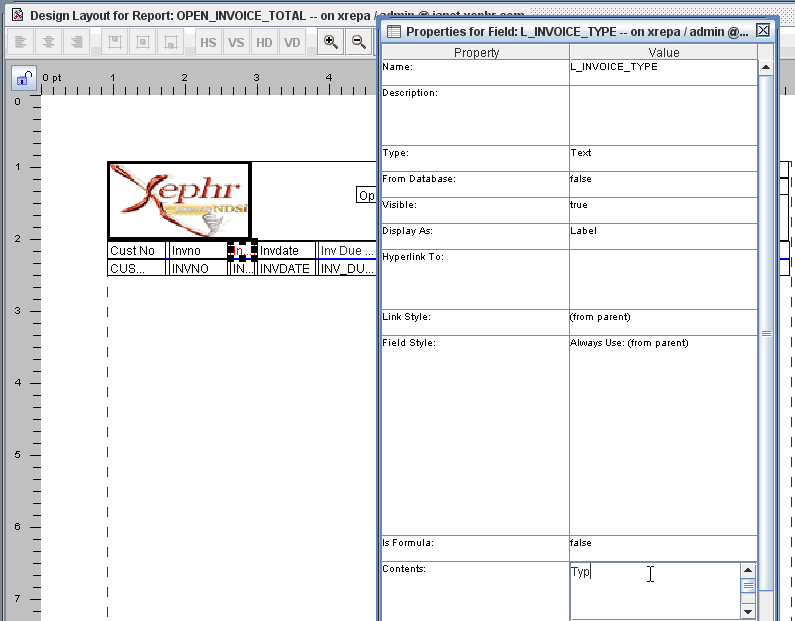
Repeat these steps for the following Labels:
|
Label |
Contents |
|
Invno |
Invoice |
|
Invdate |
Inv Date |
|
Inv Due Date |
Due Date |
|
Cur Balance |
Curr Bal |
The Designer Tool will look like this:

Click on the Save
button in the main toolbar to save the changes.
Set the pop-list in the upper right corner of the Designer
Tool to CUST_NO_TTL, which is the first total block created.
Select the CUST_NO field in the Designer Tool, in the Total Block. We are going to modify this field to be a label field for the total block. Double click on the field to display the property sheet.
Set the From Database property to false.
In the Contents field, enter Customer Total.
Change the X property to 102.
Change the Width
property to 100.

Click on the Save
button in the main toolbar to save the changes.
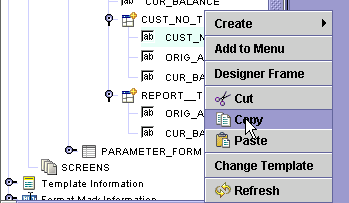
In the Explorer Tree, in the CUST_NO_TTL block, right click on the CUST_NO field.
Select Copy
from the menu.
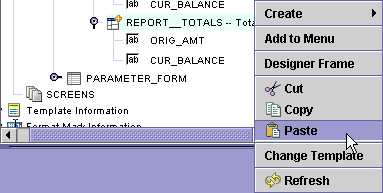
Right click on the REPORT_TOTALS block.
Select Paste
from the menu.
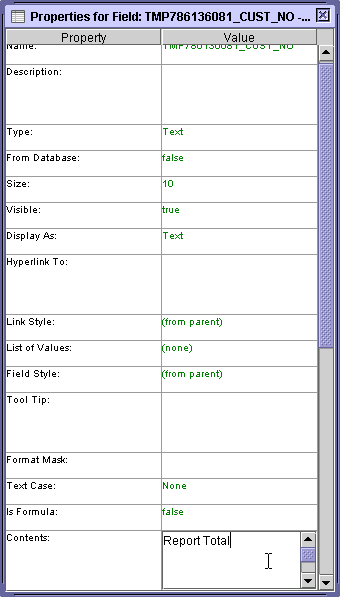
Left click on the pasted CUST_NO field.
In the Contents
field, change the text to Report Total.
Click on the Save
button in the main toolbar to save the changes.
To test the new report entity, highlight it by selecting
it in the Explorer Tree, and click on the Run
 button in the main toolbar.
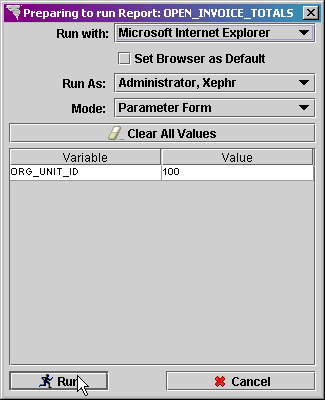
Since a global variable was defined in the Filtering
property, you must define the value before the screen is run. Enter
100 in the value field and press
the Run button.
The parameter screen is run in the browser.
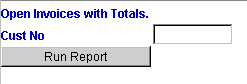
Enter the customer number in the Cust
No field and press the Run Report
button. If you leave the field blank, the report
will include all customers. You can double click
in this field to display the list of values.

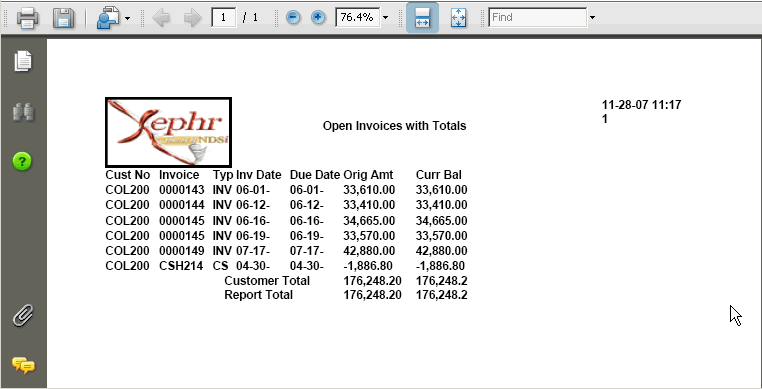
The report will be generated and displayed on the screen.
Additional modifications can be made in the Designer
Tool for layout and text changes using the learned functionality, such
as spreading out all fields, and lengthening the date fields: