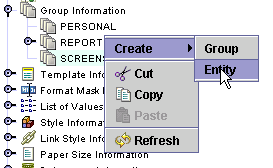
Select the Group Information object. Expand it, and select the group to which you wish to add the new screen entity.
Right click on the group and select
Create->Entity.
Click on the Screen
bullet.
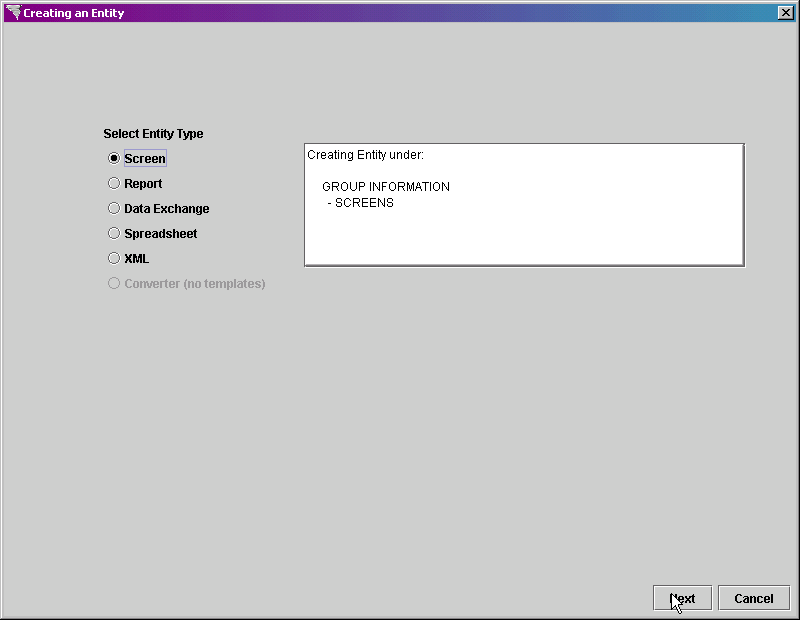
Click on the Next button at the bottom right of the screen.
In the Entity Name property, type CONTACTS as the entity name.
Leave the Datasource property set to (use default), since there is only one datasource for the Xephr install.
In the Based On property, select SCREEN_TEMPLATE, which is the template that we created earlier.
Leave the Default Mode property set to QBE View.
Leave the Body
Style, Editable Field Style,
Non-Editable Field Style, Lov Style and
Link Style properties set to (from
parent), as these styles will be taken from the SCREEN_TEMPLATE for this
screen.
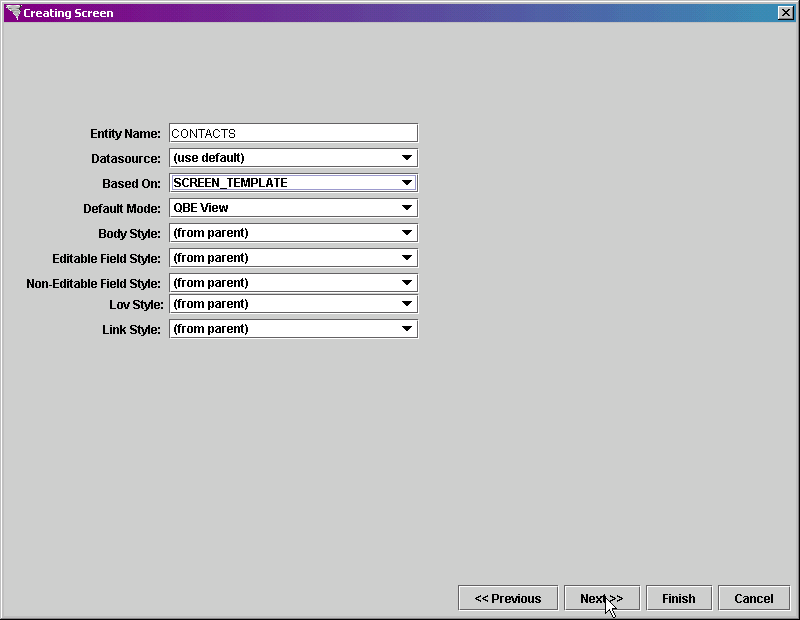
Click on the Next button at the bottom of the screen.
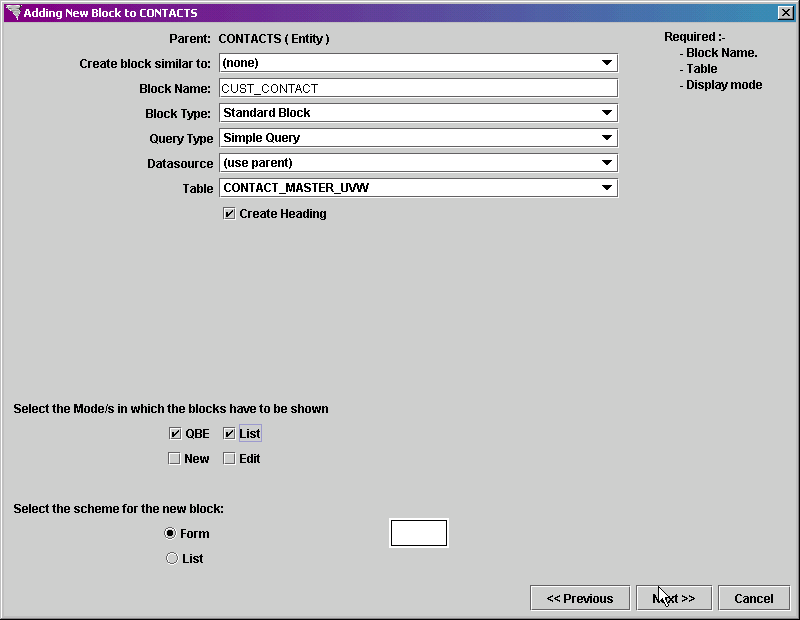
In the Block Name property, enter CUST_CONTACT as the name of the block.
In the Block Type property, select Standard Block.
Set the Query Type property to Simple Query.
Leave the Datasource property set to (use parent).
In the Table property, select the name of the table or view from which the data will be obtained. Since our datasource is set to use the Oracle 9i database for NDS Applications, we will select the view CONTACT_MASTER_UVW.
Set the Create Heading checkbox to on to indicate that a heading should be created for each mode for this block.
In the Mode
Selection section, set the QBE
checkbox to on and the List checkbox
to on.. We will be creating 4 different blocks
for this screen.
The first block is the QBE/List query block, which allows you to query
the database and return records that fit specific parameters.
The second block is the List block, which lists the records returned
by the query.
The third block is the Edit block, which allows maintenance of a single
record, selected from the list block.
The fourth block is the New block, which allows the entry of a new
record.
In the Scheme
Selection section, leave the Form
bullet set to on, since we are entering query information in this block.
Click on the Next button at the bottom right of the screen.
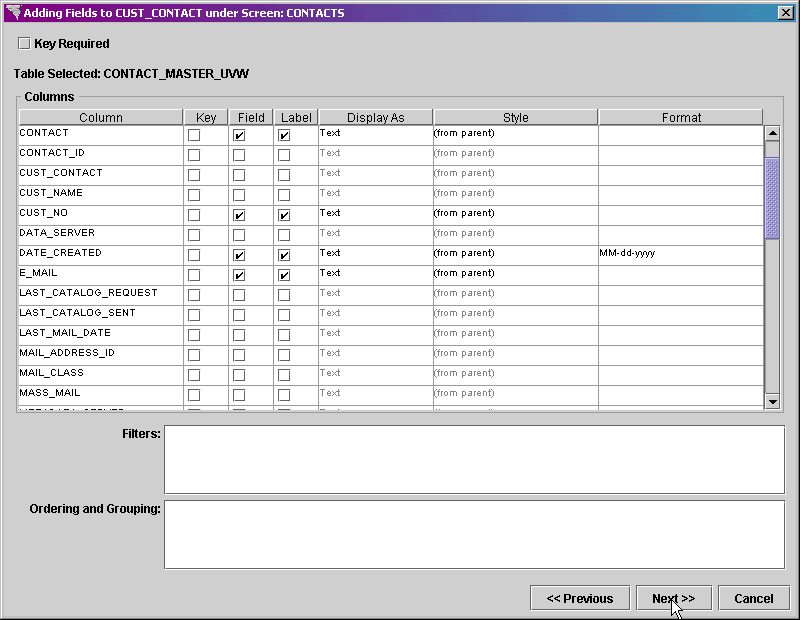
The Adding Fields screen is displayed. Select the columns that you wish to include on the screen.
Click on the name of the column
to select both the Field and Label checkboxes for that column. Do
this for the following columns:
CONTACT
CUST_NO
DATE_CREATED
E_MAIL
PRIMARY
USER_TEXT
The DATE_CREATED field needs a format mask. Set the Format pop-list to MM-dd-yyyy for this field.
Since this is the query block and records will not be updated or deleted from this screen, we do not need to define a key. Set the Key Required flag at the top of the screen to off.
Since this block is not returning data from the database,
we do not need to make entries in the Filters
or Ordering and Grouping fields
for this block.
Click on the Next button at to the bottom of the screen.
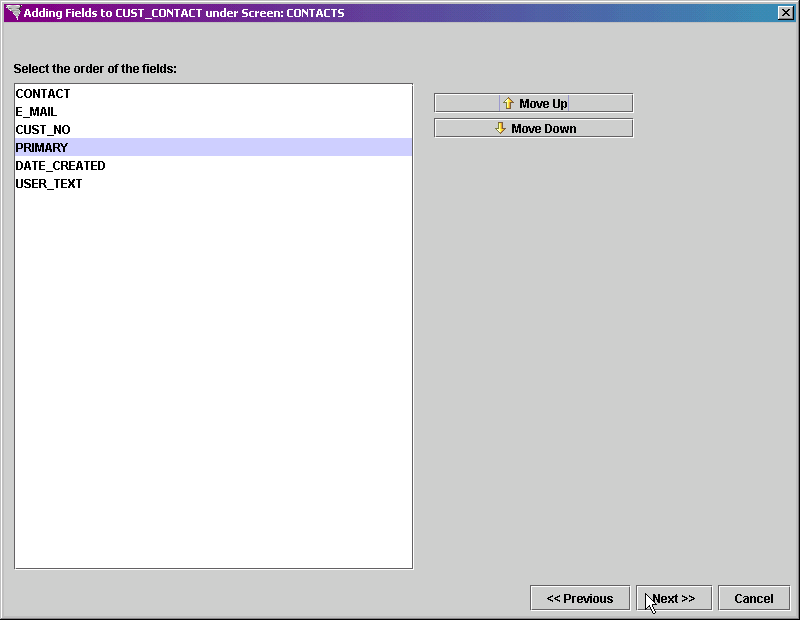
The Ordering Fields
screen is displayed next. The columns are initially
ordered as they were listed on the previous screen. To
move a field up or down, highlight the desired field by selecting it,
and click on the Move Up or Move Down buttons on the right of the screen.
Move the fields until they are in the following
order:
CONTACT
E_MAIL
CUST_NO
PRIMARY
DATE_CREATED
USER_TEXT
Click on the Next button at the bottom of the screen to continue.
The Option to Add More
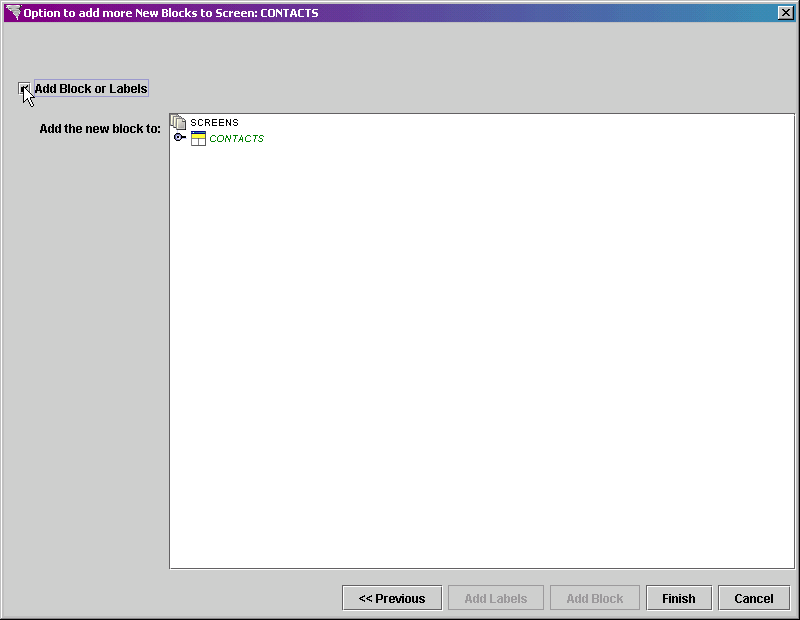
screen is displayed. We need to create the List
block next. Set the Add
Block or Labels checkbox to on. The entity
in its current form will be displayed.
Since we are adding the next block to the main screen
entity, select the CONTACTS entity.
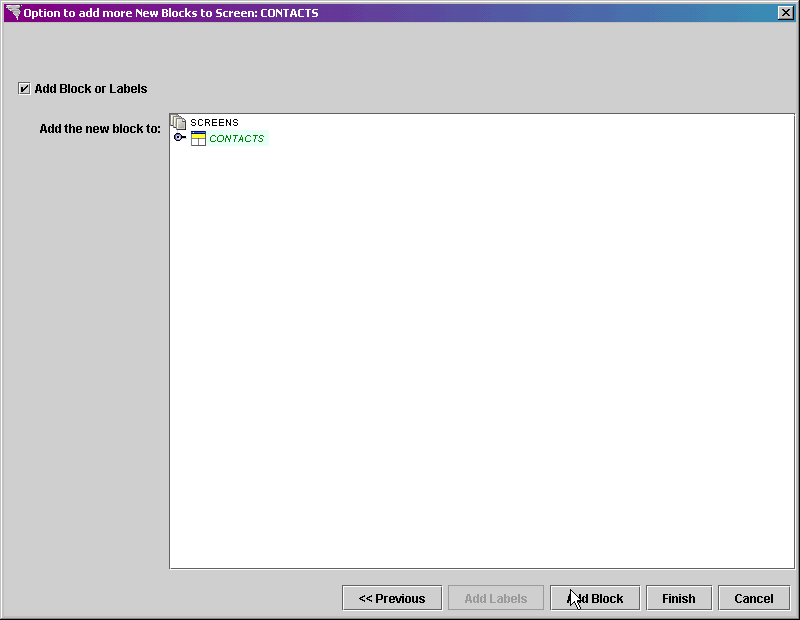
Click on the Add Block button at the bottom right of the screen.
The List block should be named the same as the query block, because the ExecuteQbe() javascript command that takes us from query mode to list mode and restricts the data displayed in the list mode to that which meets the criteria on the query screen requires it.
In the Block Name property, enter CUST_CONTACT as the name of the block.
In the Block Type property, select Standard Block.
Set the Query Type property to Simple Query.
Leave the Datasource property set to (use parent).
In the Table property, select the name of the table or view from which the data will be obtained. Since our datasource is set to use the Oracle 9i database for NDS Applications, we will select the view CONTACT_MASTER_UVW.
Set the Create Heading checkbox to on to indicate that a heading should be created for each mode for this block.
In the Mode Selection section, set the QBE checkbox to off and the List checkbox to on, as we are creating the block to list the data returned from the database.
In the Scheme
Selection section, set the List
bullet to on, since multiple records
are being returned to this screen and we wish to have the labels displayed
at the top of the screen and the fields displayed below them.
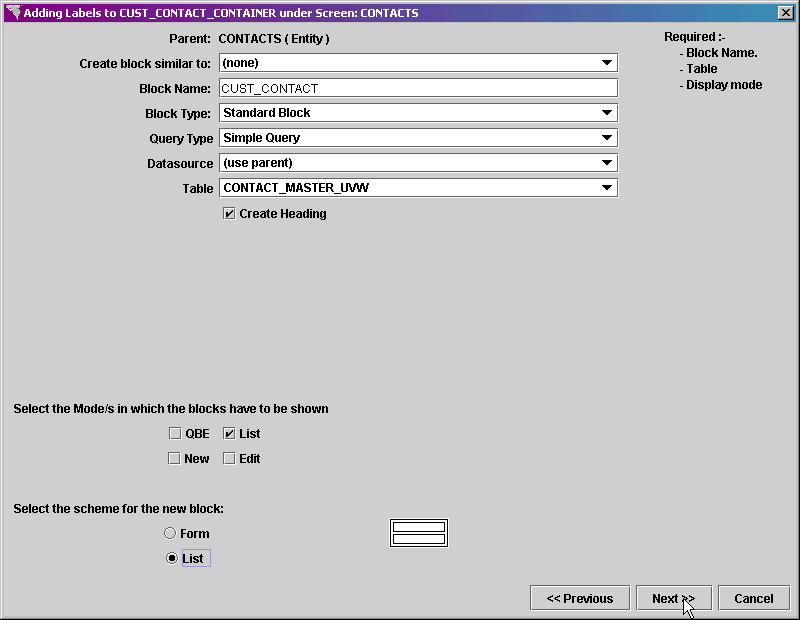
Click on the Next button at the bottom right of the screen.
The Adding Fields screen is displayed. Select the columns that you wish to include on the screen.
Click on the name of the column
to select both the Field and Label checkboxes for that column. Do
this for the following columns:
CONTACT
CUST_NO
DATE_CREATED
E_MAIL
PRIMARY
A key must be selected as the list block returns data from the database and the key is used to create a link from the list mode to the edit mode. Set the Key checkbox to on for the CONTACT_ID field as it is the key to this view.
The DATE_CREATED field needs a format mask. Set the Format pop-list to MM-dd-yyyy for this field.
In the Filters
property, you could enter code to restrict the data returned from the
table. We want to include all contacts for a customer,
but not for prospects or vendors, so enter the following filter.
where cust_contact = 'Y'
In the Ordering and
Grouping property, you can enter code to determine the order in
which the data is displayed in the screen. We want
the contacts to be listed in alphabetical order by contact name, so the
following should be entered:
order by contact
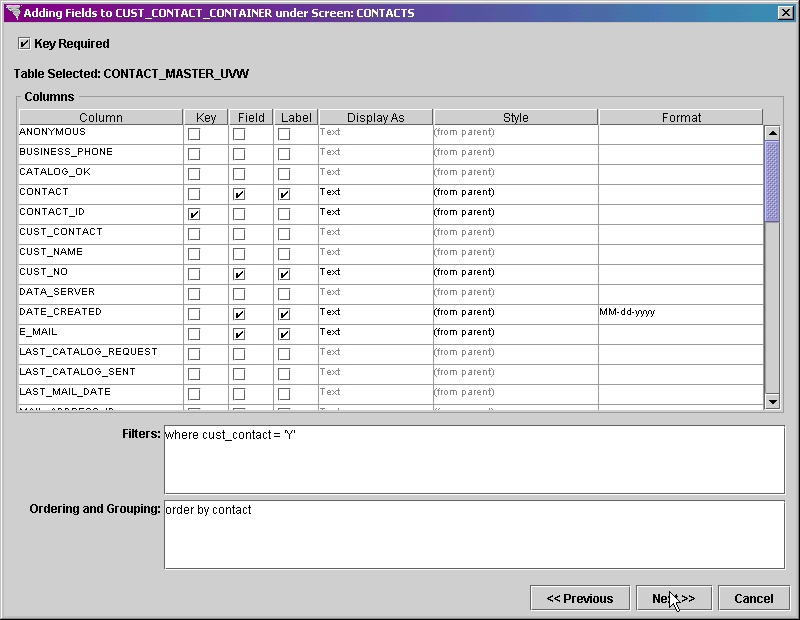
Click on the Next button at to the bottom of the screen.
The Ordering Fields
screen is displayed next. The columns are initially
ordered as they were listed on the previous screen. To
move a field up or down, highlight the desired field by selecting it,
and click on the Move Up or Move Down buttons on the right of the screen.
Move the fields until they are in the following
order:
CONTACT
E_MAIL
CUST_NO
PRIMARY
DATE_CREATED
CONTACT_ID
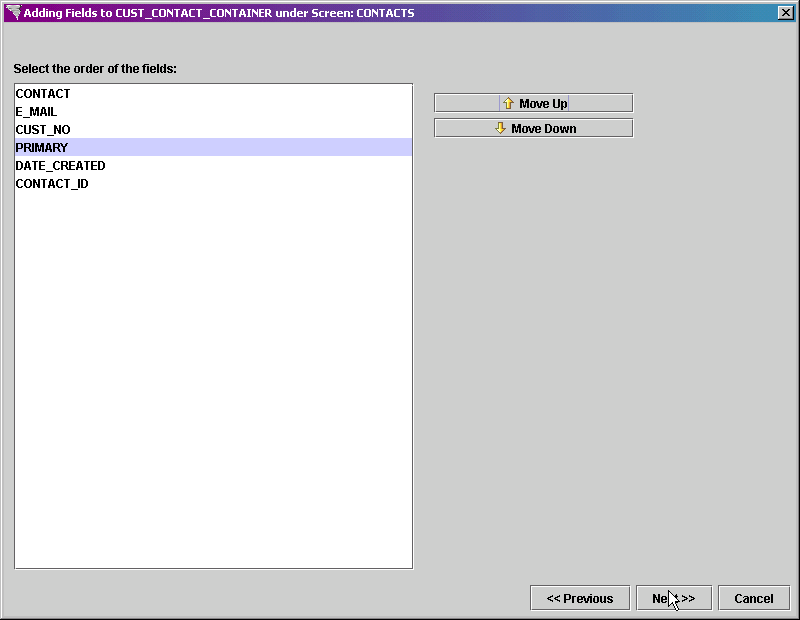
Click on the Next button at the bottom of the screen to continue.
The Option to Add More
screen is displayed. We need to create the Edit
block next. Set the Add
Block or Labels checkbox to on. The entity
in its current form will be displayed.

Since we are adding the next block to the main screen
entity, select the CONTACTS entity.

Click on the Add Block button at the bottom right of the screen.
Set the Create block similar to pop-list to CUST_CONTACT (qbe,list). This will set up the block to be the same as the earlier created qbe/list block. Then, we can just modify the properties for the Edit block.
Name the Edit block the same as the other blocks for the sake of consistency.
Set the Create Heading checkbox to on to indicate that a heading should be created for each mode for this block.
In the Mode Selection section, set the QBE checkbox to on and the List checkbox to off.. Set the Edit checkbox to on.
In the Scheme
Selection section, leave the Form
bullet set to on, since we will be displaying one record at a time on
this block, and we want the labels placed to the left of the fields to
which they belong.
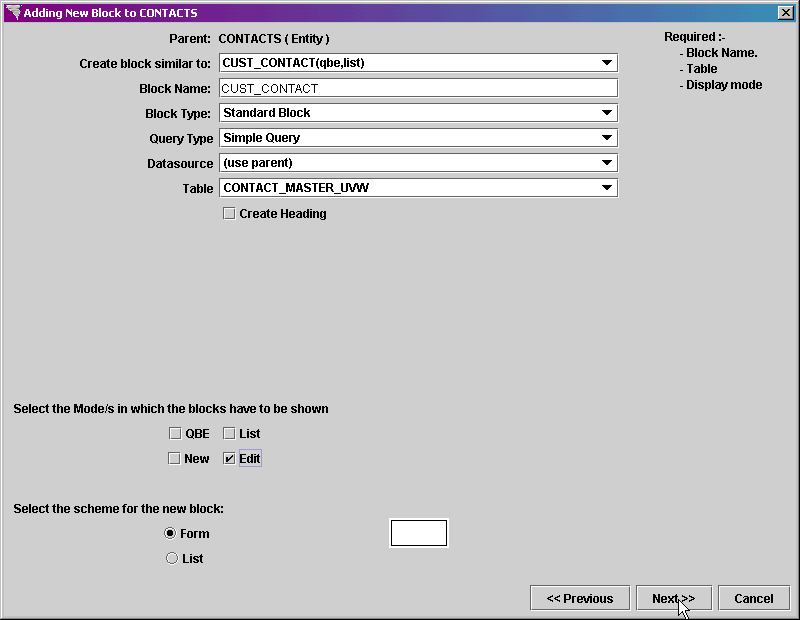
Click on the Next button at the bottom right of the screen.
The Adding Fields screen is displayed. You'll notice that there are fields already selected. These are the fields selected earlier on the qbe/list screen. We need to add to this information for the edit screen.
A key must be selected because from the Edit screen, we can do updates and deletes. The key must be defined in order to accomplish these updates and deletes. Set the Key checkbox to on for the CONTACT_ID field as it is the key to this view.
The DATE_CREATED field needs a format mask. Set the Format pop-list to MM-dd-yyyy for this field.
Since this block is accessed through the list screen
or the new screen, and is passed restrictions through those links, we
do not need to make entries in the Filters
or Ordering and Grouping fields
for this block.
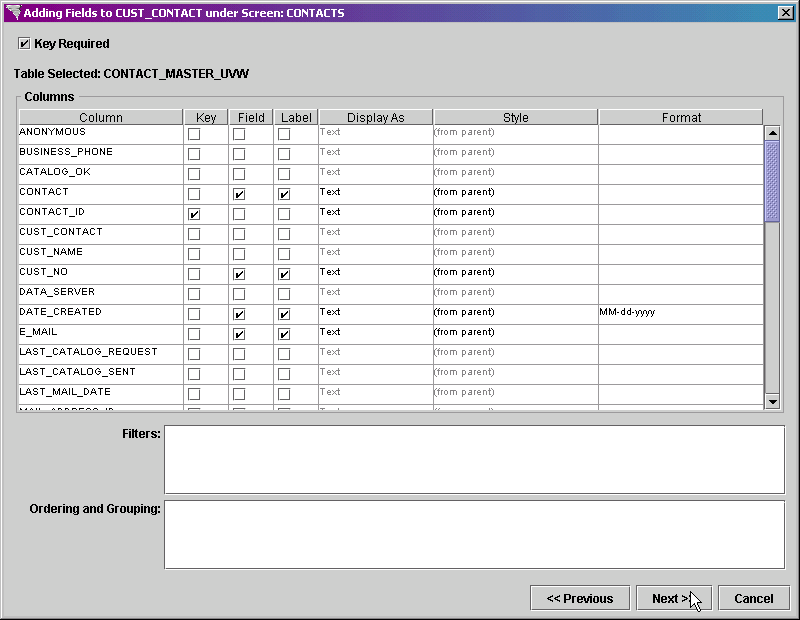
Click on the Next button at the bottom right of the screen.
The Ordering
Fields screen is displayed next. The columns
are initially ordered as they were ordered on the qbe/list screen from
which this block definition was copied. To move
a field up or down, highlight the desired field by selecting it, and click
on the Move Up or Move Down buttons on the right of the screen. Verify
that the fields are in the following order:
CONTACT
E_MAIL
CUST_NO
PRIMARY
DATE_CREATED
USER_TEXT
CONTACT_ID
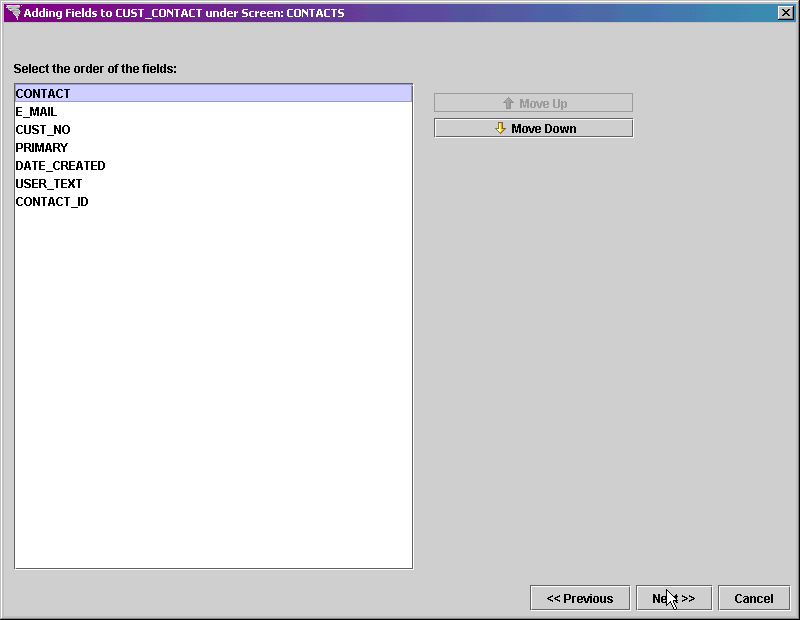
Click on the Next button at the bottom right of the screen.
The Option
to Add More screen is displayed. We need
to create the New block next. Set the Add
Block or Labels checkbox to on. The entity
in its current form will be displayed.

Since we are adding the next block to the main screen
entity, select the CONTACTS entity.

Click on the Add Block button at the bottom right of the screen.
Name the New block the same as the other blocks for the sake of consistency.
In the Block Name property, enter CUST_CONTACT as the name of the block.
In the Block Type property, select Standard Block.
Set the Query Type property to Simple Query.
Leave the Datasource property set to (use parent).
In the Table property, select the name of the table or view from which the data will be obtained. Since our datasource is set to use the Oracle 9i database for NDS Applications, we will select the view CONTACT_MASTER_UVW.
Set the Create Heading checkbox to on to indicate that a heading should be created for each mode for this block.
In the Mode Selection section, set the QBE checkbox to off and set the New checkbox to on.
In the Scheme
Selection section, leave the Form
bullet set to on, since this is the main block, and we will be creating
one record at a time.
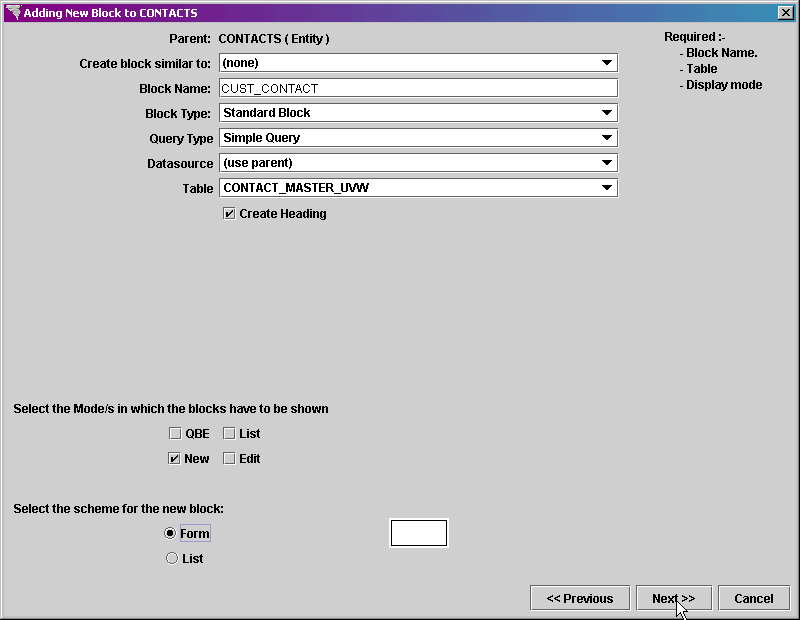
Click on the Next button at the bottom right of the screen.
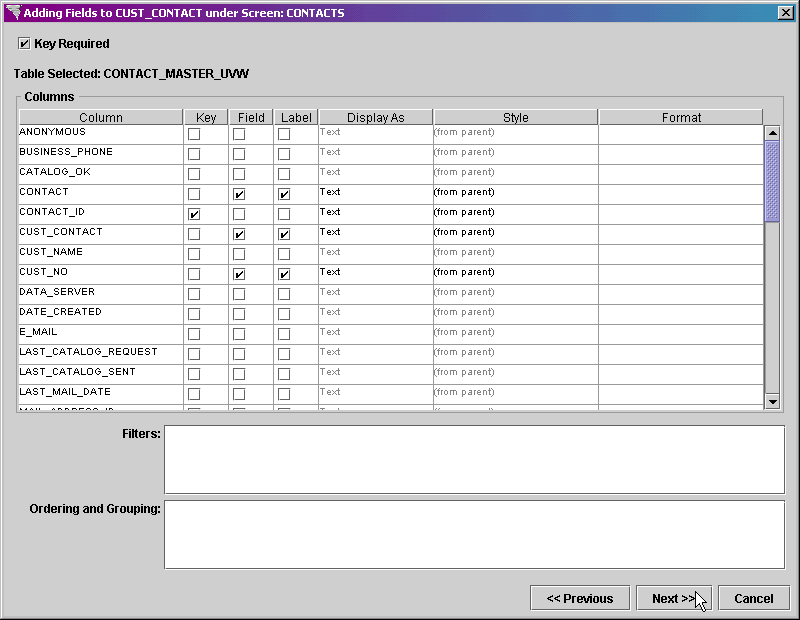
The Adding Fields screen is displayed. Select the columns that you wish to include on the screen. Only those fields required for contact creation need to be included.
Click on the name of the column
to select both the Field and Label checkboxes for that column. Do
this for the following columns:
CONTACT
CUST_CONTACT
CUST_NO
A key must be selected to continue. Set the Key checkbox to on for the CONTACT_ID field as it is the key to this view.
In the Filters property, you could enter code to restrict the data returned from the table. Since we are inserting into the view with this block, no filters need to be entered.
In the Ordering and
Grouping property, you can enter code to determine the order in
which the data is displayed in the screen. Since
we are inserting into the view with this block, no order by or group by
needs to be entered.
Click on the Next button at to the bottom of the screen.
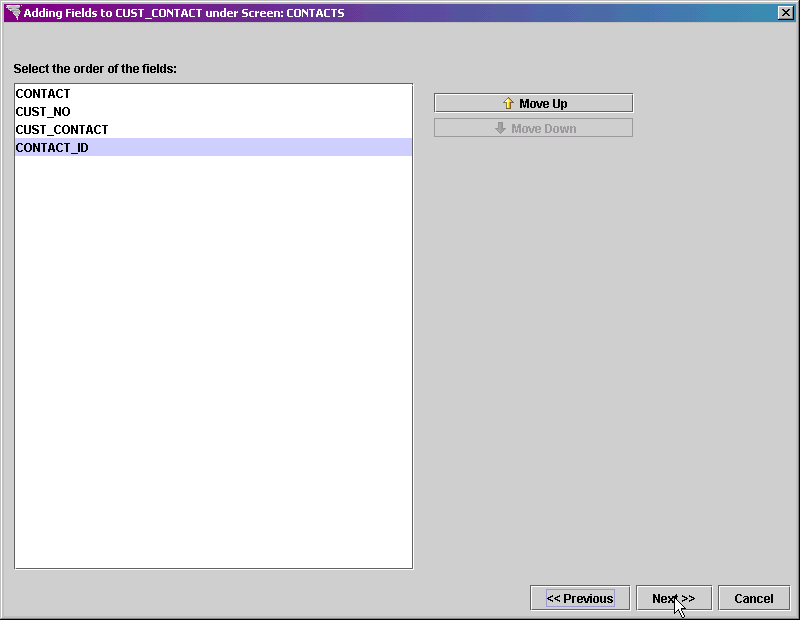
The Ordering Fields
screen is displayed next. The columns are initially
ordered as they were listed on the previous screen. To
move a field up or down, highlight the desired field by selecting it,
and click on the Move Up or Move Down buttons on the right of the screen.
Move the fields until they are in the following
order:
CONTACT
CUST_NO
CUST_CONTACT
CONTACT_ID
Click on the Next button at to the bottom of the screen.
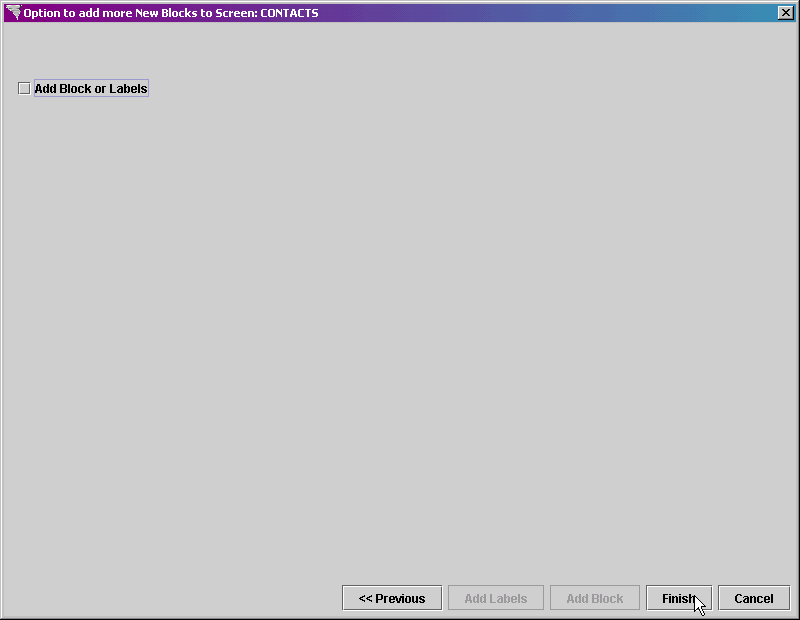
The Option to Add More
screen is displayed. We have no more blocks or
labels to add, so click on the Finish
button.
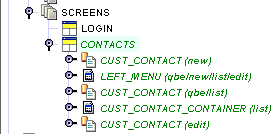
The new entity is added to the initially selected group.
In the Explorer Tree, the new entity will be displayed,
expanded with all blocks shown.
Click on the Save  button in the main toolbar to save the new screen entity.
Now we need to make sure that the correct links are showing up on each mode for this screen.
Right click on the CONTACTS entity in the Explorer Tree
and select Designer Frame from
the menu.
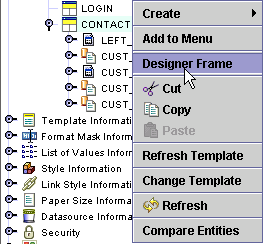
Within the Designer Tool, you can move, align, and resize the objects. For specific instructions on the Designer Tool and its functionality, see the Designer Tool section.
When the Designer Tool
is displayed, expand it so that you can see the entire entity. The
Designer Tool displays the default
mode of the entity selected. The pop-list in the
upper right of the Designer Tool
indicates that we are viewing the lay out of the QBE
View.
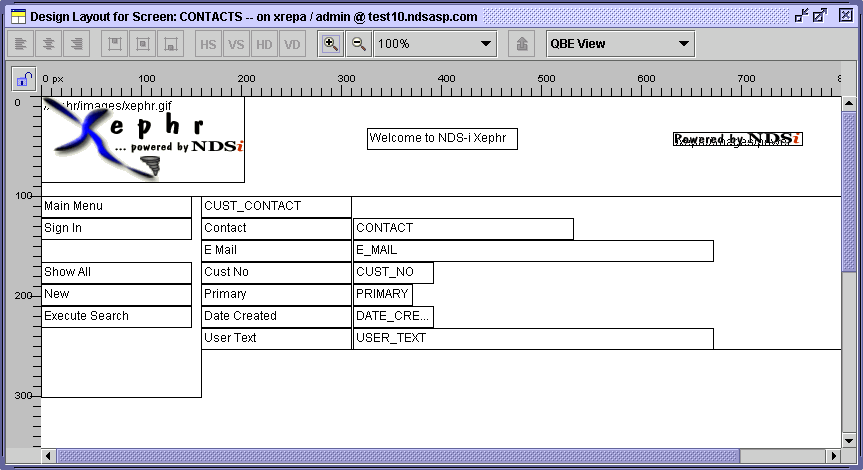
Left click on the field that contains the word CUST_CONTACT. This is the heading for this block in QBE and List Modes. Double click to display the property sheet.
In the Contents
property, enter the text: Customer Contacts
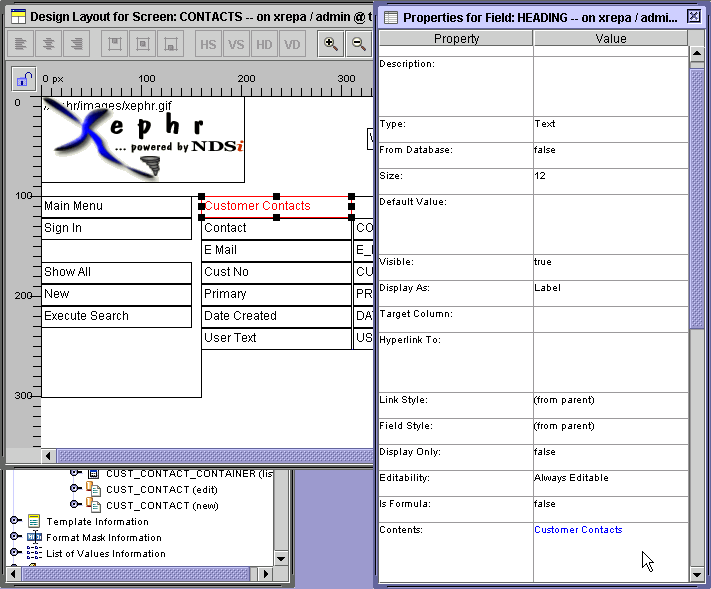
Click on the Save  button in the main toolbar to save the changes.
We want to be able to query contacts by multiple customers, so we want to make the customer number field into a multi-select option list.
In the Designer Tool, left click on the CUST_NO field and double click to display the property sheet.
Set the Display As
property to Option List.

In the Option List
Values field, select the CUST_NO list of values that was created
earlier.

Scroll down in the property sheet.
Set the Width property to 200.
Set the Height
property to 84.

Set the Enable Multi-Select pop-list to true.
Set the No of Rows
Exposed property to 4.
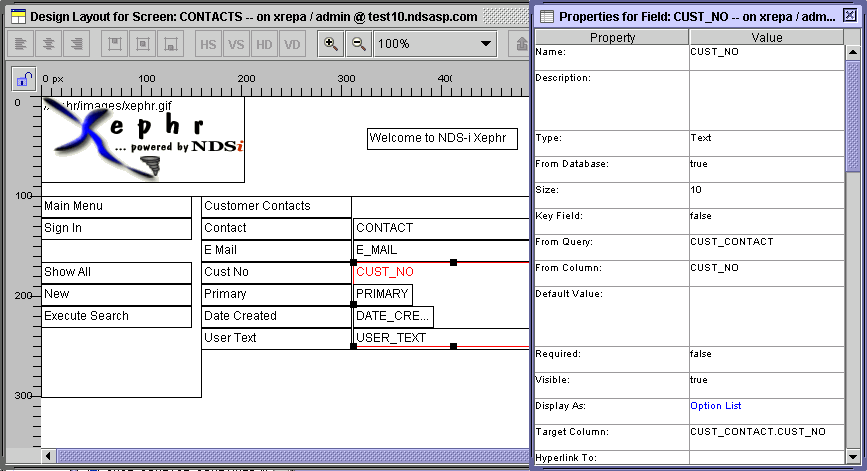
We need to change the layout a little to accommodate the length of the text and number of rows exposed in the CUST_NO field.
Click on the background of the block to select it. Then,
hover your cursor over the bottom edge of the block until it turns into
a double headed arrow. Hold down your left mouse
button and drag the edge of the block down until there is enough space
for all of the fields.

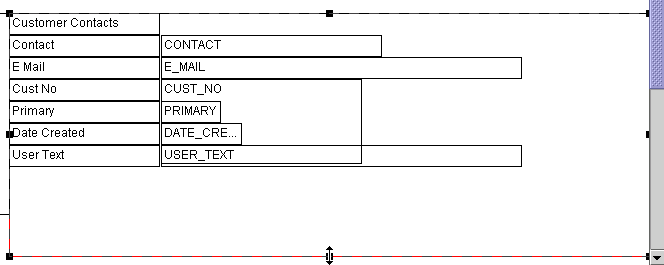
Now we need to move down the fields that are being overlapped by the CUST_NO field.
Hold down the Shift key on your keyboard. Left
click on the Primary, PRIMARY, Date Created, DATE_CRE..., User Text, and
USER_TEXT fields to select them.

Once all are selected, left click on one of the selected
fields, hold down your left mouse button, and drag down the fields until
they are below the CUST_NO field.

Click on the Save  button in the main toolbar to save the changes. ***
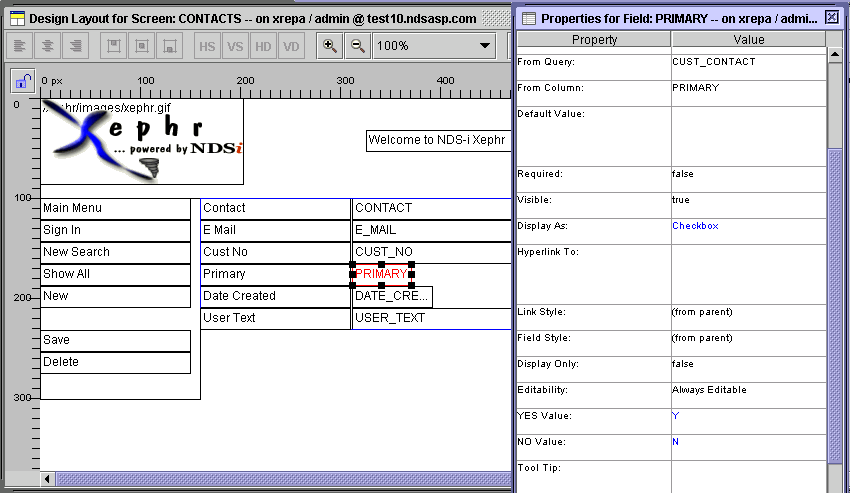
The PRIMARY field is a Y/N value field, so we can make it into a checkbox field.
Select the PRIMARY field by left clicking on it. Double click on it to display the property sheet.
Change the Display As property to Checkbox.
In the YES Value property, enter Y.
In the NO Value
property, enter N.
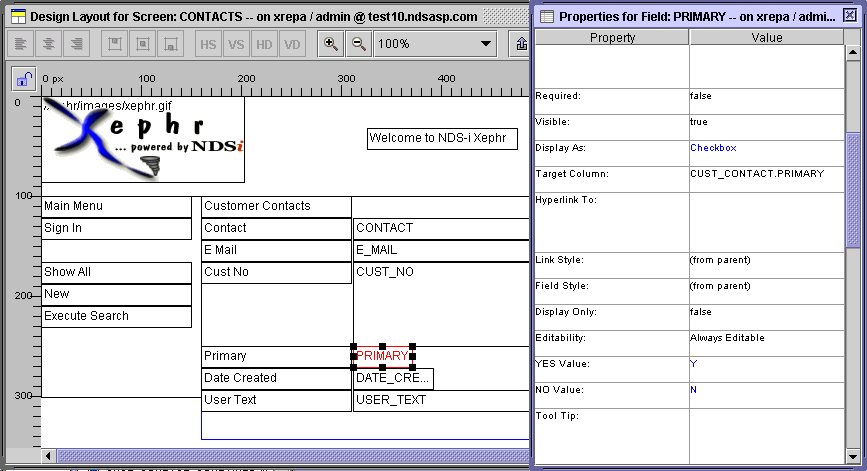
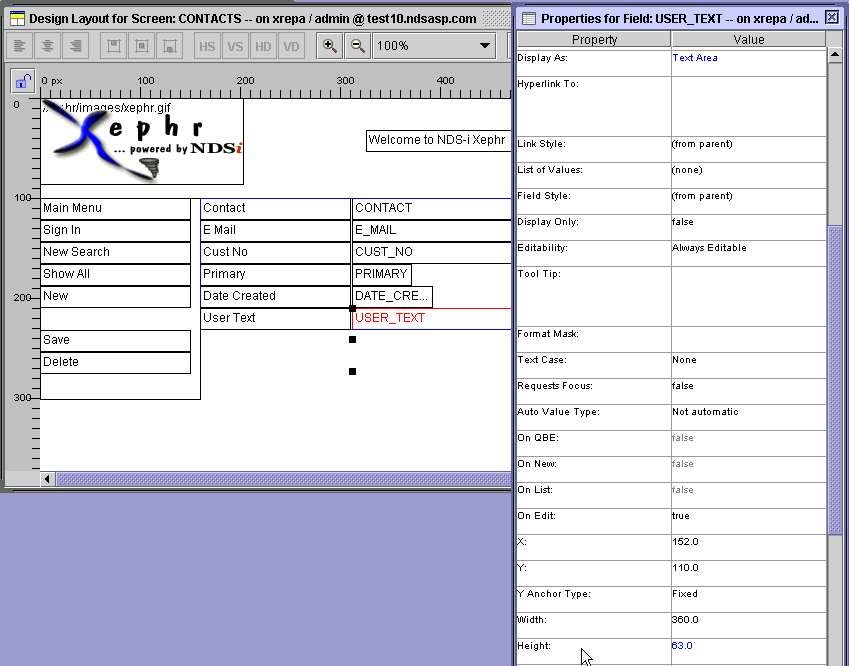
The USER_TEXT field is a text area, so we need to change its type and size.
Select the USER_TEXT field by left clicking on it. Double click on it to display the property sheet.
Change the Display As property to Text Area.
Change the Width property to 300.
Change the Height
to 63.
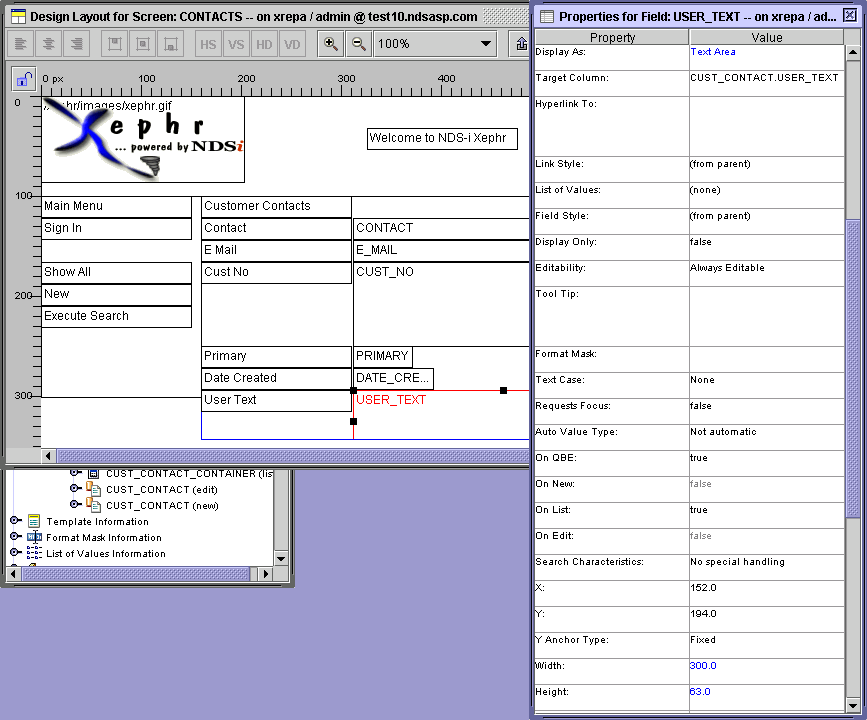
The block needs to be a little larger to accommodate
the larger USER_TEXT field. Click on the background
of the block to select it. Then, hover your cursor
over the bottom edge of the block until it turns into a double headed
arrow. Hold down your left mouse button and drag
the edge of the block down until there is enough space for all of the
fields.
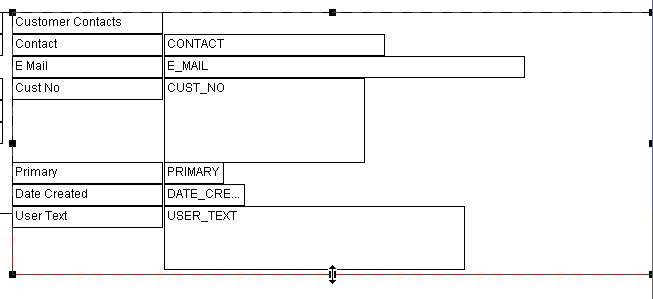
Click on the Save  button in the main toolbar to save the changes.
You have completed the changes for this screen in QBE Mode. Now we will move onto List Mode.
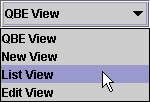
In the pop-list in the upper right corner of the Designer
Tool, select List View.
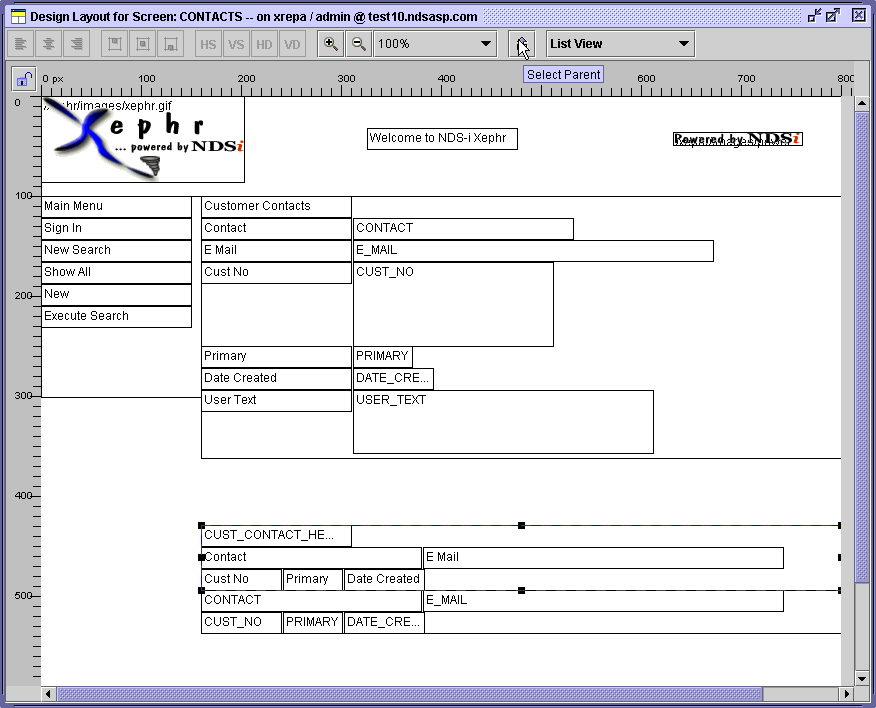
The list block is too far down on the screen, beneath the query block that is also included on the list screen.
Left click on the header block to select it, and then
click on the Select Parent button
in the toolbar at the top of the Designer
Tool. This selects the top level container.
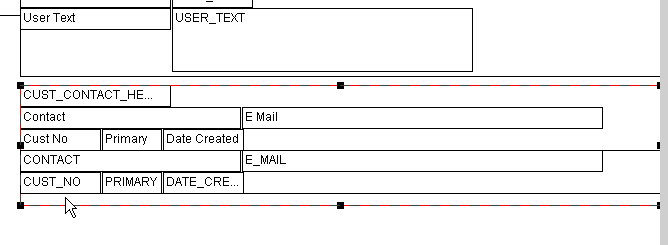
Now we need to make the parent block just a little bigger,
so that we can move it around in the Designer Tool. Click
on the background of the block to select it. Then,
hover your cursor over the bottom edge of the block until it turns into
a double headed arrow. Hold down your left mouse
button and drag the edge of the block down.

Now left click in the space that was created. Hold
down the mouse button, and drag the block up so that it's closer to the
query block.
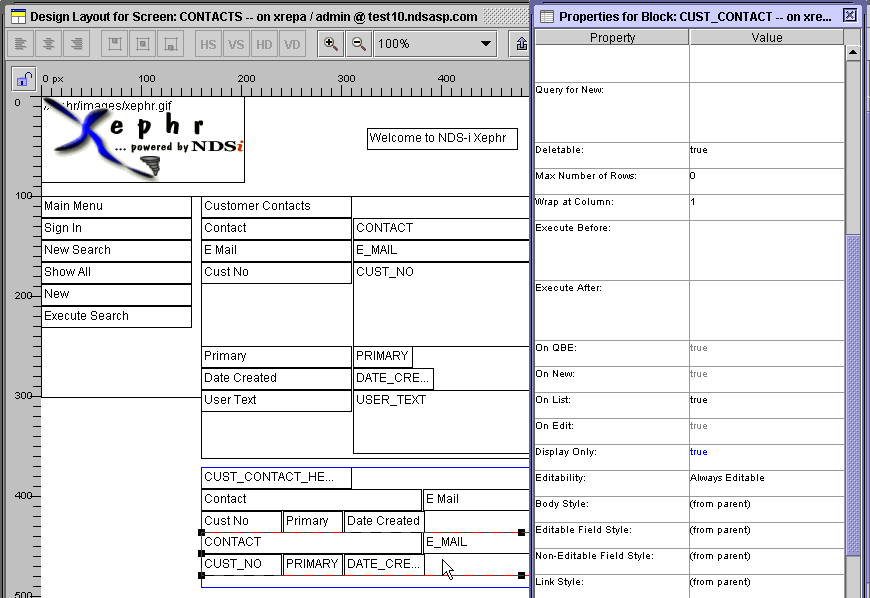
The list screen should be Display Only, so first, we will mark the database block display Only.
In the Designer Tool, left click in the blank area to the right of the DATE_CREATED field to select the CUST_CONTACT block. Double click to display the properties sheet.
Set the Display Only
property to true.
In the Designer Tool, left click on the field that reads CUST_CONTACT_HEADER, which is the heading for the block. Double click to display the property sheet.
For the Contents property, enter the text List of Contacts.

All of the fields that are on this screen do not fit. We are going to modify the layout and size of the fields so that they fit on one line.
Hold down your Shift key on the keyboard, and select
the Contact and CONTACT fields. Display the property
sheet. In the Width
property, enter 175.

Select the E Mail field,
then hold down your Shift key on the keyboard, and select E_MAIL field.
Display the property sheet. In
the Width property, enter 250.

Using the Designer
Tool, move the objects around until they look like this:

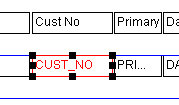
We can shrink the Primary and PRIMARY field to better fit the CUST_NO field.
Click on the Primary field to select it, hover over
the left edge until your cursor turns into a double headed arrow. Then
hold your left mouse button down and drag the cursor to the right.

Repeat for the PRIMARY field.

Then move the CUST_NO field to the right.
Now we need to make the space between the database records
a little smaller. Click on the background of the
block to select it. Then, hover your cursor over
the bottom edge of the block until it turns into a double headed arrow.
Hold down your left mouse button and drag the edge
of the block up.

Repeat for the header block, and then move the database
block up to the edge of the header block. When
you are finished, it should look like this:

Click on the Save  button in the main toolbar to save the changes.
You have completed the changes for this screen in List Mode. Now we will move onto Edit Mode.
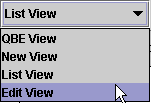
In the pop-list in the upper right corner of the Designer
Tool, select Edit View.
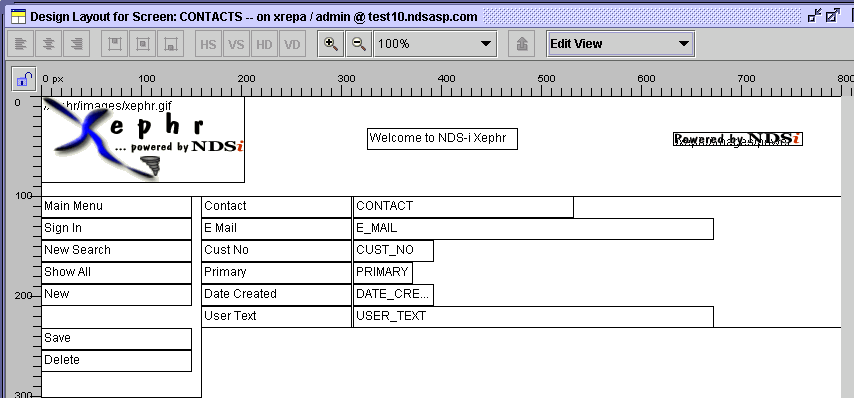
We need to make similar changes to the ones we made on the qbe screen.
The CUST_NO field should be an option list, but not multi-select this time.
Left click on the CUST_NO field and display the property sheet.
Set the Display As pop-list to Option List
Set the Option List Values pop-list to the previously created CUST_NO list of values.
Set the Width
property to 200.
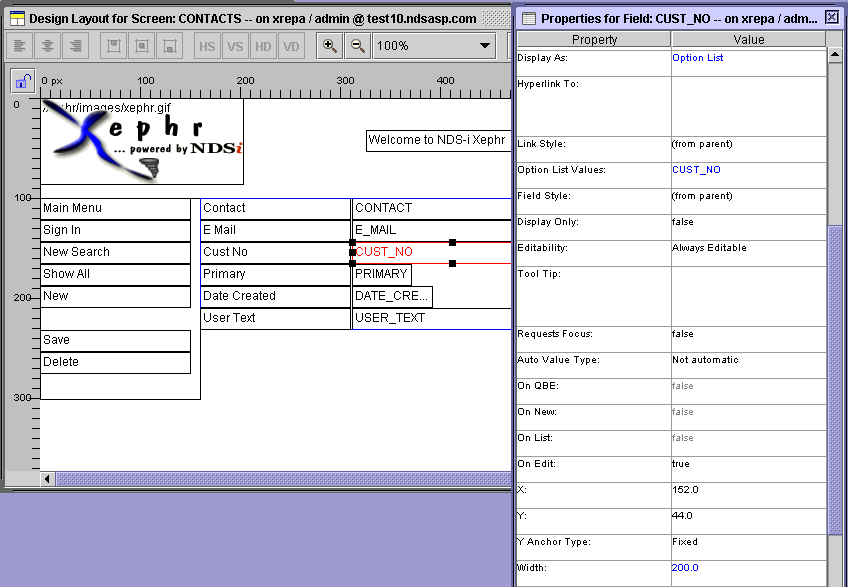
The PRIMARY field needs to be a checkbox.
Left click on the PRIMARY field and display the property sheet.
Set the Display As property to true.
Set the YES Value property to Y.
Set the NO Value
property to N.
The USER_TEXT field needs to be a text area.
Set the Display As property to Text Area.
Set the Height
property to 63.
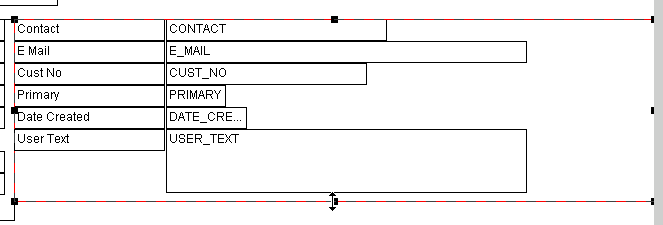
The block needs to be a little bit larger to accommodate
the USER_TEXT field. Click on the background of
the block to select it. Then, hover your cursor
over the bottom edge of the block until it turns into a double headed
arrow. Hold down your left mouse button and drag
the edge of the block down.
Click on the Save  button in the main toolbar to save the changes.
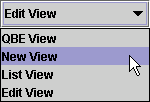
Now we need to modify the New screen. In
the pop-list in the upper right corner of the Designer Tool, select New View.
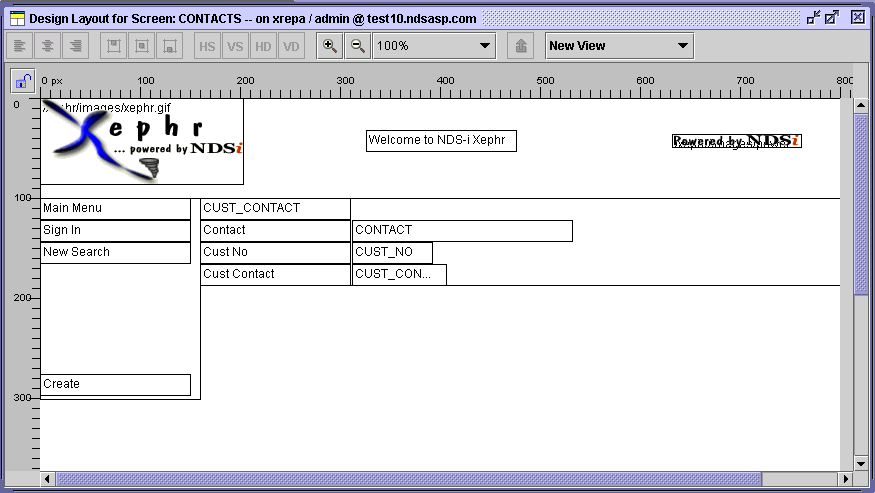
In the Designer Tool, left click on the field that reads CUST_CONTACT, which is the heading for the block. Double click to display the property sheet.
For the Contents property, enter the text Create Contacts.

The CUST_NO field should be an option list, but not multi-select this time.
Left click on the CUST_NO field and display the property sheet.
Set the Display As pop-list to Option List
Set the Option List Values pop-list to the previously created CUST_NO list of values.
Set the Width property to 200.
This field is also Required for a new contact to be
created. Set the Required
property to true.
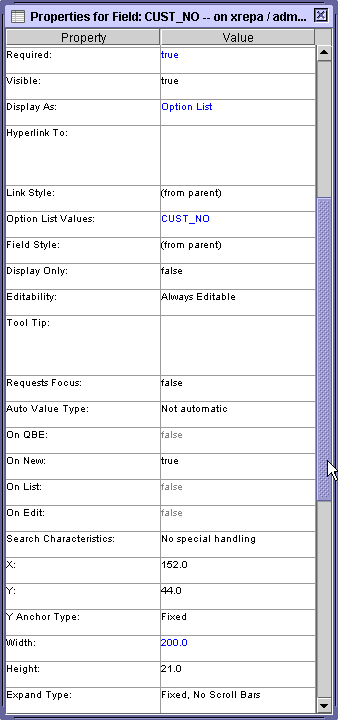
The CONTACT field is also required for the entry of a new contact. Left click on the field in the Designer Tool and double click to display the property sheet.
Set the Required
property to true.

The CUST_CONTACT field is required to be Y for new entries. However, we don't need the user to enter this. We can default the value for new records.
Left click on the CUST_CONTACT field in the Designer Tool and double click to display the property sheet.
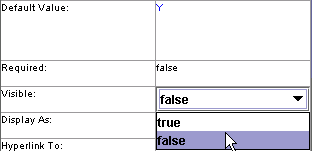
In the Default Value property, enter Y.
Set the Visible
property to false.
Click on the Save  button in the main toolbar to save the changes.
Delete the Cust Contact label field. Left click on the Cust Contact field.
Click on the Delete
Current button in the main toolbar.
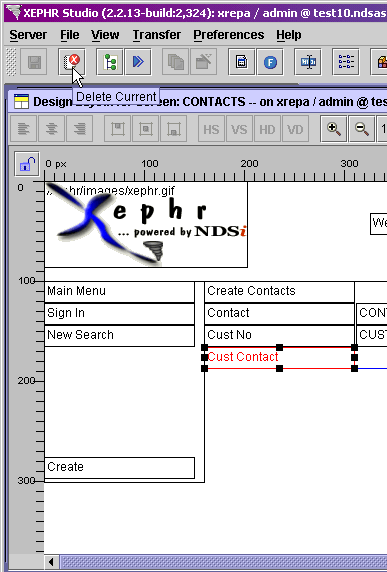
The Delete Confirm pop-up is displayed. Click
on Yes.

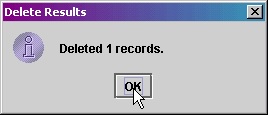
The Delete Results pop-up is displayed. Click
on Ok.
Select the field labeled Create in the Left Menu. We
will be modifying this field to be a button that will insert the new contact
record. Double click to display the property sheet.
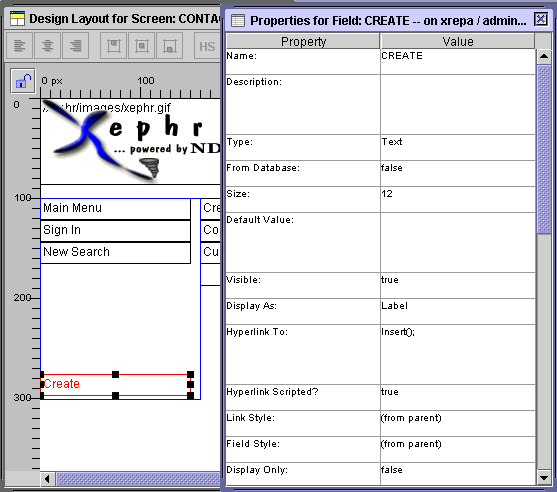
In the Hyperlink To property, the javascript code that
will create the contact record is displayed: Insert();
We also want the screen to open the Edit screen once
the contact record has been inserted, provided that no errors were returned.
Double click in the Hyperlink
To property to display the an edit box.
After the Insert(); text, enter the following text:
if (lastResult)
{ShowEdit('CUST_CONTACT.CUST_NO', $$CUST_CONTACT.CUST_NO.first$$, 'CUST_CONTACT.CONTACT',
$$CUST_CONTACT.CONTACT.first$$);}
The 'if (lastResult)' part indicates that the next part of the code
should only be performed if no errors are returned on the New screen when
the button is pressed. The remainder of the code
opens the edit screen, passing the customer number and contact values,
so that only the new record will be displayed.
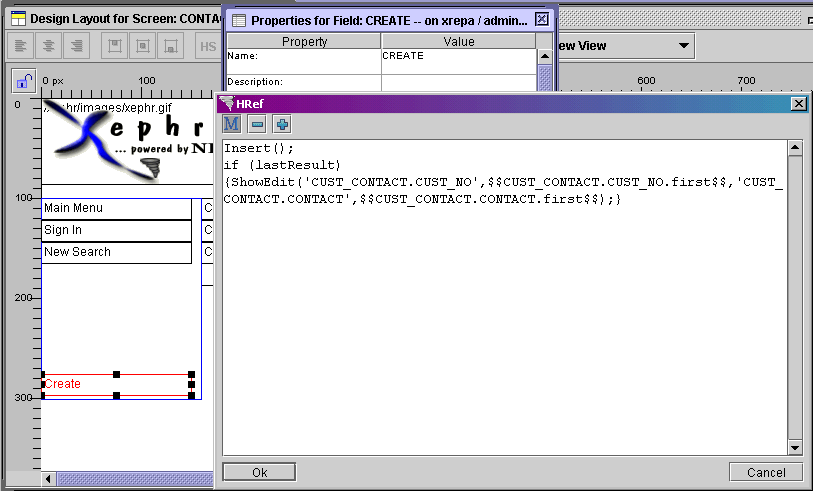
Press the Ok button to return the new value to the Hyperlink To property.
Click on the Save  button in the main toolbar to save the changes.
To test the new screen entity, highlight it by selecting
it, and click on the Run  button in the main toolbar.
The Preparing to Run screen is displayed.
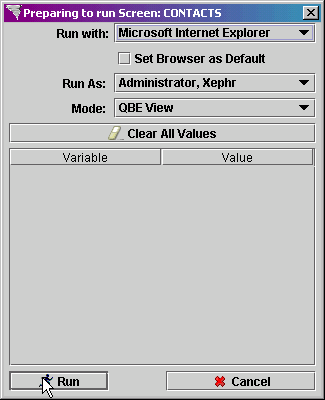
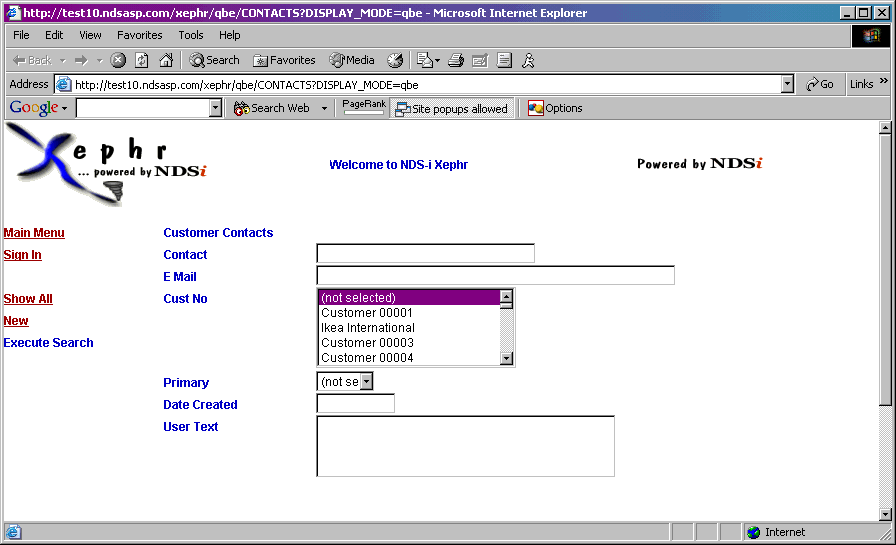
The file will be run in the browser.
