on the desktop of the Xephr Server.
In this example, we will explore the features of the Xephr
To run the Xephr Administration Console, double click on the Xephr Administration
Console icon on the desktop of the Xephr Server.
Xephr is a registered trademark of NDS Systems, LC.
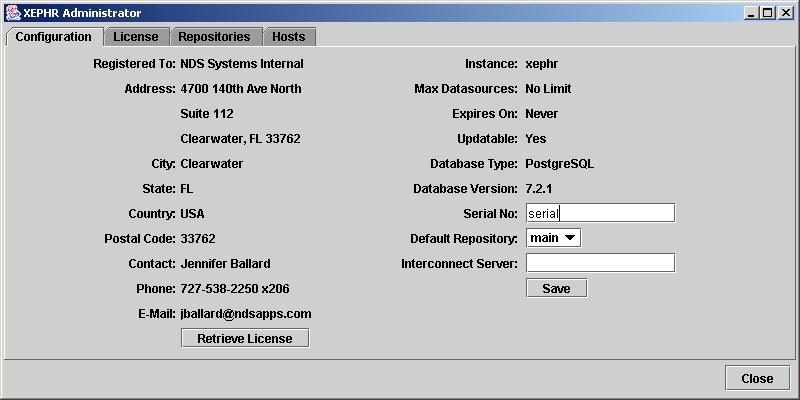
The non-editable information on this tab was either assigned during installation or is obtained from the NDS Corporate database for the serial number provided for the Xephr install.
To change the serial number, enter the new serial number in the Serial No property.
Click on the Save button.
Click on the Retrieve License button. You should be connected to the internet when you click on this button so that the Xephr web service can retrieve the information from the NDS Corporate database. The serial number validation checks the serial number entered with the NDS Xephr web service to retrieve the customer's information from the NDS Corporate database to generate the Xephr master record. Without an internet connection, this validation will not occur.
To change the default repository for the Xephr installation, first you must create a new repository on the Repositories Tab.
Then, select the desired repository from the Default Repository pop-list.
Click on the Save button.
To change the interconnect server for the Xephr installation, enter the server name for the interconnect server in the Interconnect Server property.
Click on the Save button.
You will have to stop and restart the Xephr service on the Xephr server for this change to take effect.
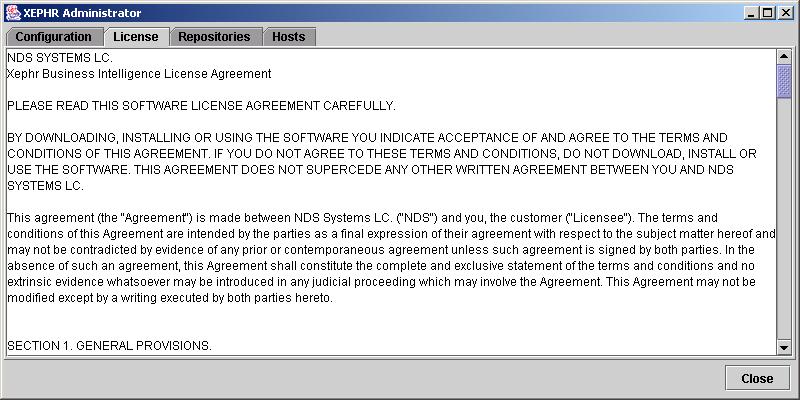
The NDS Xephr Software License Agreement is displayed on this tab. There are no maintenance options here.
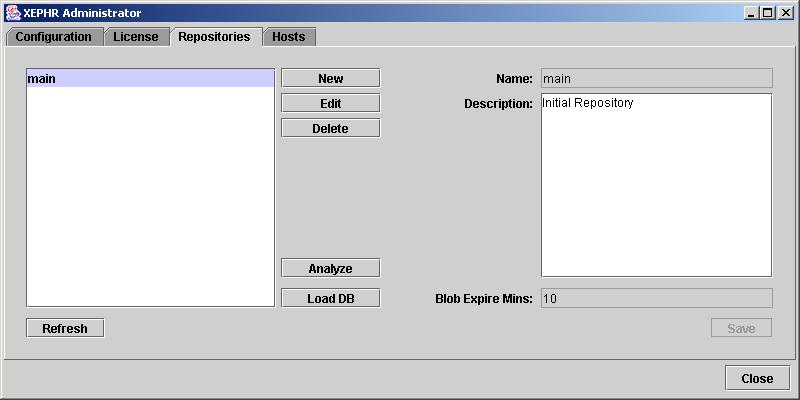
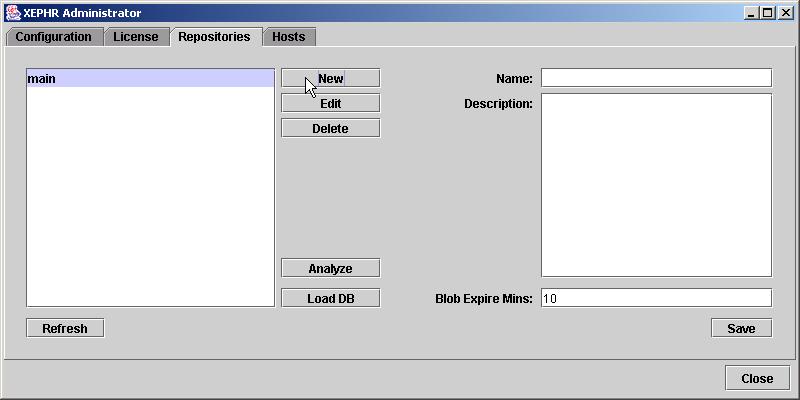
On the Repositories Tab, you can view, create, modify, and delete Xephr repositories in the PostgreSQL database. The repository created when installing Xephr is displayed with the description Initial Repository and can be edited.
In the section on the left of the screen, all repositories are displayed. To select a repository, left click on the repository name.
When a repository is selected, the repository name, description, and Blob Expire Mins are displayed on the right.
Click on the Refresh button at any time to refresh the information displayed on this tab.
Select the repository to maintain on the left of the screen.
Click on the Edit button.
The properties on the right become editable.
In the Description property, modify the description for the repository.
In the Blob Expire Mins property, change the number of minutes that generated binary objects, such as graphics and pdf's are retained in the repository.
When all changes have been made, click on the Save button.
Click on the New button.
The properties on the right become
editable.
In the Name property, enter the name of the new repository.
In the Description property, enter the description for the new repository.
In the Blob
Expire Mins property, enter the number of minutes that generated
binary objects, such as graphics and pdf's are retained in the repository.
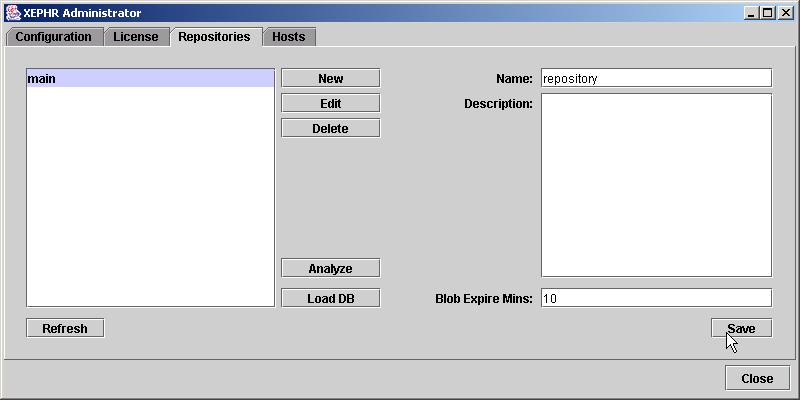
When all properties have been entered, click on the Save button.
The Define
Admin User pop-up screen will be displayed.
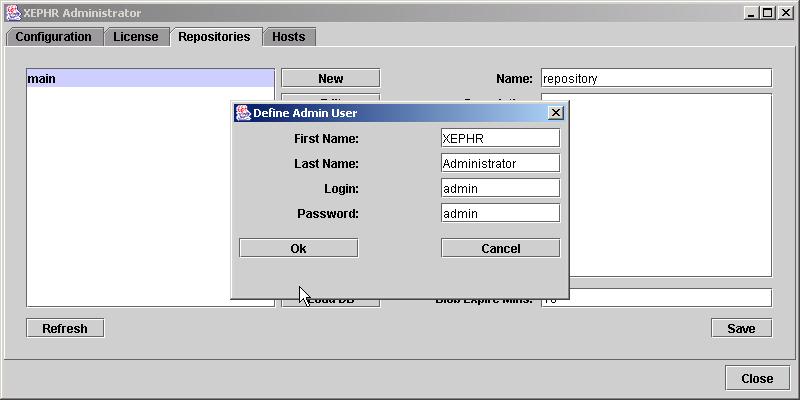
The defaults for these fields are those that were used for the initial repository created during installation, but they can be changed.
In the First Name property, enter the repository administrator's first name.
In the Last Name property, enter the repository administrator's last name.
In the Login property, enter the repository administrator's log in user ID.
In the Password property, enter the repository administrator's password.
Click on the Ok
button to continue.

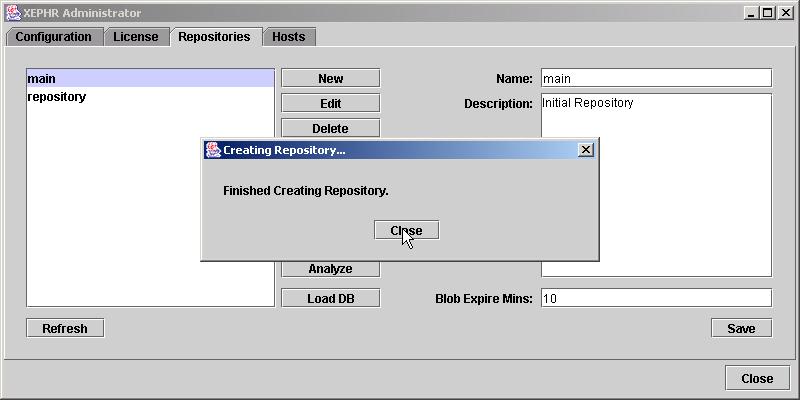
Click on the Close button.
The repository is created and added to the list on the left.
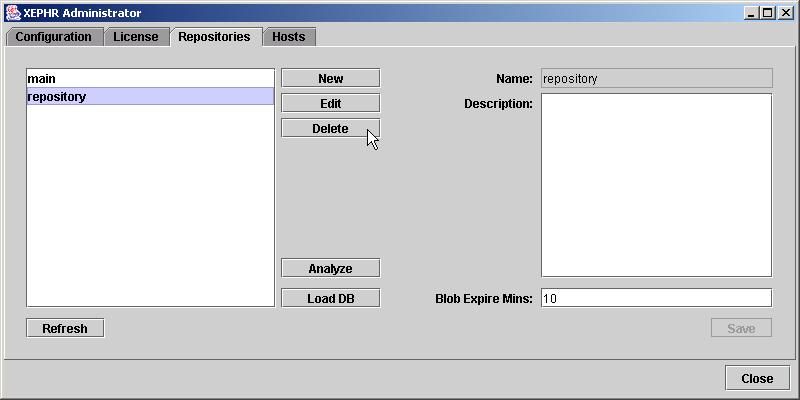
Select the repository to delete on the left of the screen.
Click on the Delete
button.
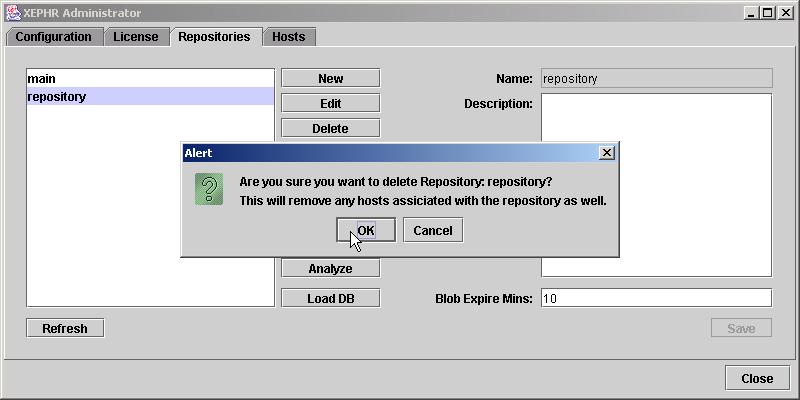
A message asking you to confirm
the delete will be displayed. Click on the Ok button to delete the repository.
You will be informed that the action
is irreversible. Click on the Ok
button to delete the repository.
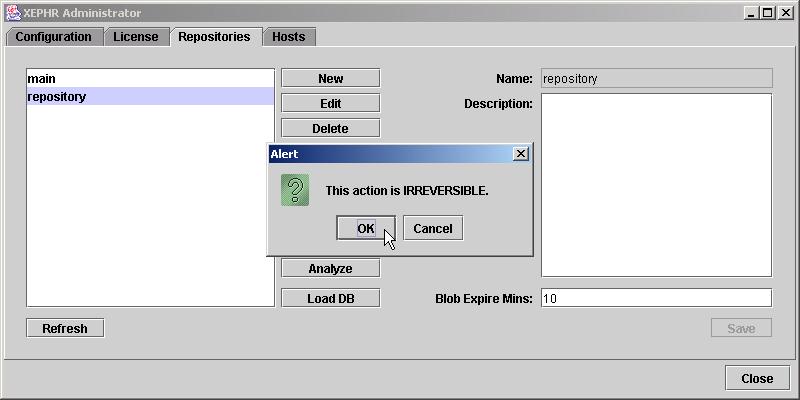
The repository will be deleted.
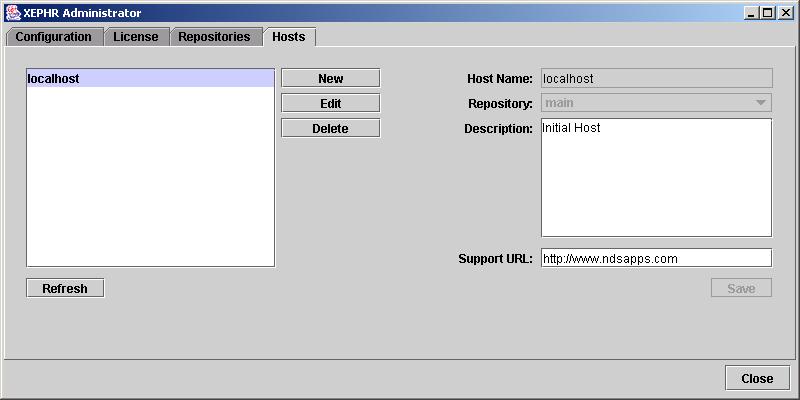
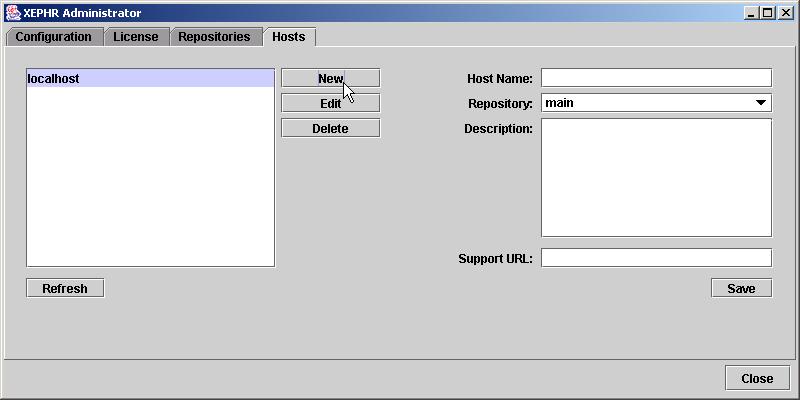
On the Hosts tab, you can view, modify, create, and delete Xephr hosts. Xephr hosts identify the connection string used in the web browser to connect the Xephr repositories in your PostgreSQL database. The host created when installing Xephr is displayed with the description Initial Host and can be edited here.
In the section on the left of the screen, all hosts are displayed. To select a host, left click on the host name.
When a host is selected, the host name, repository, description, and Support URL are displayed on the right.
Click on the Refresh button at any time to refresh the information displayed on this tab.
Select the host to maintain on the left of the screen.
Click on the Edit button.
The properties on the right become editable.
In the Repository property, select the repository used when connecting to this host.
In the Description property, modify the description for the host.
In the Support URL property, enter the URL to be displayed on the Support Pop-Up selected from the Help menu on the main toolbar in the Xephr Studio.
When all changes have been made, click on the Save button.
Click on the New button.
The properties on the right become
editable.
In the Name property, enter the name of the new host.
In the Repository
property, select the repository used when connecting to the new host.
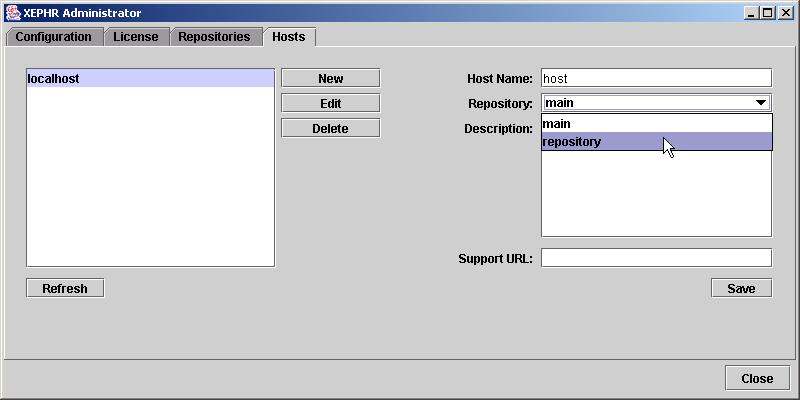
In the Description property, enter the description for the new host.
In the Support URL property, enter the URL to be displayed on the Support Pop-Up selected from the Help menu on the main toolbar in the Xephr Studio.
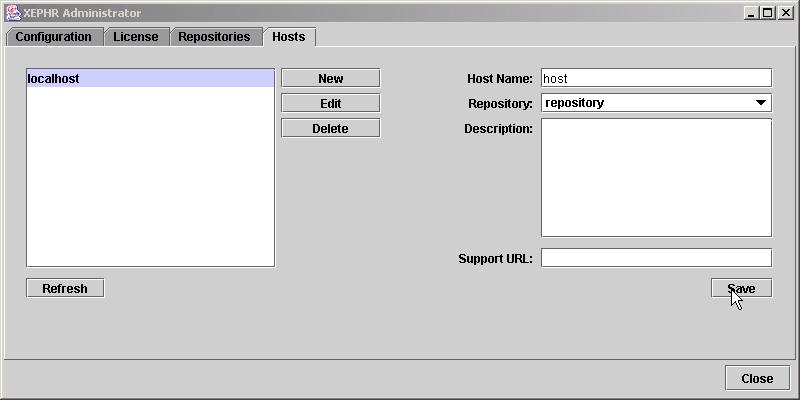
When all properties have been entered,
click on the Save button.
Select the host to delete on the
left of the screen.
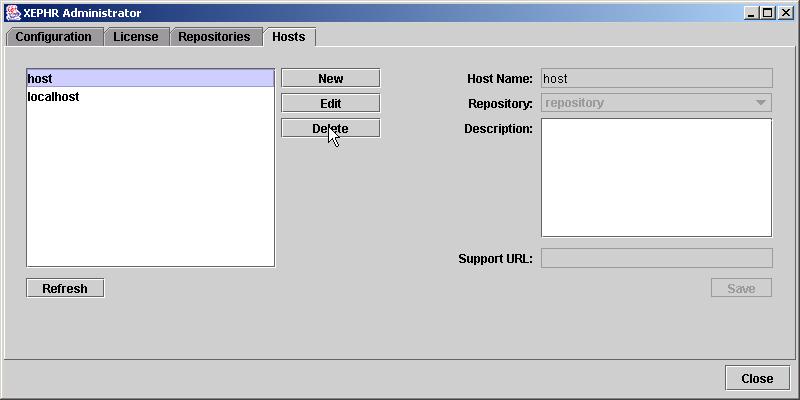
Click on the Delete button.
The host will be deleted.
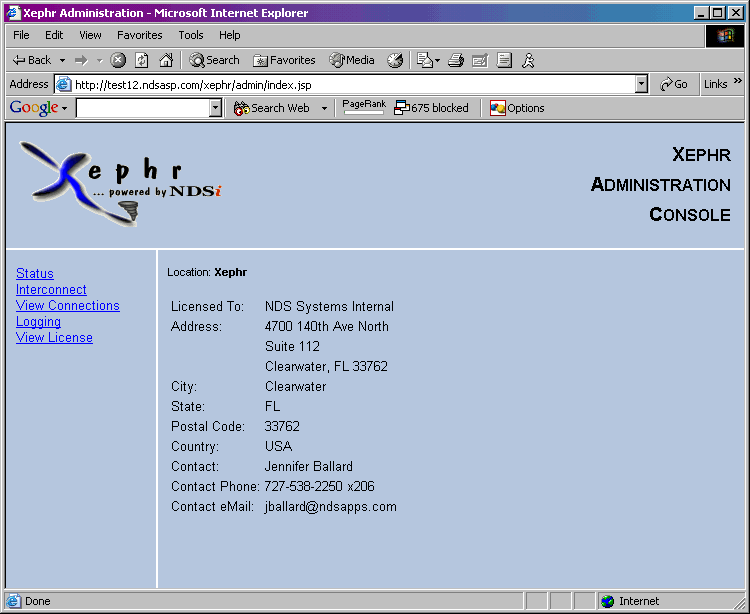
The online Xephr Administration Console is located through a browser pointed at the xephr server URL: http://localhost/xephr/admin where localhost is replaced with the actual Xephr server host name.
The first page of the online console
displays the licensed to information for the Xephr server. This
information is also available by clicking on the Status link on the left
menu.
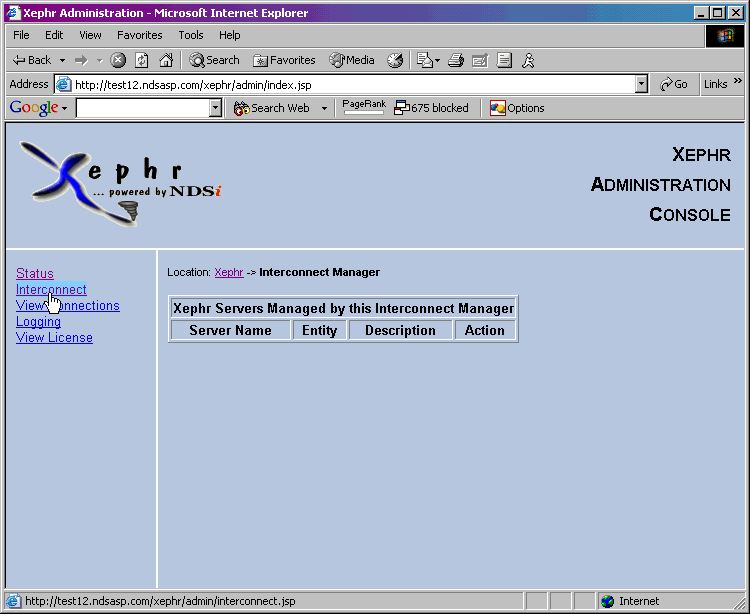
The Interconnect link on the left
menu displays any published interconnect XML documents created for the
host and repository to which the URL is pointing.
The View Connections link on the
left menu displays the database connection information for the Xephr server.
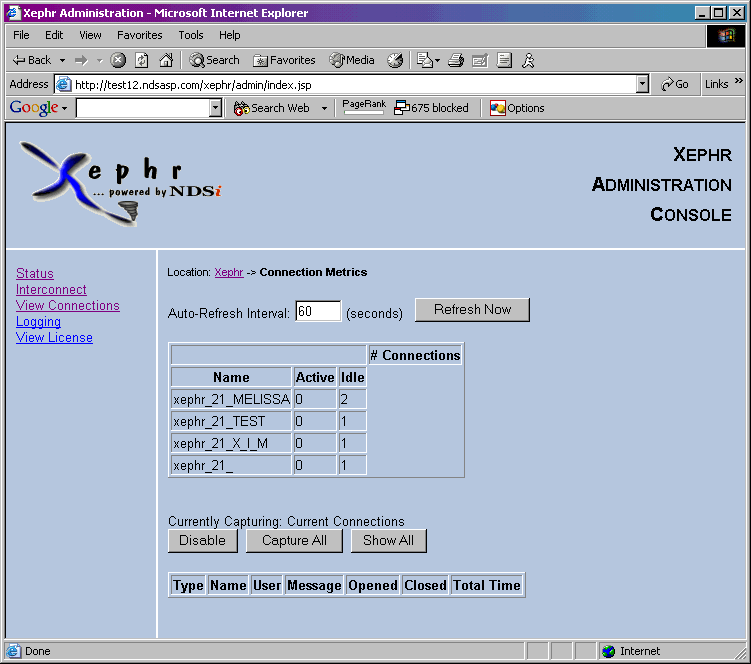
To refresh the view, click on the Refresh Now button.
At the bottom of the screen, you have more options:
The Enable/Disable button will enable or disable connection capturing.
The Capture All button sets the connection capturing to capture all connections.
The Capture Current button sets the connection capturing to capture only current connections.
The Show All button will display all captured connections.
The Show Only DS button will display in captured datasource connections.
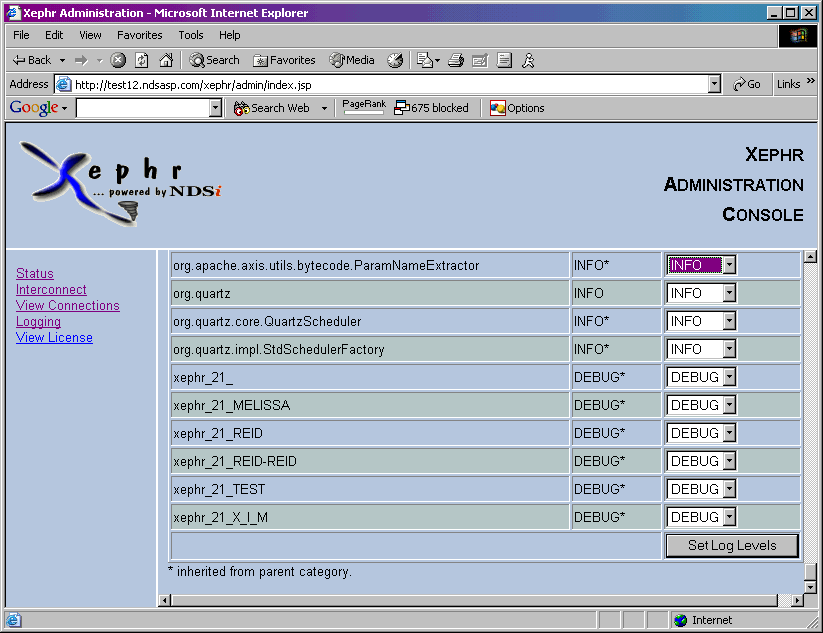
The Logging link on the left menu
allows you to define the logging level for each logging category.
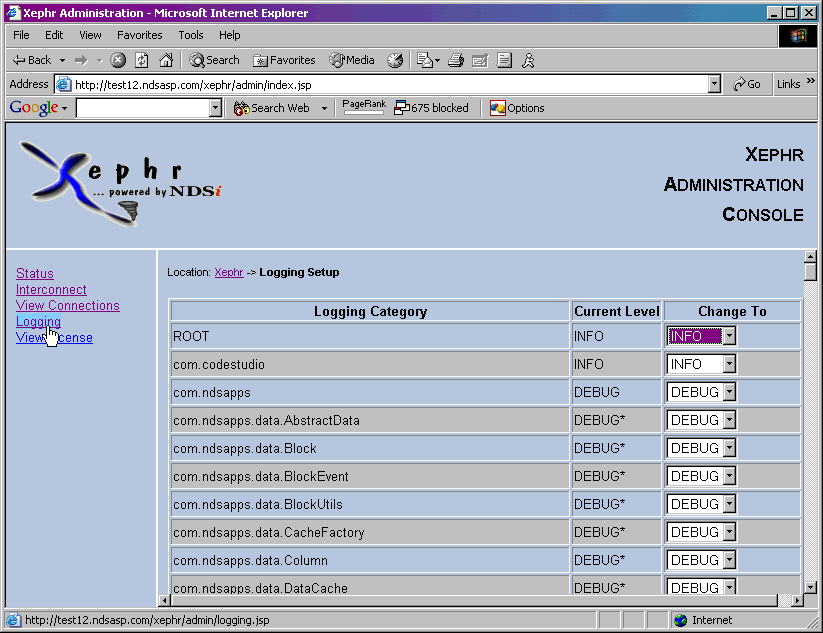
The Current Level column displays the logging level for that category.
To change the logging level for
a category, set the Change To
pop-list to the desired setting. These settings
represent a level of logging starting at no logging (OFF) to log everything
(ALL). Do not change these levels unless you contact
your support representative for assistance.
Choices are:
OFF
FATAL
ERROR
WARN
INFO
DEBUG
ALL
When you have completed setting
the Change To pop-list to the desired setting, press the Set
Log Levels button at the bottom of the list.
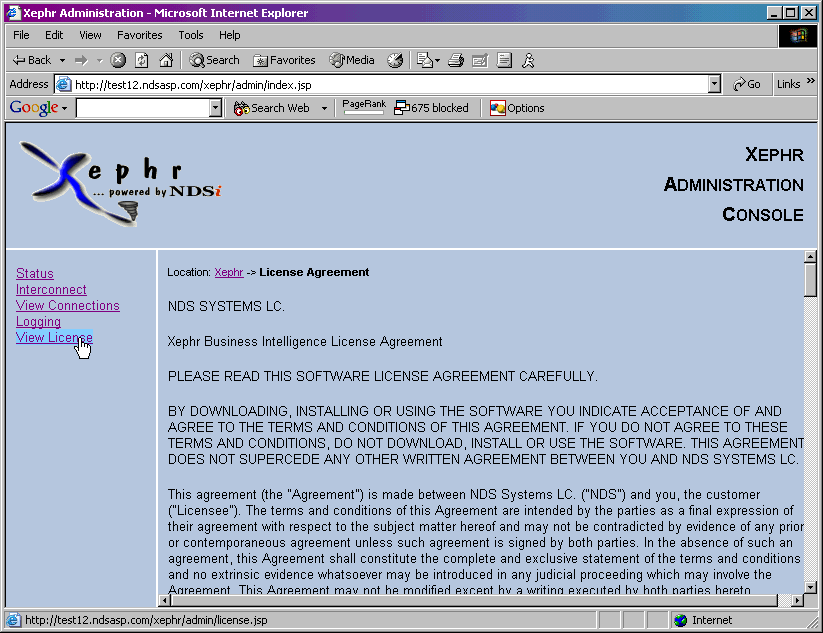
The View License link on the left
menu displays the Xephr license.