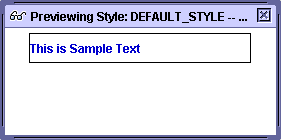
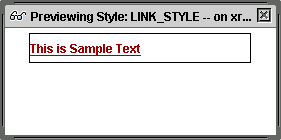
The default style will be blue bold text on a white background.
The child style will be dark red bold underlined text on the same background.
Child styles inherit settings from the parent style. This
makes maintenance of the styles easier, allowing users to change one setting
at the parent style level and have it cascade to the child styles.
Click on the DEFAULT_STYLE object.
Right click and select Create
Style.
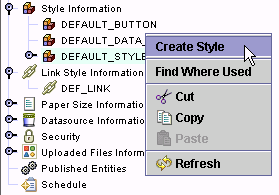
The new style will be created.
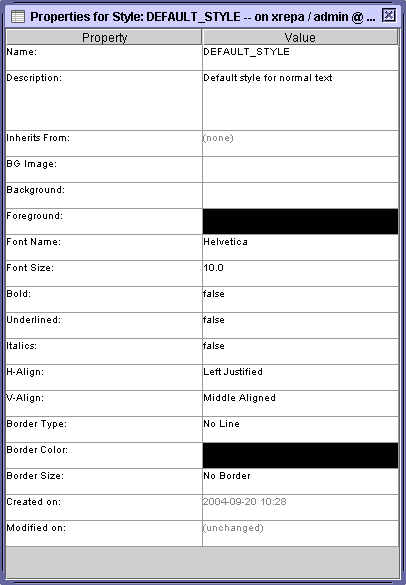
In the Property Sheet, in the Name
property, enter LINK_STYLE.

In the Description
property, enter the description for this style - Red, underlined text
for links.

The Inherits From
property displays the style's parent style, from which properties can
be inherited.

The Background Inherited
property is set to true. Since we want the background
for the style to be the same as the DEFAULT_STYLE, leave this property
set to true.

The Foreground Inherited
property is set to true, but we want the text color to be different for
the style. Set this property to false.

The Foreground
property is now displayed to allow you to select the desired foreground
color.

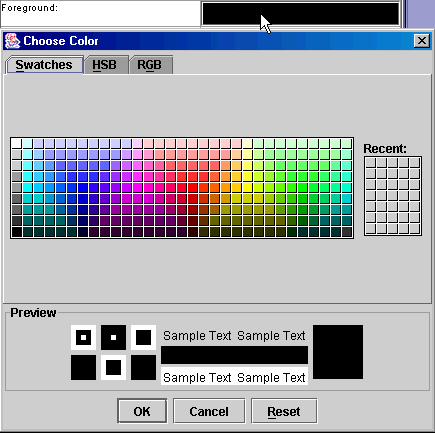
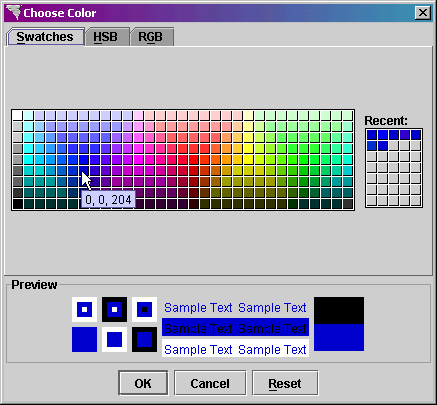
To select the text color, click on the Foreground
property to display the color palette.
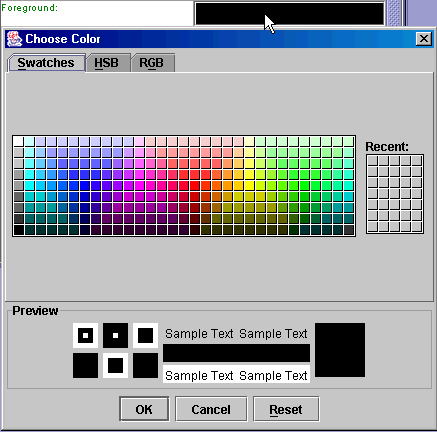
Click on the desired color swatch to view it in the
preview section of the palette.
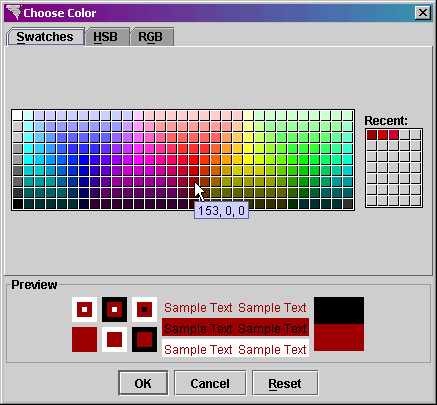
When you have selected the dark red color, click on
the Ok button. The
color will be returned to the Foreground property

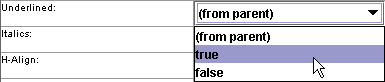
The parent style does not have underlined text, so we
need to modify the Underlined
property. Set the pop-list to true.
The remaining properties will be inherited from the
parent style since we have no need for them to be different.
Press the Save
 button in the main toolbar to save the new style.
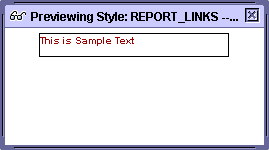
Click on the Preview
 button in the main toolbar to view your style.
This example will created a new style for report objects with a white
background and black bold text, and an additional child style for that
parent that has a white background and dark red bold text.
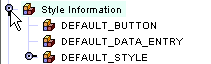
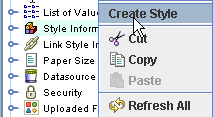
Click on the Style Information object.
Right click and select Create
Style.
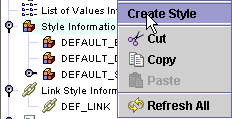
The new style will be created.
In the Property Sheet, in the Name
property, enter REPORT_STYLE.
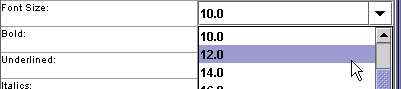
In the Bold
property, set the pop-list to true.
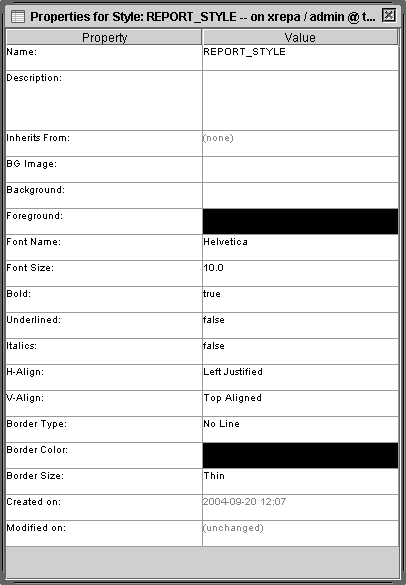
Press the Save
button in the main toolbar to save the new style.
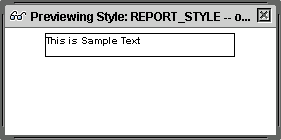
Click on the Preview
button in the main toolbar to view your style.
Click on the REPORT_STYLE object.
Right click and select Create
Style.

The new style will be created.
In the Property Sheet, in the Name
property, enter REPORT_LINKS.
The Background Inherited
property is set to true. Since we want the background
for the style to be the same as the REPORT_STYLE, leave this property
set to true.
The Foreground Inherited
property is set to true, but we want the text color to be different for
the style. Set this property to false.
The Foreground
property is now displayed to allow you to select the desired foreground
color.
To select the text color, click on the Foreground
property to display the color palette.
Click on the desired color swatch to view it in the
preview section of the palette.
When you have selected the dark red color, click on
the Ok button. The
color will be returned to the Foreground property.
The remaining properties will be inherited from the
parent style since we have no need for them to be different.
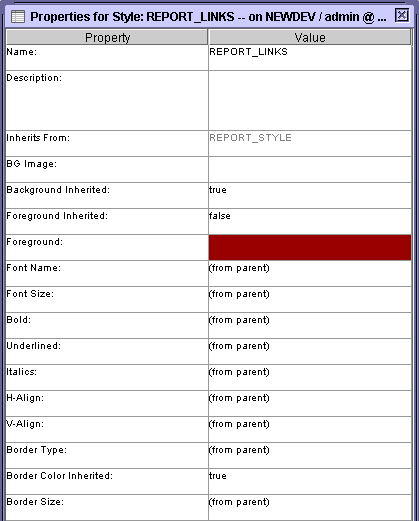
Press the Save
button in the main toolbar to save the new style.
Click on the Preview
button in the main toolbar to view your style.
Expand the Style Information
object.
Click on the DEFAULT_STYLE object.
Right click and select Create
Style.
The new style will be created.
In the Property Sheet, in the Name
property, enter TAB_SELECT.
The Background Inherited
property is set to true, but we want the background color to be different
for the style. Set this property to false.
The Background
property is now displayed to allow you to select the desired background
color.
To select the text color, click on the Background
property to display the color palette.
Click on the desired color swatch to view it in the
preview section of the palette.
When you have selected the dark blue color, click on
the Ok button. The
color will be returned to the Background
property.
The Foreground Inherited
property is set to true, but we want the text color to be different for
the style. Set this property to false.
The Foreground
property is now displayed to allow you to select the desired foreground
color.
To select the text color, click on the Foreground
property to display the color palette.
Click on the desired color swatch to view it in the
preview section of the palette.
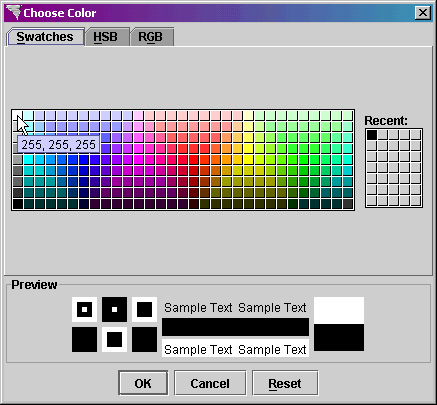
When you have selected white, click on the Ok
button. The color will be returned to the Foreground property.
The remaining properties will be inherited from the
parent style since we have no need for them to be different.

Press the Save
button in the main toolbar to save the new style.
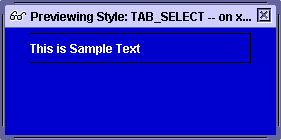
Click on the Preview
button in the main toolbar to view your style.
Expand the Style Information
object.
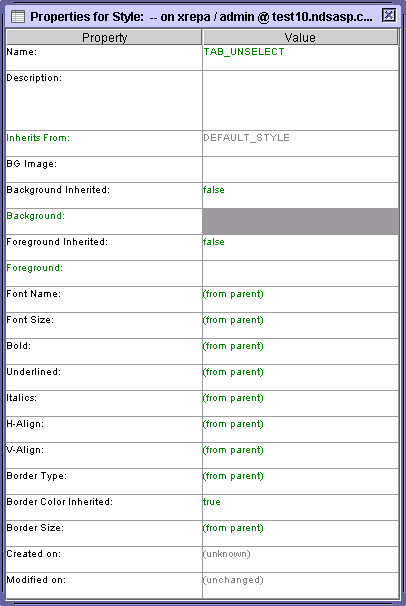
Click on the DEFAULT_STYLE object.
Right click and select Create
Style.
The new style will be created.
In the Property Sheet, in the Name
property, enter TAB_UNSELECT.
The Background Inherited
property is set to true, but we want the background color to be different
for the style. Set this property to false.
The Background
property is now displayed to allow you to select the desired background
color.
To select the text color, click on the Background
property to display the color palette.
Click on the desired color swatch to view it in the
preview section of the palette.

When you have selected the dark blue color, click on
the Ok button. The
color will be returned to the Background
property.
The Foreground Inherited
property is set to true, but we want the text color to be different for
the style. Set this property to false.
The Foreground
property is now displayed to allow you to select the desired foreground
color.
To select the text color, click on the Foreground
property to display the color palette.
Click on the desired color swatch to view it in the
preview section of the palette.
When you have selected white, click on the Ok
button. The color will be returned to the Foreground property.
The remaining properties will be inherited from the
parent style since we have no need for them to be different.
Press the Save
button in the main toolbar to save the new style.
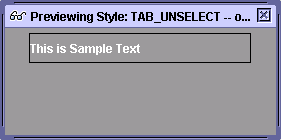
Click on the Preview
button in the main toolbar to view your style.
Right click on the Style
Information object and select Create
Style.
The new style will be created.
In the Property Sheet, in the Name
property, enter CASCADE.
Leave the Background
property set to white..
- Leave the Foreground
set to black.
Set the Font Name
property to Helvetica.
Set the Border Type
property to Solid Line, since we want the cascading menus to have a line
around each entry.
Leave the Border Color
property set to black.
Set the Border Size
property to 1 Pixel.
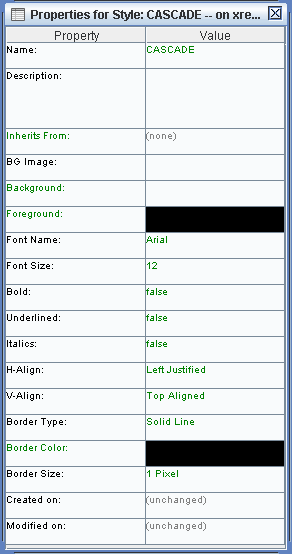
Press the Save
button in the main toolbar to save the new style.
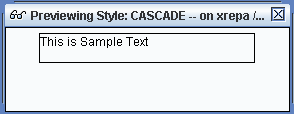
Click on the Preview
button in the main toolbar to view your style.
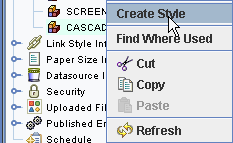
Right click on the newly created CASCADE style and select
Create Style.
The new style will be created.
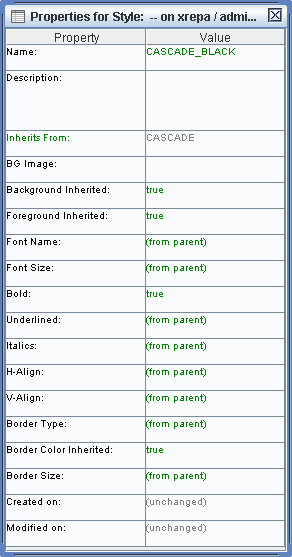
In the Property Sheet, in the Name
property, enter CASCADE_BLACK.
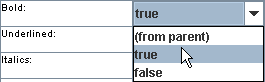
The parent style does not have bold text, so we need
to modify the Bold property. Set
the pop-list to true.
he remaining properties will be inherited from the parent
style since we have no need for them to be different.
Press the Save
button in the main toolbar to save the new style.
Click on the Preview
button in the main toolbar to view your style.

Right click on the newly created CASCADE style and select
Create Style.
The new style will be created.
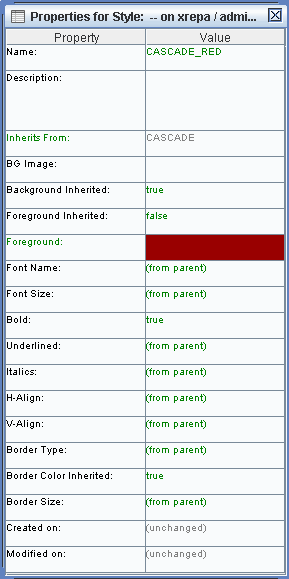
In the Property Sheet, in the Name
property, enter CASCADE_RED.
The Foreground Inherited
property is set to true, but we want the text color to be different for
the style. Set this property to false.
The Foreground
property is now displayed to allow you to select the desired foreground
color.
To select the text color, click on the Foreground
property to display the color palette.
Click on the desired color swatch to view it in the
preview section of the palette.
When you have selected the dark red color, click on
the Ok button. The
color will be returned to the Foreground property
The parent style does not have bold text, so we need
to modify the Bold property. Set
the pop-list to true.
The parent style does not have underlined text, so we
need to modify the Underlined
property. Set the pop-list to true.
The remaining properties will be inherited from the
parent style since we have no need for them to be different.
Press the Save
button in the main toolbar to save the new style.
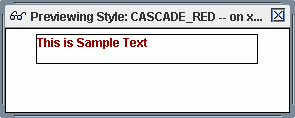
Click on the Preview
button in the main toolbar to view your style.
Xephr is a registered trademark of NDS Systems, LC.
 to the left of the Style
Information object to expand it and display the existing styles
to the left of the Style
Information object to expand it and display the existing styles